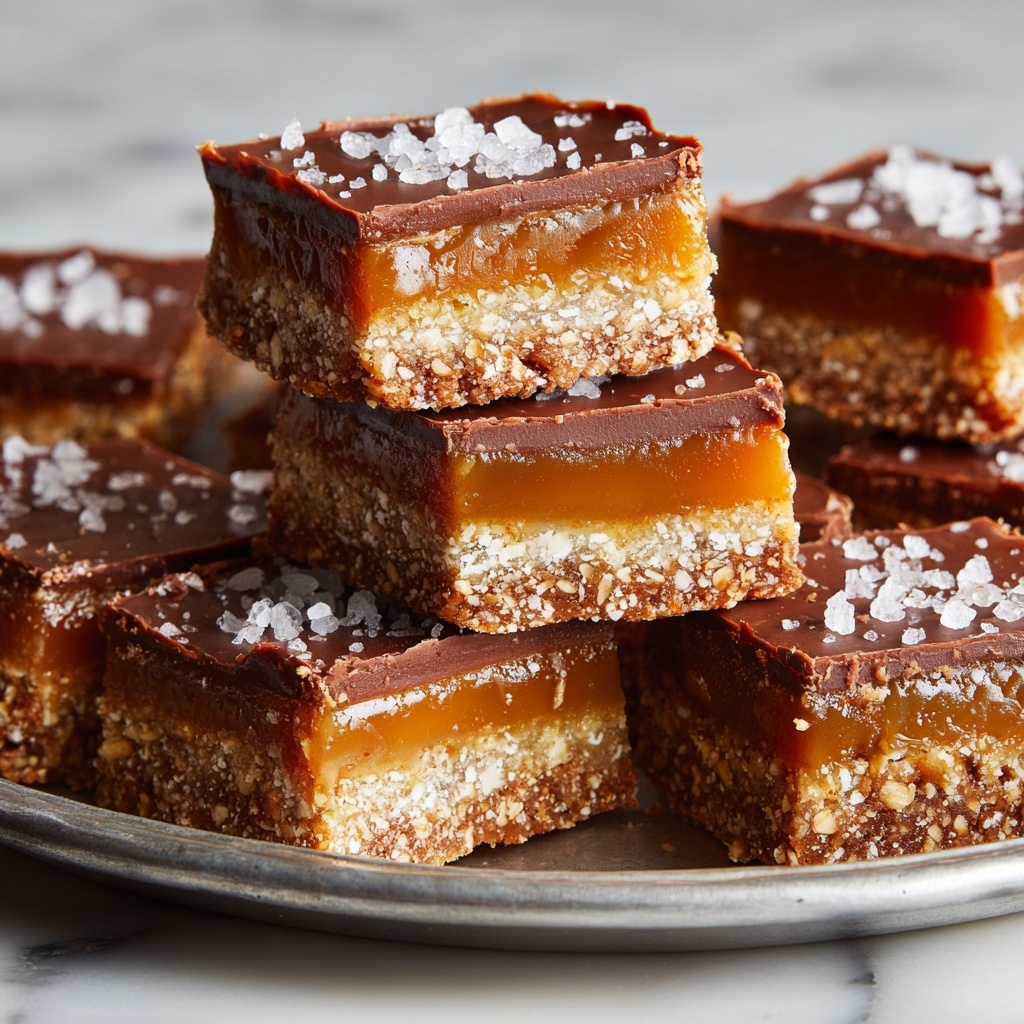
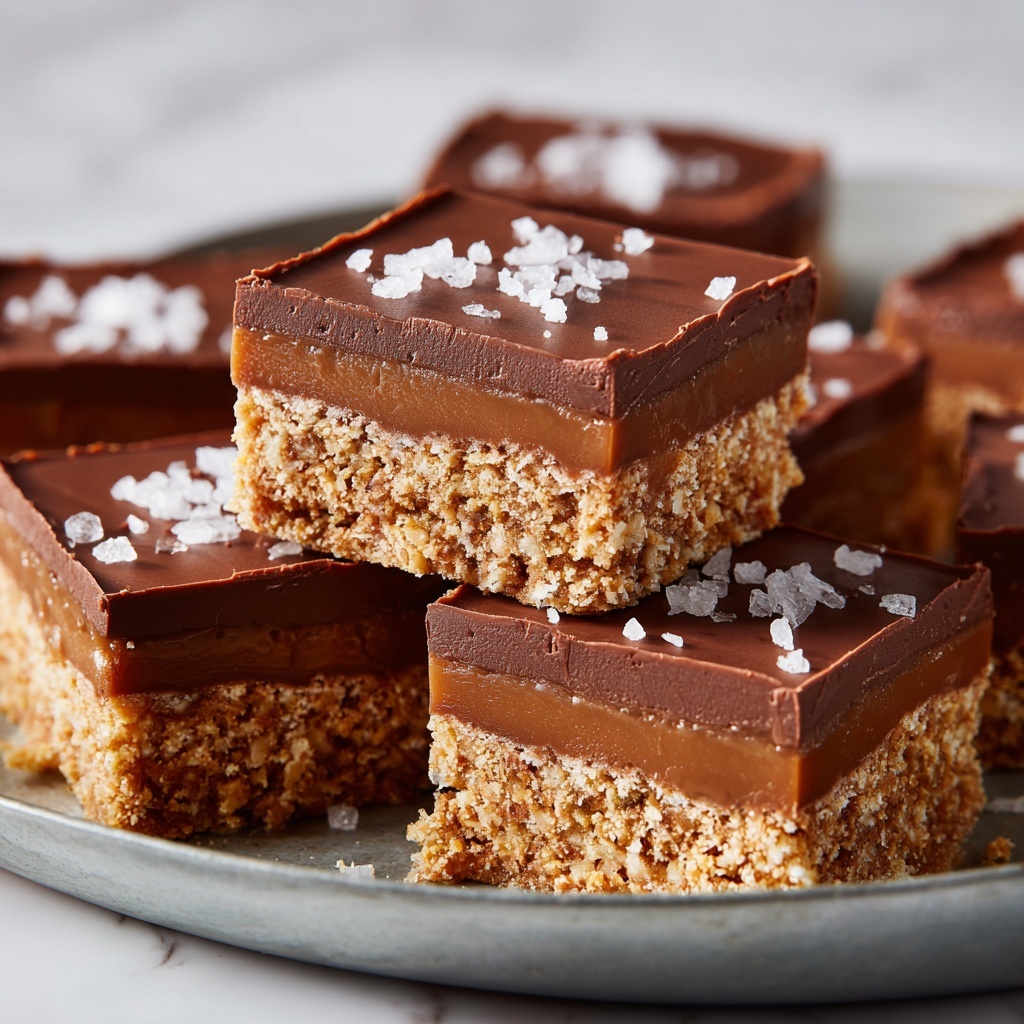
If you have a soft spot for the divine pairing of chocolate and peanut butter, then this Chocolate Peanut Butter Oatmeal Bars Recipe is about to become your new obsession. These bars are the perfect balance of chewy oats, rich peanut butter, and luscious chocolate, all tied together with just the right touch of sweetness from maple syrup. Whether you’re after a wholesome snack to fuel your afternoon or a guilt-minimized treat to satisfy your dessert cravings, these bars bring wholesome ingredients and indulgent flavors together in one gloriously easy dish. Trust me, once you try this recipe, it’ll quickly become your go-to for packed lunches, post-workout bites, or cozy evenings on the couch.
Ingredients You’ll Need
Great recipes start with simple, thoughtful ingredients, and this Chocolate Peanut Butter Oatmeal Bars Recipe is no exception. Each ingredient plays a vital role in creating that perfect texture and flavor: oats add wholesome chewiness, peanut butter brings creaminess and depth, maple syrup lends a natural sweetness, and the chocolate topping? Pure bliss in every bite.
- Rolled oats (200 g): Use certified gluten-free if needed to keep the bars hearty and naturally nutritious.
- Smooth peanut butter (total 730 g): Provides creamy richness and acts as the binding agent for the crust and layers.
- Pure maple syrup (250 ml): Offers a subtle, natural sweetness that complements the peanut butter perfectly.
- Sea salt (½ teaspoon plus extra for garnish): Balances the sweetness and enhances all the flavors beautifully.
- Coconut oil (55 g, solid): Adds a touch of tropical flavor and helps the filling set firmly.
- Vegan chocolate (200 g): Melted to create that decadent chocolate layer topping the bars.
How to Make Chocolate Peanut Butter Oatmeal Bars Recipe
Step 1: Prepare the Crust
Start by lining an 8-inch square pan with parchment paper—this makes removal so much easier later on. Blitz the oats and sea salt in a food processor until they become finely ground, almost like a coarse flour. Then add in the peanut butter and maple syrup, blending until the mixture sticks together in a dough-like consistency. If it feels too crumbly, a splash more maple syrup will help bind everything perfectly. Press this mixture firmly into the base of the pan and smooth it out evenly using a spatula or the bottom of a glass. Pop it into the fridge to chill while you work on the filling.
Step 2: Create the Caramel Filling
In a heatproof bowl, combine the peanut butter, maple syrup, sea salt, and coconut oil. Set the bowl over a pot of simmering water to create a double boiler, gently stirring until everything melts and blends into a smooth, luscious caramel. Pour this gorgeous caramel over the chilled oat crust, spreading it evenly. Cover and return the pan to the fridge for at least 1-2 hours—or even better, overnight—to let the filling set beautifully.
Step 3: Add the Chocolate Topping
Melt the vegan chocolate together with a smaller amount of peanut butter in the same double boiler setup, stirring until silky and combined. Gently pour this chocolate layer over the set caramel layer, smoothing it out confidently. Sprinkle a little flaky sea salt over the top to bring contrast and a gourmet touch. Pop the pan back in the fridge for 15-20 minutes until the chocolate firms up nice and glossy.
Step 4: Slice and Serve
For the cleanest, most professional-looking slices, heat a sharp knife in a jug of boiling water, wipe it dry, and then slice through the bars gently. The warm knife glides through the chocolate and caramel layers without cracking or squashing the bars. Serve them straight from the fridge for that perfect chewy, fudge-y experience.
How to Serve Chocolate Peanut Butter Oatmeal Bars Recipe

Garnishes
Add a sprinkle of flaky sea salt on top just before serving for that irresistible salty-sweet finish. For extra fun, scatter a handful of chopped roasted peanuts or shredded coconut on the bars to add texture and a pop of visual interest.
Side Dishes
These bars pair beautifully with a cup of black coffee or a creamy plant-based latte. For a lighter snack combo, serve alongside fresh berries or apple slices which add a fresh, vibrant contrast to the rich bars.
Creative Ways to Present
For special occasions, stack the bars and tie with a rustic twine bow or serve them on a wooden board alongside small bowls of peanut butter and melted chocolate for dipping. Want a fun twist? Chop the bars into bite-sized pieces and skewer them with fruit cubes for a delightful dessert kebab.
Make Ahead and Storage
Storing Leftovers
Store any leftover bars in an airtight container in the fridge to keep them fresh and firm. They remain deliciously chewy for up to one week, making them a perfect grab-and-go snack for your busy days.
Freezing
These bars freeze exceptionally well. Wrap individual slices tightly in parchment paper and place them in a freezer-safe container. They’ll keep for up to 3 months and thaw quickly on the counter or in the fridge.
Reheating
If you prefer a softer texture, allow frozen bars to thaw slightly then warm them gently in the microwave for 10-15 seconds. The chocolate will soften, and the peanut butter layers become delightfully gooey, as if freshly made.
FAQs
Can I use crunchy peanut butter instead of smooth?
Absolutely! Crunchy peanut butter will add a little extra texture and nuttiness to the bars. Just be aware it might change the smoothness of the layers but the flavor will still be fantastic.
Is there a non-vegan version of this recipe?
Yes, you can swap the vegan chocolate for any milk or dark chocolate you prefer. Just be sure the rest of your ingredients align with your dietary preferences.
How can I make the bars nut-free?
To keep things nut-free, substitute the peanut butter with sunflower seed butter or tahini. The flavor profile will shift slightly but the chewy texture and sweetness will remain just as delightful.
What’s the best way to cut the bars cleanly?
Heating your knife in hot water before slicing, then wiping it dry between cuts, is the secret to clean, smooth edges without cracking or crumbling.
Can I add protein powder to boost nutrition?
Definitely! Incorporate your favorite protein powder into the oat crust or caramel filling for an extra protein punch, just adjust the maple syrup slightly if your mix affects the consistency.
Final Thoughts
There’s something truly special about biting into a homemade Chocolate Peanut Butter Oatmeal Bars Recipe that’s packed with flavor, texture, and a little bit of love. These bars are proof that wholesome ingredients can be transformed into an indulgent treat that feels like a hug in every bite. Whether you’re baking for yourself, your family, or sharing with friends, I can’t recommend this recipe enough. Dive in and enjoy the magic of chocolate and peanut butter coming together with oats in this utterly delicious way!
Print
Chocolate Peanut Butter Oatmeal Bars Recipe
- Prep Time: 20 minutes
- Cook Time: 10 minutes (melting and assembly time)
- Total Time: 1 hour 55 minutes (includes chilling time)
- Yield: 16 bars
- Category: Dessert
- Method: No-Cook
- Cuisine: American
- Diet: Vegan, Gluten Free
Description
These Chocolate Peanut Butter Oatmeal Bars are a delicious no-bake treat combining a crunchy oat crust, a smooth peanut butter caramel filling, and a rich chocolate topping. Perfect for a healthy snack or dessert, they are naturally gluten-free and vegan-friendly, made with wholesome ingredients like rolled oats, natural peanut butter, and pure maple syrup. The layers chill to set in the fridge, making this an easy and satisfying recipe that’s great for meal prep and on-the-go enjoyment.
Ingredients
Crust
- 200 g rolled oats (certified gluten-free if needed)
- ½ teaspoon sea salt (plus extra for garnish)
- 200 g smooth peanut butter
- 100 ml pure maple syrup
Filling
- 280 g smooth peanut butter
- 150 ml pure maple syrup
- 55 g coconut oil (solid)
Topping
- 200 g vegan chocolate
- 50 g smooth peanut butter
- Flaky sea salt for sprinkling
Instructions
- Prepare the crust: Line the base and sides of an 8-inch square pan with parchment paper. Add rolled oats and sea salt to a food processor and blitz until finely ground. Add 200 g peanut butter and 100 ml maple syrup, blending until the mixture forms a dough. If it’s too dry, add a little more maple syrup.
- Press the crust: Evenly press the crust mixture into the base of the prepared pan. Smooth the surface using a spatula or flat-bottomed glass. Place the crust in the fridge while preparing the filling.
- Make the filling: Combine 280 g peanut butter, 150 ml maple syrup, and 55 g solid coconut oil in a heat-resistant bowl. Heat gently over a double boiler (bain-marie), stirring constantly until all ingredients melt and blend into a smooth caramel consistency.
- Assemble and set filling: Pour the caramel filling evenly over the chilled oat crust. Return the pan to the fridge and chill for 1-2 hours or until the filling is firm. For best results, chill overnight.
- Prepare the topping: Melt 200 g vegan chocolate and 50 g peanut butter together over a double boiler, stirring until smooth and combined.
- Add the topping: Pour the melted chocolate mixture over the set caramel layer. Sprinkle flaky sea salt on top for garnish. Return to the fridge and chill for 15-20 minutes until the chocolate topping is firm.
- Slice the bars: To slice, heat a sharp knife by placing it in boiling water, then wipe it dry before cutting. The warmed knife will slice cleanly through the layers without cracking the bars.
- Store properly: Keep the bars stored in an airtight container in the fridge for up to one week. Alternatively, freeze any unused portions and thaw as needed before serving.
Notes
- Use certified gluten-free oats if gluten sensitivity is a concern.
- For a firmer texture, chill the bars overnight before slicing.
- Heating the knife before slicing helps achieve clean cuts without crumbling.
- Store bars in the fridge or freezer to maintain freshness and texture.
- This recipe is vegan and naturally gluten-free.


