
If you have a sweet tooth but also want to keep things healthy and satisfying, this Protein Cheesecake Recipe is going to be your new best friend. Blending creamy Greek yogurt, luscious cream cheese, and a boost of vanilla protein powder, this cheesecake offers a perfect balance of indulgence and nutrition. Whether you bake it with a buttery graham cracker crust or skip it for a low-carb version, each bite feels like a celebration without the guilt. It’s an amazing way to enjoy dessert while hitting your protein goals, and trust me, once you try this wonderful recipe, it’ll become a staple in your dessert rotation.
Ingredients You’ll Need
This Protein Cheesecake Recipe uses simple but essential ingredients that come together beautifully to create a creamy, textured, and flavorful treat. Each component plays its role: the crust adds a buttery crunch, the filling is silky and protein-packed, and the toppings bring a pop of freshness and sweetness.
- Crushed graham crackers or almond flour: Adds a delightful base with a hint of crunch and flavor.
- Melted butter or coconut oil: Binds the crust ingredients and adds richness.
- Sweetener of choice: Sweetens both crust and filling naturally, adjustable to taste.
- Greek yogurt or dairy-free yogurt: Brings creaminess and a tangy note while adding protein.
- Low-fat or plant-based cream cheese: Makes the cheesecake luxuriously smooth.
- Vanilla protein powder: Gives the recipe its protein punch with tasty vanilla flavor.
- Eggs or flax eggs: Help set the cheesecake without overpowering the texture.
- Vanilla extract: Enhances the sweetness and depth of flavor.
- Cornstarch or arrowroot powder: Thickens the filling for that perfect cheesecake body.
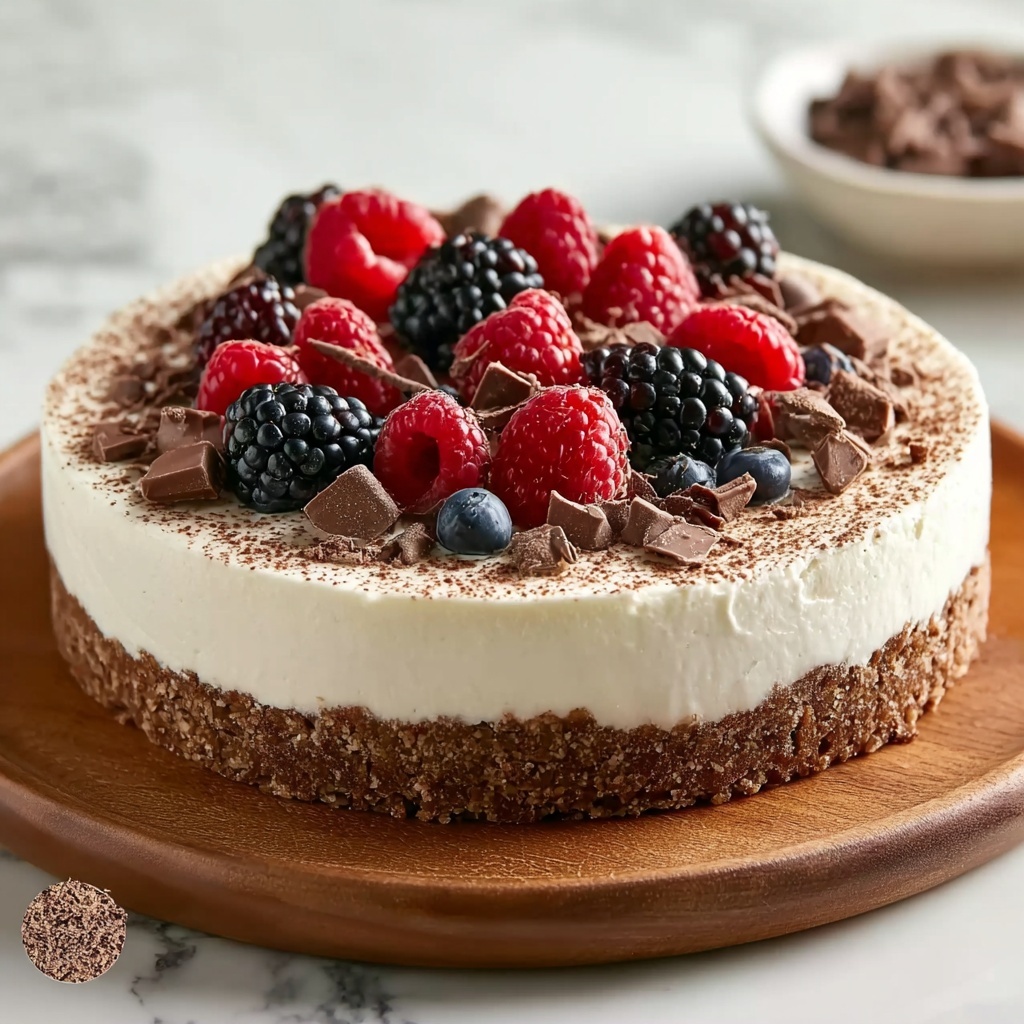
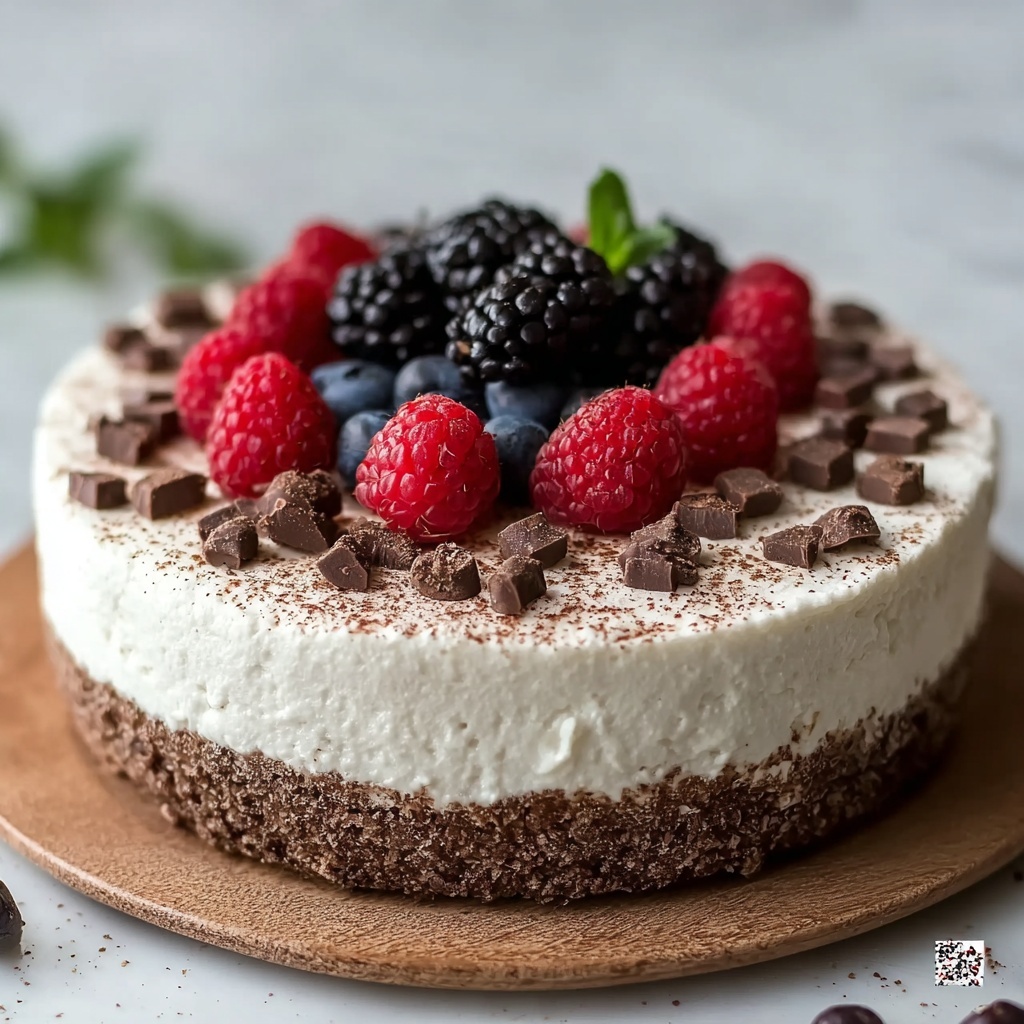
- Fresh berries: Offer vibrant color and a refreshing contrast as a topping.
- Sugar-free chocolate or caramel syrup: Adds a decadent finishing touch without extra sugar.
How to Make Protein Cheesecake Recipe
Step 1: Prepare the Crust (Optional)
Start by preheating your oven to 350°F (175°C). In a mixing bowl, combine crushed graham crackers with melted butter and your sweetener of choice until everything sticks together nicely. Press this mixture firmly into the bottom of a 9-inch springform pan. Pop it in the oven for about 8 to 10 minutes until it sets and turns lightly golden. If you prefer a crustless cheesecake, it’s completely fine to skip this step because the filling shines all on its own.
Step 2: Make the Filling
Grab a large bowl and mix together the Greek yogurt, cream cheese, vanilla protein powder, sweetener, vanilla extract, and cornstarch until the texture is smooth and creamy. Next, add the eggs one at a time, folding them in gently. This careful mixing prevents air bubbles that could cause cracks later, ensuring your cheesecake stays silky and uniform throughout.
Step 3: Bake the Cheesecake
Pour your smooth filling right over the crust, or directly into the pan if you skipped the crust. Place the cheesecake in a water bath — this gentle method keeps moisture in and prevents cracking — and bake at 325°F (160°C) for 40 to 45 minutes. You’ll know it’s done when the edges are set but the center still jiggles just a little. Then turn off the oven and leave the cheesecake inside with the door slightly open to cool down slowly, about 30 minutes, which helps it finish setting beautifully.
Step 4: Chill and Serve
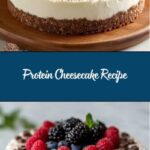
Once cooled, slide the cheesecake into the refrigerator for at least 4 hours or even overnight to get that perfect texture. Before serving, top with a selection of fresh berries for a vibrant, juicy crunch, or drizzle sugar-free chocolate or caramel syrup to add a sweet, indulgent touch without the guilt.
How to Serve Protein Cheesecake Recipe
Garnishes
Fresh berries like strawberries, blueberries, or raspberries are the ultimate garnish for this protein cheesecake. They inject color, add a juicy tartness that balances the creaminess, and keep things feeling light and fresh. If you want something more indulgent, a light drizzle of sugar-free chocolate or caramel syrup delivers sweetness and shine without overpowering the natural flavors.
Side Dishes
This Protein Cheesecake Recipe pairs wonderfully with a simple fruit salad or a handful of roasted nuts to add crunch and earthiness. For a morning treat, serve alongside your favorite cup of coffee or a refreshing herbal tea to keep things balanced. It also works great as a post-workout snack when you want something both satisfying and nourishing.
Creative Ways to Present
Want to impress guests? Serve the cheesecake in individual glass jars layered with fresh berries and a sprinkle of crushed nuts or granola for texture. You can also use mini springform pans to make single servings that look elegant and are easy to grab. Another fun idea is topping with edible flowers or mint leaves to elevate the visual appeal for any special occasion.
Make Ahead and Storage
Storing Leftovers
Keep your cheesecake covered tightly with plastic wrap or an airtight container in the refrigerator. It will stay fresh for up to 4 days, maintaining its creamy goodness and balanced flavors. Bringing it back to room temperature before serving enhances the texture and flavor.
Freezing
If you want to make this Protein Cheesecake Recipe in advance or save some for later, it freezes beautifully. Wrap the whole cake or individual slices tightly in plastic wrap and then add a layer of aluminum foil to prevent freezer burn. It can be stored up to one month. Thaw overnight in the fridge before enjoying.
Reheating
Cheesecake is best served chilled, so reheating is generally not necessary. If you prefer it slightly warmer, let slices sit at room temperature for about 20 minutes. Avoid using a microwave as it may alter the texture unfavorably.
FAQs
Can I make this Protein Cheesecake Recipe vegan?
Absolutely! Swap Greek yogurt for a thick plant-based yogurt, use plant-based cream cheese, and replace eggs with flax eggs to keep the recipe vegan while maintaining a creamy texture and good structure.
What protein powder works best in this recipe?
Vanilla-flavored whey or plant-based protein powders both work well here. Choose one you enjoy on its own for the best flavor. Avoid unflavored or overly sweetened varieties to keep the balance just right.
Is the crust necessary?
The crust adds a wonderful texture contrast but is completely optional. For a low-carb or simpler version, you can skip it and bake the filling directly in the pan without compromising the taste.
How can I prevent cracks on the cheesecake surface?
Mix the batter gently to avoid adding excess air, bake in a water bath, and cool the cheesecake slowly in the oven with the door ajar. These steps help keep the surface smooth and crack-free.
Can I substitute the sweetener?
Yes! Feel free to use honey, maple syrup, stevia, or a sugar substitute based on your taste and dietary preferences. Just adjust the quantity to keep the sweetness balanced.
Final Thoughts
This Protein Cheesecake Recipe is such a delightful way to satisfy your dessert cravings while fueling your body with wholesome ingredients. It’s creamy, flavorful, and can easily be tailored to suit your dietary needs or preferences. I encourage you to try it out soon — once you do, you’ll see how effortlessly it fits into your healthy lifestyle without missing a beat on taste or satisfaction.
Print
Protein Cheesecake Recipe
- Prep Time: 20 minutes
- Cook Time: 50 minutes
- Total Time: 5 hours 10 minutes
- Yield: 8 servings
- Category: Dessert
- Method: Baking
- Cuisine: American
- Diet: Low Fat
Description
This Protein Cheesecake is a nutritious twist on the classic dessert, combining creamy Greek yogurt, protein powder, and a subtle sweetness to create a guilt-free treat. Perfect for fitness enthusiasts and dessert lovers alike, it offers a rich texture with optional crust and toppings, baked gently in a water bath for the best results.
Ingredients
For the Crust (Optional):
- 1 cup crushed graham crackers (or almond flour for a low-carb option)
- 2 tbsp melted butter (or coconut oil for a dairy-free option)
- 1 tbsp sweetener of choice (honey, maple syrup, or stevia)
For the Filling:
- 2 cups Greek yogurt (or dairy-free yogurt for vegan options)
- 1 cup low-fat cream cheese (or plant-based cream cheese)
- 2 scoops vanilla protein powder (about 60g)
- 2 large eggs (or flax eggs for vegan versions)
- 1/3 cup sweetener of choice (honey, stevia, or sugar substitute)
- 1 tsp vanilla extract
- 1 tbsp cornstarch (or arrowroot powder)
For Topping (Optional):
- Fresh berries (strawberries, blueberries, or raspberries)
- A drizzle of sugar-free chocolate or caramel syrup
Instructions
- Prepare the Crust (Optional): Preheat your oven to 350°F (175°C). In a bowl, mix the crushed graham crackers, melted butter, and sweetener until well combined. Press the mixture evenly into the bottom of a 9-inch springform pan. Bake for 8–10 minutes, then set aside to cool. For a crustless option, skip this step.
- Make the Filling: In a large bowl, combine Greek yogurt, cream cheese, protein powder, sweetener, vanilla extract, and cornstarch. Mix until smooth and creamy. Add eggs one at a time, mixing gently after each addition. Be careful not to overmix to avoid air bubbles.
- Bake the Cheesecake: Pour the filling over the crust (or directly into the pan for crustless). Bake in a water bath at 325°F (160°C) for 40–45 minutes, or until the edges are set but the center is slightly jiggly. Turn off the oven and leave the cheesecake inside with the door slightly open to cool for about 30 minutes.
- Chill and Serve: Refrigerate the cheesecake for at least 4 hours, or overnight for the best texture. Before serving, top with fresh berries, a drizzle of syrup, or your favorite low-calorie topping.
Notes
- For a dairy-free or vegan version, use plant-based cream cheese, dairy-free yogurt, and flax eggs instead of traditional dairy ingredients and eggs.
- Using a water bath helps prevent cracks and ensures even baking for a creamy texture.
- Allowing the cheesecake to cool slowly in the oven with the door ajar helps prevent sudden temperature changes that can cause cracking.
- Sweeteners can be adjusted based on dietary preferences or restrictions.
- The crust is optional; omitting it reduces carbohydrates and calories.