
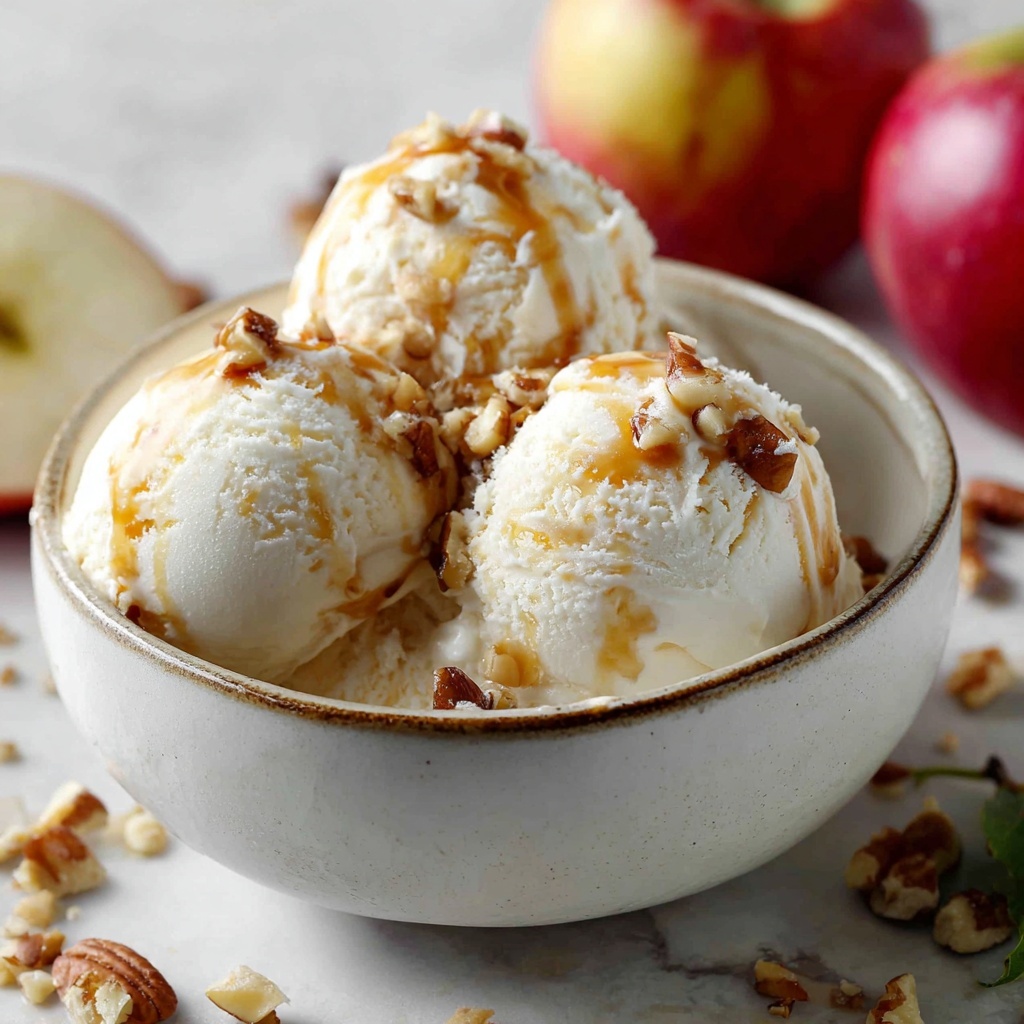
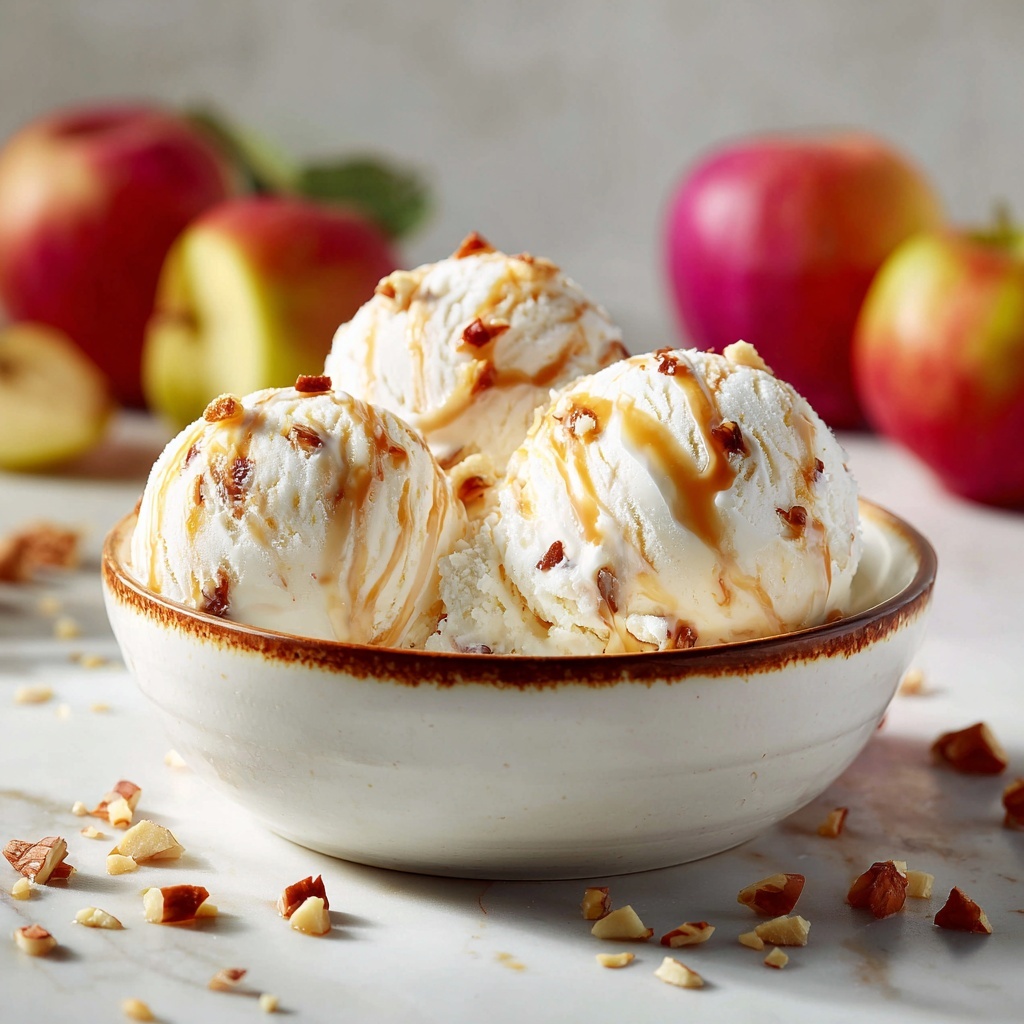
If you’re craving a sweet treat that perfectly captures the essence of a classic autumn dessert yet keeps things delightfully cool and refreshing, you have to try this Creamy Homemade Apple Pie Ice Cream for Summer Bliss Recipe. It’s like biting into a scoop of pure comfort, where tender apple pie filling meets rich, velvety ice cream loaded with cinnamon-spiced apples, buttery notes, and crunchy cookie pieces. Whether you’re looking to impress guests at a summer barbecue or craving a nostalgic dessert that sings with fruity freshness and creamy goodness, this recipe will have you swooning with every spoonful.
Ingredients You’ll Need
Using simple, accessible ingredients is the charm of this recipe. Each component is carefully chosen to bring out the best in both texture and flavor, creating a balance between creamy smoothness, fruity warmth, and satisfying crunch.
- Apples (3-4 pieces): Choose Honeycrisp, Granny Smith, or Gala for the perfect balance of tartness and sweetness in your apple pie filling.
- Sugar (½ cup): Adjust this based on your apples’ natural sweetness to keep the flavor bright and not overly sweet.
- Cinnamon (1 teaspoon): Brings a warm spiced note; feel free to swap with nutmeg for a different twist.
- Butter (2 tablespoons): Essential for sautéing the apples and adding richness to the filling.
- Heavy Cream (2 cups): The heart of the ice cream, offering that luscious, rich texture; full-fat coconut milk works for a dairy-free option.
- Whole Milk (1 cup): Adds creaminess while lightening the base; almond milk is a lighter alternative.
- Sweetened Condensed Milk (1 can): Sweetens and gives the ice cream body without requiring an ice cream machine; opt for no-sugar versions if you prefer.
- Snickerdoodle Cookies (1 cup): These crushed cookies introduce a beautiful crunch and a hint of cinnamon sugar; you can substitute with your favorite cookie.
- Pie Crust Pieces (1 cup): Pre-bake these for that irresistible flaky texture reminiscent of classic apple pie.
How to Make Creamy Homemade Apple Pie Ice Cream for Summer Bliss Recipe
Step 1: Prepare the Apple Pie Filling
Start by peeling and chopping your chosen 3 to 4 apples into bite-sized pieces. Toss them into a warm skillet alongside ½ cup of sugar and 1 teaspoon of cinnamon. Cook gently over medium heat until the apples soften and release their fragrant juices—about 5 to 7 minutes. This step infuses the fruit with sweetness and spice, resulting in a tender, aromatic filling that will be the star of your ice cream. Allow the mixture to cool completely before moving on.
Step 2: Whip the Ice Cream Base
Next, take 2 cups of heavy cream and whip it using an electric mixer until soft peaks form—this usually takes 3 to 4 minutes. This whipping brings airiness and volume, making the ice cream luxuriously creamy. Gently fold in 1 cup of whole milk and 1 can of sweetened condensed milk. This blend perfectly balances richness and sweetness, creating a smooth, luscious base without needing an ice cream maker.
Step 3: Combine Apple Filling with Base
Carefully fold the cooled apple pie filling into the mousse-like cream base, making sure the apple pieces are evenly distributed. Then fold in 1 cup each of crushed snickerdoodle cookies and pre-baked pie crust pieces. These add that essential textural contrast—soft and creamy meets crunchy and flaky—which makes every spoonful delightful. Avoid overmixing to maintain pockets of texture throughout the ice cream.
Step 4: Freeze Until Ready
Transfer the mixture into an airtight container, pressing plastic wrap directly onto the surface to prevent icy crystals from forming. Pop it into the freezer for at least 4 hours, or until fully set. Patience is key here, but the wait will be so worth it as you soon dive into creamy, spiced, crunchy, fruity goodness.
How to Serve Creamy Homemade Apple Pie Ice Cream for Summer Bliss Recipe
Garnishes
Top off your scoops with a sprinkle of cinnamon or a handful of extra crushed snickerdoodle cookies for added crunch. Fresh apple slices or a drizzle of caramel sauce can elevate presentation and flavor, creating that extra wow factor for guests or special family moments.
Side Dishes
This ice cream pairs beautifully with warm apple pie for an indulgent dessert experience or alongside a simple spiced cake like gingerbread or pound cake. It’s also irresistible as a topping for freshly baked waffles or pancakes during a weekend brunch.
Creative Ways to Present
Serve your ice cream in elegant glass bowls layered with alternating chunks of apple pie filling and cookie crumbs for a parfait effect. Alternatively, sandwich scoops between buttery snickerdoodle cookies for apple pie ice cream sandwiches that are perfect for casual summer gatherings or kid-friendly treats.
Make Ahead and Storage
Storing Leftovers
Keep your ice cream in an airtight container in the freezer. It’s best enjoyed within 2 weeks to capture peak freshness and flavor. Label your container with the date so you can enjoy your creamy treat while it’s at its best.
Freezing
This recipe freezes wonderfully since it doesn’t rely on an ice cream machine. Just ensure the container is sealed tightly to prevent freezer burn and ice crystals. Pressing plastic wrap onto the surface before sealing helps the ice cream stay creamy and smooth.
Reheating
Since it’s ice cream, reheating isn’t necessary. If it becomes too hard in the freezer, simply let it sit at room temperature for 5 to 10 minutes before scooping to soften up perfectly.
FAQs
Can I use different apple varieties?
Absolutely! While Honeycrisp, Granny Smith, and Gala are recommended for their balance of sweetness and tartness, feel free to experiment with what’s in season or what you love most. Just adjust sugar accordingly to keep the flavor harmonious.
Is it possible to make this recipe dairy-free?
Yes! Substitute heavy cream with full-fat coconut milk and use almond milk or another plant-based milk instead of whole milk. Look for sweetened condensed coconut milk or prepare a homemade version to keep the creamy sweetness intact.
Do I need an ice cream maker?
Nope! This Creamy Homemade Apple Pie Ice Cream for Summer Bliss Recipe is designed to be churn-free, relying on the folding and freezing process to achieve a luscious texture without any special equipment.
How do I prevent ice crystals from forming?
Pressing plastic wrap directly onto the surface of the ice cream before sealing the container is the trick to prevent ice crystals. This keeps air out and maintains the creamy texture you want for a perfect scoop.
Can I add other mix-ins?
Definitely! Chopped nuts like pecans or walnuts would complement the apple pie flavors wonderfully, as would a swirl of caramel or a handful of mini chocolate chips for an extra layer of indulgence.
Final Thoughts
Making this Creamy Homemade Apple Pie Ice Cream for Summer Bliss Recipe is pure joy that rewards you with a decadent, nostalgic treat perfect for warm days and special gatherings. It’s simple enough to whip up on a whim yet impressive enough to wow anyone lucky enough to try it. So go ahead, gather your ingredients, and dive into this luscious slice of summer apple pie heaven!
Print
Creamy Homemade Apple Pie Ice Cream for Summer Bliss Recipe
- Prep Time: 15 minutes
- Cook Time: 7 minutes
- Total Time: 4 hours 30 minutes
- Yield: 8 servings
- Category: Dessert
- Method: Stovetop
- Cuisine: American
Description
Indulge in a luscious Creamy Homemade Apple Pie Ice Cream, perfect for summer bliss. This recipe blends tender, cinnamon-spiced sautéed apples with a rich ice cream base enhanced by sweetened condensed milk and crushes of snickerdoodle cookies and pie crust for a delightful texture. Enjoy the classic flavors of apple pie in a refreshing frozen treat that’s easy to prepare and irresistible to all ages.
Ingredients
Apple Pie Filling
- 3–4 pieces Apples (Best varieties are Honeycrisp, Granny Smith, or Gala.)
- 0.5 cups Sugar (Adjust according to natural sweetness of apples.)
- 1 teaspoon Cinnamon (Can substitute with nutmeg for a unique twist.)
- 2 tablespoons Butter (No substitutes needed for function.)
Ice Cream Base
- 2 cups Heavy Cream (Can use full-fat coconut milk for dairy-free.)
- 1 cup Whole Milk (Almond milk is a lighter alternative.)
- 1 can Sweetened Condensed Milk (Can substitute with no-sugar version for lower-calorie.)
Mix-ins
- 1 cup Snickerdoodle Cookies, crushed (Adds crunch and flavor; feel free to use your favorite cookie.)
- 1 cup Pie Crust Pieces, pre-baked (For best texture)
Instructions
- Prepare Apple Pie Filling: Peel and chop 3-4 apples of your choice. In a skillet over medium heat, sauté the apples with ½ cup of sugar, 1 teaspoon of cinnamon, and 2 tablespoons of butter. Cook until the apples are soft and fragrant, approximately 5-7 minutes. Remove from heat and let the filling cool completely before using it in the ice cream base.
- Make Ice Cream Base: In a large mixing bowl, whip 2 cups of heavy cream until soft peaks form; this typically takes about 3-4 minutes using an electric mixer. Gently fold in 1 cup of whole milk and 1 can of sweetened condensed milk until fully combined, ensuring a smooth, creamy mixture.
- Combine Ingredients: Carefully fold the cooled apple pie filling into the ice cream base, followed by 1 cup of crushed snickerdoodle cookies and 1 cup of pre-baked pie crust pieces. Mix gently to ensure even distribution while maintaining the ice cream’s light texture.
- Freeze: Transfer the combined mixture into an airtight container. Press plastic wrap directly onto the surface of the ice cream to prevent ice crystal formation. Seal the container and freeze for at least 4 hours, or until fully set and solid.
Notes
- Use tart apples like Granny Smith for more pronounced apple flavor or sweeter varieties like Gala for a naturally sweeter ice cream.
- For a dairy-free version, substitute heavy cream with full-fat coconut milk and whole milk with almond milk.
- Adjust sugar quantity based on the sweetness of your apples and personal preference.
- Pre-baking the pie crust pieces ensures they stay crisp and add a pleasant crunch to the ice cream.
- For a lower-calorie or diabetic-friendly version, use no-sugar-added condensed milk and reduce added sugar.


