If you’ve ever dreamed of enjoying the rich, fudgy taste of brownies without waiting to bake and cool them, this Brownie Batter Dip Recipe is about to become your new obsession. It captures every bit of that decadent chocolate flavor and creamy texture, all in a luscious, no-bake dip that’s perfect for parties, casual snacking, or indulging any time of day. Whether you’re dipping fresh fruit, pretzels, or cookies, this dip brings the best of brownie batter straight to your taste buds in the happiest way possible.
Ingredients You’ll Need
Whipping up this Brownie Batter Dip Recipe requires surprisingly simple ingredients, each playing a vital role in layering flavor, richness, and texture. From the heat-treated flour that ensures safety without compromise, to the luscious butter and cocoa that deliver chocolatey goodness, every component shines.
- 1 cup all-purpose flour (heat-treated): Essential for a safe-to-eat batter base that mimics authentic brownie texture.
- 1/2 cup unsweetened cocoa powder: Provides the deep, fudgy chocolate flavor that defines this dip.
- 1/2 cup unsalted butter (softened): Adds creaminess and richness for that melt-in-your-mouth feel.
- 1 cup brown sugar: Brings warm, molasses-like sweetness and enhances moisture.
- 1/4 cup granulated sugar: Balances sweetness while helping create a fluffy texture.
- 2 tablespoons milk: Moistens the dip, making it smooth and easily scoopable.
- 1 teaspoon vanilla extract: Elevates the overall flavor with sweet, aromatic undertones.
- 1/2 teaspoon salt: Heightens the chocolate notes and balances the sweetness.
- 1/2 cup mini chocolate chips: Adds bursts of melty, gooey chocolate fun in every bite.
How to Make Brownie Batter Dip Recipe
Step 1: Heat-Treat the Flour
Safety first! Since this dip uses raw flour, it’s important to heat-treat it by microwaving it in a bowl for about 1 minute, stirring halfway through. This simple step eliminates any potential bacteria while keeping the texture perfect for dipping. Let it cool completely before using.
Step 2: Cream Butter and Sugars
In a mixing bowl, combine the softened butter with the brown sugar and granulated sugar. Beat them together until you get a dreamy, smooth, and fluffy mixture — this is where the richness and sweetness start coming to life.
Step 3: Add Vanilla and Milk
Pour in the vanilla extract and milk, then mix everything until it blends into a creamy, luscious base. This will make your dip smooth and easy to scoop, while the vanilla infuses a warm sweetness.
Step 4: Mix in Cocoa and Salt
Next, stir in the unsweetened cocoa powder alongside the salt. These ingredients deepen the chocolate flavor and balance the sweetness perfectly, making this dip taste like authentic brownie batter.
Step 5: Incorporate Flour Gradually
Slowly add the cooled, heat-treated flour to the mixture, mixing well after each addition. This keeps the batter smooth and silky while achieving that thick, scoopable consistency you want in a dip.
Step 6: Fold in Mini Chocolate Chips
Finally, gently fold in the mini chocolate chips. These little pockets of chocolate bring an extra layer of indulgence and texture that make each bite exciting.
Step 7: Chill for Best Texture
Pop your dip into the fridge for 15 to 20 minutes. Chilling allows the flavors to meld together and gives the dip a satisfyingly thick but still creamy texture that clings beautifully to whatever you’re dipping.
How to Serve Brownie Batter Dip Recipe

Garnishes
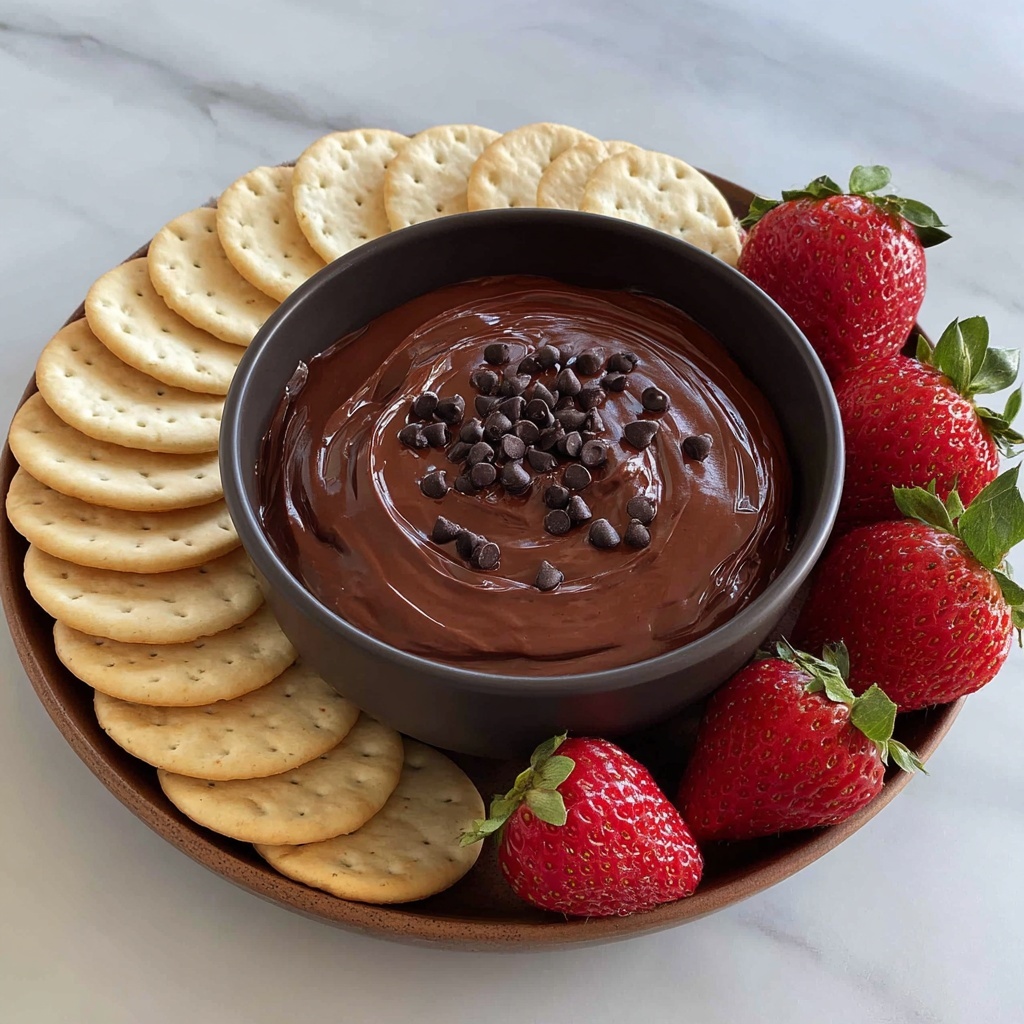
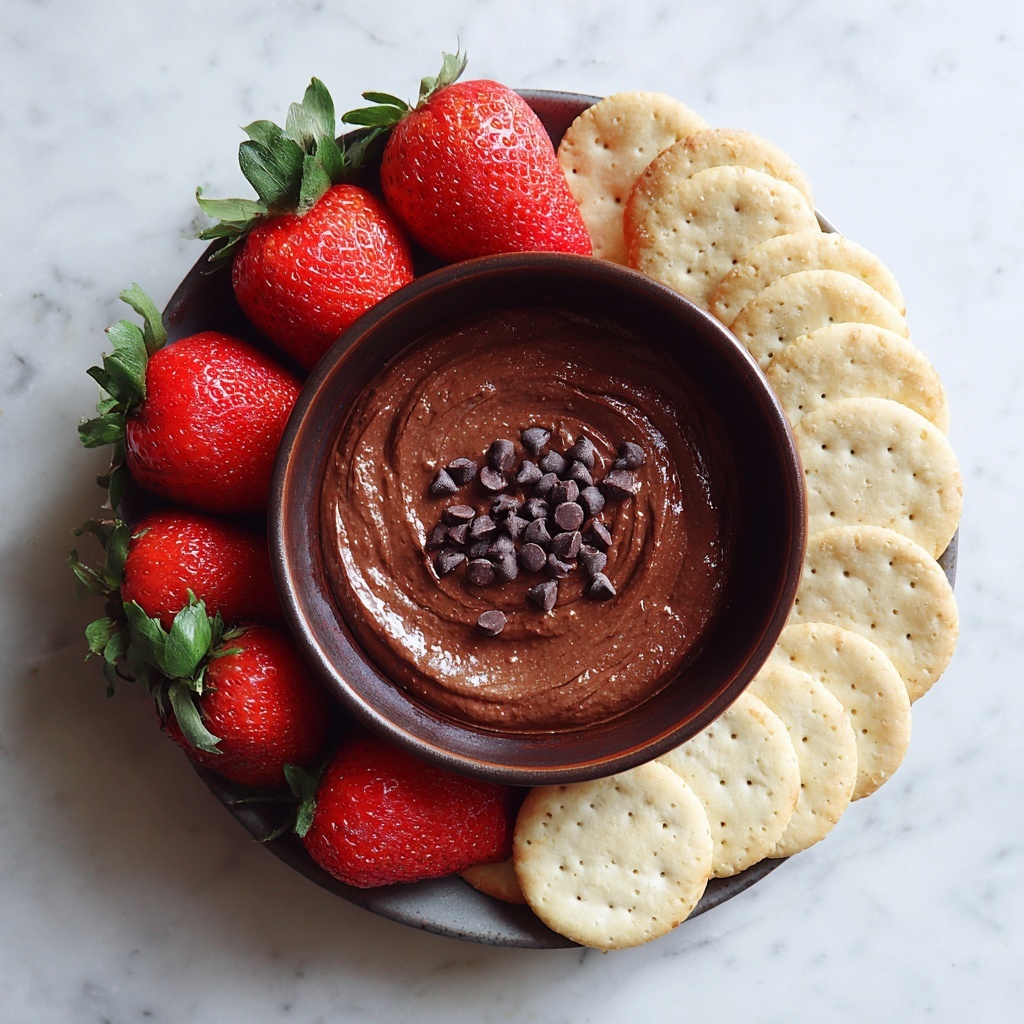
Adding a few garnishes can take your Brownie Batter Dip Recipe from delicious to show-stopping. Sprinkle some extra mini chocolate chips on top or dust with a little cocoa powder or powdered sugar. For a bit of color contrast and freshness, chopped nuts or a handful of fresh berries work wonders too.
Side Dishes
This dip pairs wonderfully with a wide variety of dippers. Crunchy pretzels add the perfect salty counterpoint, while soft cookies offer an extra dose of sweetness and texture. Fresh fruit like strawberries, banana slices, or apple wedges brighten the richness and keep things balanced.
Creative Ways to Present
Presentation is half the fun! Serve this dip in a pretty glass bowl surrounded by an assortment of dippers on a wooden board for an inviting spread. Or, for a party, spoon the dip into mini jars or cups with dipped spoons for individual servings. You can even pipe the dip over cupcakes as a frosting alternative for an unexpected treat.
Make Ahead and Storage
Storing Leftovers
If you have any leftovers, don’t worry — this dip holds up beautifully when stored. Simply cover it tightly with plastic wrap or transfer it to an airtight container and refrigerate. It will stay fresh and delicious for up to 4 days, making it a convenient dessert you can enjoy anytime.
Freezing
Freezing this dip isn’t generally recommended because it can affect the texture and creaminess. The butter and milk base may separate or become grainy after thawing. For the best experience, try to enjoy it fresh or refrigerated within a few days.
Reheating
This dip is meant to be served chilled or at room temperature, so reheating is not necessary. If it becomes too firm, simply let it sit on the counter for a little while or stir gently to soften it before serving.
FAQs
Can I use gluten-free flour for this dip?
Yes! You can substitute all-purpose flour with a gluten-free flour blend that is safe to eat raw or can be heat-treated similarly. Just make sure the texture aligns so your dip remains smooth and scoopable.
Is this dip safe to eat raw?
Absolutely, as long as you heat-treat the flour first. This important step kills any harmful bacteria in raw flour, making it completely safe to enjoy the dip without baking.
Can I make this dip vegan?
To make a vegan version, swap the butter for a plant-based vegan butter and use a dairy-free milk alternative. Just ensure the cocoa powder and chocolate chips are also dairy-free. The recipe will still be deliciously rich and chocolatey!
How long does this dip last in the fridge?
Stored in an airtight container, the dip keeps well for about 4 days. Beyond that, the texture and freshness might start to deteriorate, so it’s best enjoyed sooner.
Can I adjust the sweetness level?
Definitely! If you prefer a less sweet dip, reduce the brown and granulated sugar slightly. Conversely, for an extra sweet treat, adding a splash more vanilla or a few extra chocolate chips can enhance the flavor without overpowering it.
Final Thoughts
I can’t recommend this Brownie Batter Dip Recipe enough—it’s the perfect way to satisfy your chocolate cravings without any fuss. Whether you’re sharing it with friends, enjoying a cozy night in, or need a quick dessert fix, this dip delivers pure comfort with every luscious bite. Trust me, once you try it, it’ll become your go-to sweet treat for every occasion.
Print
Brownie Batter Dip Recipe
- Prep Time: 10 minutes
- Cook Time: 0 minutes
- Total Time: 10 minutes
- Yield: 6 servings
- Category: Dessert
- Method: No-Cook
- Cuisine: American
- Diet: Vegetarian
Description
This rich and indulgent Brownie Batter Dip combines the flavors of classic brownie batter into a creamy, no-bake dip perfect for parties or casual snacking. Made with heat-treated flour for safety, cocoa powder, brown and granulated sugars, and mini chocolate chips, it offers a deliciously sweet treat that pairs perfectly with cookies, pretzels, or fresh fruit.
Ingredients
Dry Ingredients
- 1 cup all-purpose flour (heat-treated)
- 1/2 cup unsweetened cocoa powder
- 1/2 teaspoon salt
- 1/2 cup mini chocolate chips
Wet Ingredients
- 1/2 cup unsalted butter (softened)
- 1 cup brown sugar
- 1/4 cup granulated sugar
- 2 tablespoons milk
- 1 teaspoon vanilla extract
Instructions
- Heat-Treat the Flour: Microwave the all-purpose flour in a bowl for about 1 minute, stirring halfway through to ensure even heat. Then, allow the flour to cool completely before using to eliminate the risk of raw flour bacteria.
- Cream Butter and Sugars: In a mixing bowl, use a hand or stand mixer to cream together the softened unsalted butter, brown sugar, and granulated sugar until the mixture becomes smooth and fluffy, which should take about 2-3 minutes.
- Add Vanilla and Milk: Mix in the vanilla extract and milk thoroughly until combined, creating a creamy base for your dip.
- Incorporate Dry Ingredients: Stir in the cocoa powder and salt into the wet mixture. Gradually add the cooled, heat-treated flour, mixing gently to avoid lumps and ensure a smooth batter consistency.
- Fold in Chocolate Chips: Gently fold in the mini chocolate chips to distribute them evenly throughout the dip.
- Chill the Dip: Place the dip in the refrigerator for 15 to 20 minutes. Chilling helps the flavors meld and improves the texture for dipping.
- Serve: Serve chilled with your choice of dippables such as cookies, pretzels, or fresh fruit for a crowd-pleasing dessert option.
Notes
- Heat-treating the flour ensures it is safe to consume raw in this recipe.
- You can substitute regular milk with any dairy-free alternative like almond or oat milk if desired.
- For a thinner consistency, add additional milk a teaspoon at a time until preferred thickness is reached.

