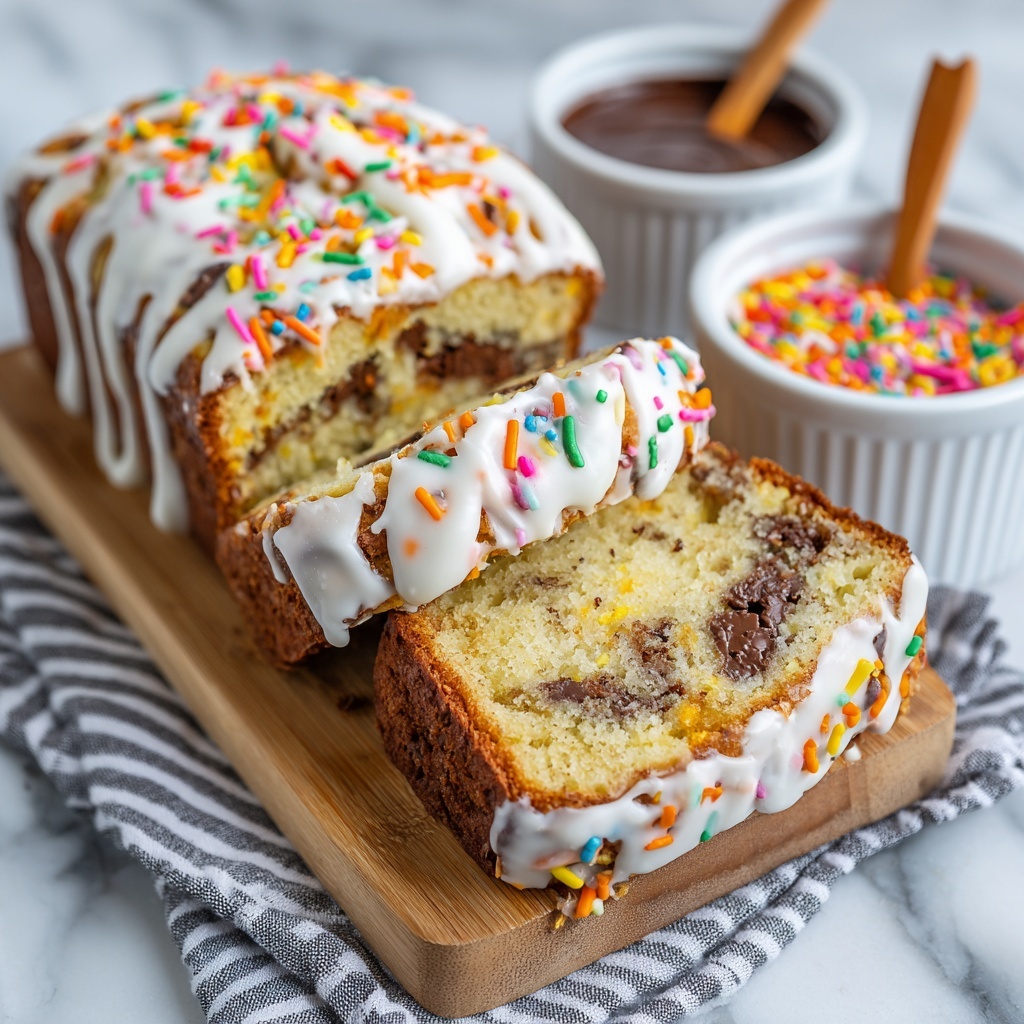
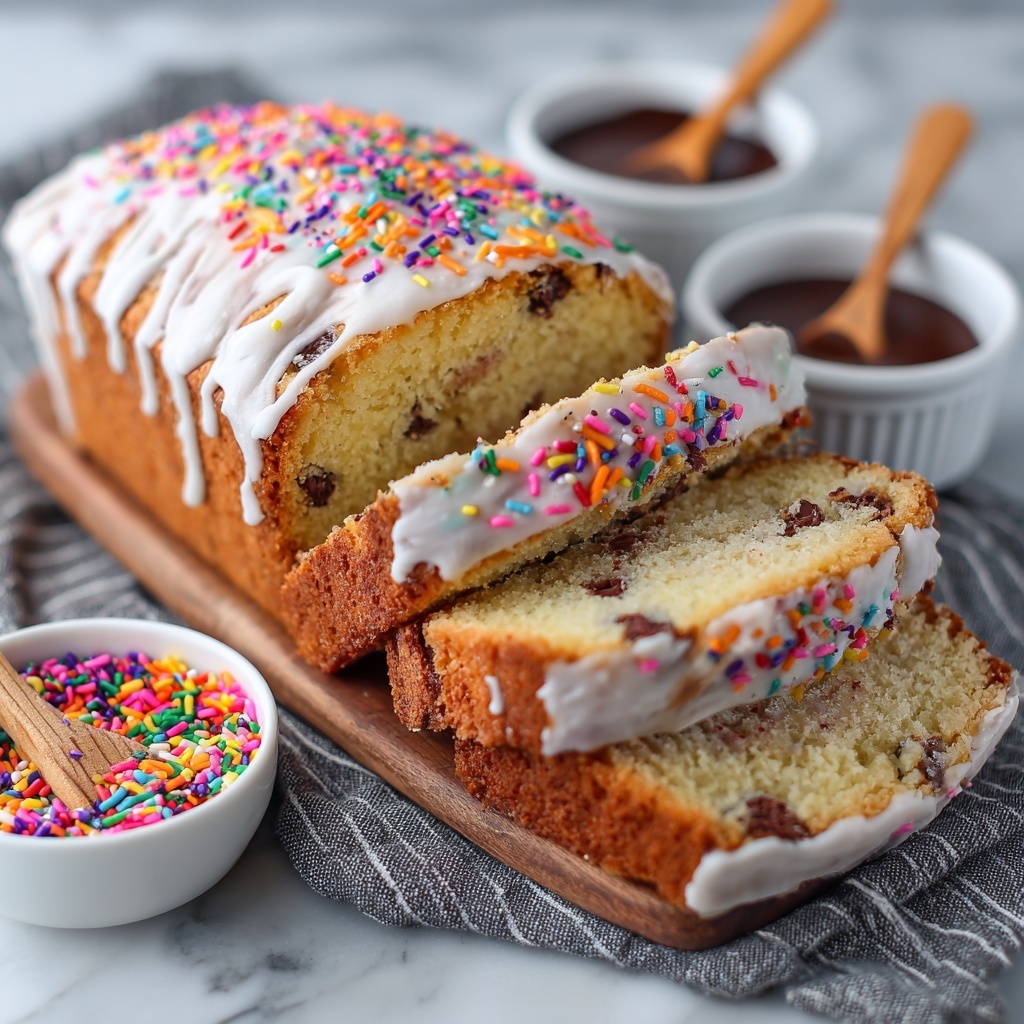
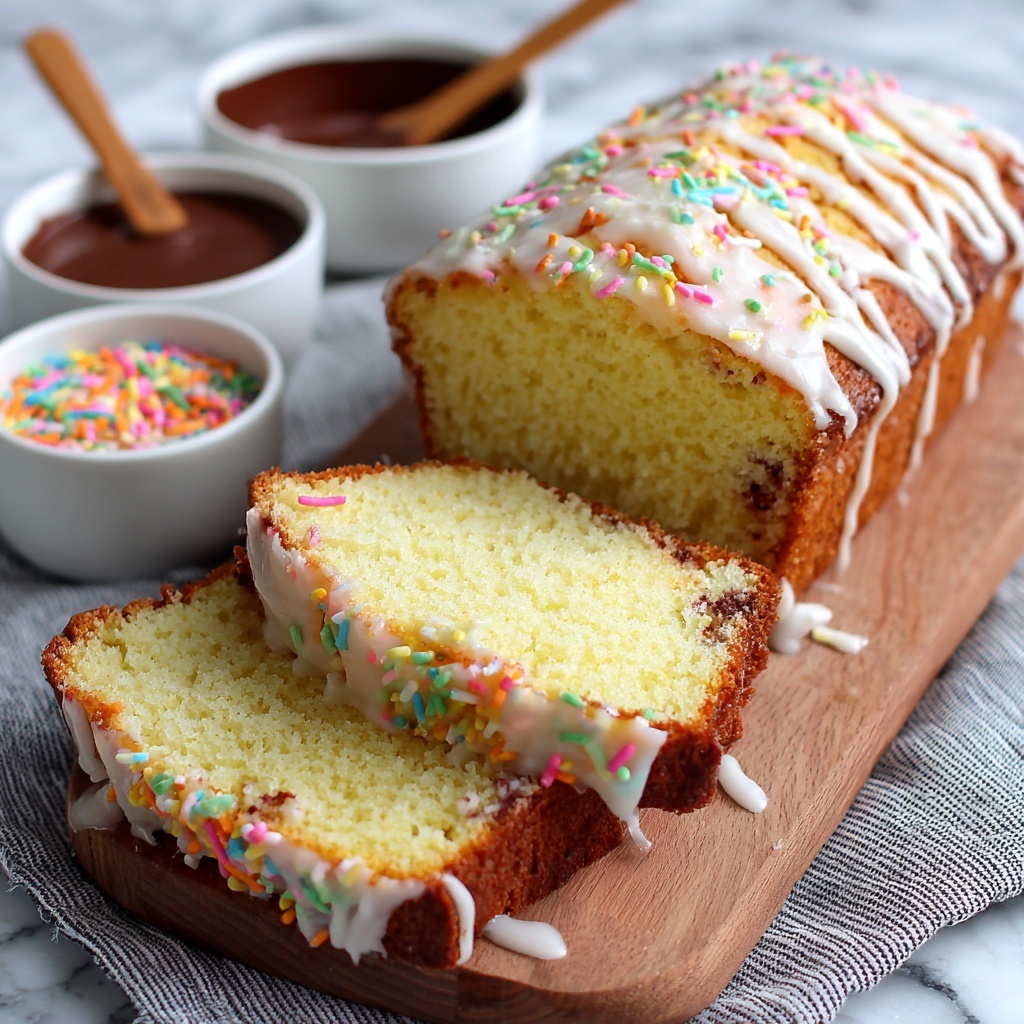
Discover the delightful simplicity and surprising charm of the Ice Cream Bread: Bake a Sweet, Unique Treat Today Recipe. This fun and easy recipe transforms your favorite ice cream flavor into a soft, tender loaf of bread that’s perfect for breakfast, snacks, or dessert. With minimal ingredients and no yeast required, this charming treat offers a sweet, moist texture and a subtle flavor that varies with your choice of ice cream — making it not just a bread but a creative culinary adventure you’ll want to bake again and again.
Ingredients You’ll Need
Getting ready to make this amazing bread requires just a few simple but key ingredients that work harmoniously together. Each one plays a vital role in ensuring your loaf bakes up with the perfect texture and taste you’ll love.
- 2 cups of softened ice cream: The star of the show, providing moisture, sweetness, and the base flavor—choose your favorite!
- 1 ½ cups of self-rising flour: Adds structure and a natural lift to your bread without needing extra yeast.
- 1 teaspoon of vanilla extract (optional): Enhances the overall flavor, especially if you opt for a more subtle ice cream taste.
- Pinch of salt: Balances sweetness and brings depth to the flavor profile.
How to Make Ice Cream Bread: Bake a Sweet, Unique Treat Today Recipe
Step 1: Prepare Your Oven and Pan
Begin by preheating your oven to 350°F (175°C). Grease a 9×5-inch loaf pan generously, or line it with parchment paper to make removing the bread after baking a breeze. This crucial setup step ensures your bread won’t stick and will have a lovely crust.
Step 2: Mix Your Batter with Care
In a large mixing bowl, combine the softened ice cream and self-rising flour. Stir gently until just combined — remember, overmixing can make your bread tough, so keep it light and quick. If you like, this is the perfect moment to add the vanilla extract and a pinch of salt, which will subtly elevate your bread’s flavor.
Step 3: Pour and Smooth
Transfer the batter into the prepared loaf pan, carefully smoothing the top with a spatula. This little step ensures even baking and a beautiful golden top that will make your bread as pretty as it is delicious.
Step 4: Bake Until Golden and Set
Bake for about 30 to 35 minutes. You’ll know your bread is ready when the top turns a gorgeous golden brown and a toothpick inserted in the center emerges clean. This signals a perfectly baked loaf with a tender crumb.
Step 5: Cool Before Enjoying
Allow your bread to cool in the pan for around 10 minutes; this helps it set properly. Then, transfer it to a wire rack to cool completely. Cooling it fully lets you slice without crumbling and enjoy the texture at its best.
How to Serve Ice Cream Bread: Bake a Sweet, Unique Treat Today Recipe
Garnishes
Elevate your ice cream bread by adding delightful garnishes. Fresh berries, a drizzle of honey, or a smear of butter can amplify the flavor while adding color and texture. Sprinkle some cinnamon sugar or a dusting of powdered sugar for that extra tempting look and a touch of sweetness.
Side Dishes
This bread pairs wonderfully with a variety of sides. Serve alongside a warm cup of tea or coffee for a cozy breakfast. For a light dessert, accompany it with a scoop of ice cream or a dollop of whipped cream. The gentle sweetness of the bread complements fruit salads or even creamy spreads beautifully.
Creative Ways to Present
Feel playful by slicing the bread and turning it into mini sandwiches with nut butter or jam layers. Toast slices for a crispy twist or cut into cubes for a sweet bread pudding. Your Ice Cream Bread: Bake a Sweet, Unique Treat Today Recipe is a versatile hit that invites experimentation and fun presentations.
Make Ahead and Storage
Storing Leftovers
To keep your ice cream bread fresh, store it wrapped tightly in plastic wrap or placed in an airtight container at room temperature for up to 2 days. The shorter shelf life is due to its moist texture, so enjoy it soon for the best tenderness and flavor.
Freezing
If you want to save some for later, freezing is an excellent option. Wrap the cooled bread securely in plastic wrap and place it inside a zip-top freezer bag. It can last for up to 3 months frozen. When ready to use, thaw at room temperature for a few hours or overnight in the fridge.
Reheating
To revive your frozen or stored bread, gently warm slices in a toaster oven or microwave for a few seconds. This will refresh the softness and bring out the flavors just like when freshly baked. Avoid overheating to keep the crumb tender and moist.
FAQs
Can I use any flavor of ice cream for this bread?
Absolutely! The beauty of this Ice Cream Bread: Bake a Sweet, Unique Treat Today Recipe is that you can customize it with any flavor you love, from classic vanilla to fruity or chocolate varieties—each will give a unique spin to your bread.
Do I need self-rising flour or can I use all-purpose flour?
Self-rising flour is recommended because it already contains baking powder and salt, which help the bread rise without yeast. If you only have all-purpose flour, you can make your own self-rising version by adding 1½ teaspoons baking powder and ¼ teaspoon salt per cup of flour.
What is the texture of ice cream bread like?
The texture is surprisingly soft and moist, akin to a quick bread or cake. It’s tender but sturdy enough to slice, making it perfect for spreads or to enjoy plain with its mild sweetness.
Can I add mix-ins to the batter?
Yes! Feel free to toss in chocolate chips, nuts, or dried fruit to personalize your loaf. Just fold them in gently after combining the basic batter to maintain the bread’s delicate crumb.
Is this bread suitable for kids?
Definitely! The recipe is simple, sweet, and fun, making it appealing to kids and adults alike. Plus, using their favorite ice cream flavors makes it an exciting treat that encourages them to get involved in baking.
Final Thoughts
There is something truly magical about turning just two main ingredients into a warm, sweet loaf of bread. Whether you are making this for a last-minute dessert, a unique breakfast, or a fun baking activity, the Ice Cream Bread: Bake a Sweet, Unique Treat Today Recipe will deliver smiles and compliments all around. Give it a try—you might just discover your new favorite go-to treat!
Print
Ice Cream Bread: Bake a Sweet, Unique Treat Today Recipe
- Prep Time: 10 minutes
- Cook Time: 35 minutes
- Total Time: 45 minutes
- Yield: 8 servings
- Category: Dessert
- Method: Baking
- Cuisine: American
Description
Ice Cream Bread is a quick and unique recipe that transforms softened ice cream and self-rising flour into a delicious, sweet bread. This easy-to-make loaf offers a delightful treat with minimal ingredients and effort, perfect for a creative dessert or snack.
Ingredients
Dry Ingredients
- 1 ½ cups self-rising flour
- Pinch of salt (optional)
Wet Ingredients
- 2 cups softened ice cream (any flavor)
- 1 teaspoon vanilla extract (optional)
Instructions
- Preheat the Oven: Preheat your oven to 350°F (175°C). Grease a 9×5-inch loaf pan or line it with parchment paper to ensure easy removal of the bread after baking.
- Mix Ingredients: In a large mixing bowl, combine the softened ice cream and self-rising flour. Stir the mixture gently until just combined to avoid overmixing, which could toughen the bread. If you like, add vanilla extract and a pinch of salt to enhance the flavor.
- Prepare for Baking: Pour the batter into the prepared loaf pan and smooth the top evenly with a spatula to ensure uniform baking.
- Bake the Bread: Place the loaf pan in the preheated oven and bake for 30-35 minutes. The bread is done when the top turns golden brown and a toothpick inserted in the center comes out clean.
- Cool Before Serving: Let the bread sit in the pan for about 10 minutes after baking. Then transfer it to a wire rack to cool completely before slicing and serving.
Notes
- Use any flavor of ice cream, but avoid those with mix-ins like large chunks of chocolate or nuts for best texture.
- The bread is best enjoyed fresh but can be stored wrapped tightly for up to 2 days at room temperature.
- For a gluten-free option, use a gluten-free self-rising flour blend.
- Do not overmix the batter to keep the bread light and tender.
- Let the bread cool completely before slicing to avoid crumbling.


