
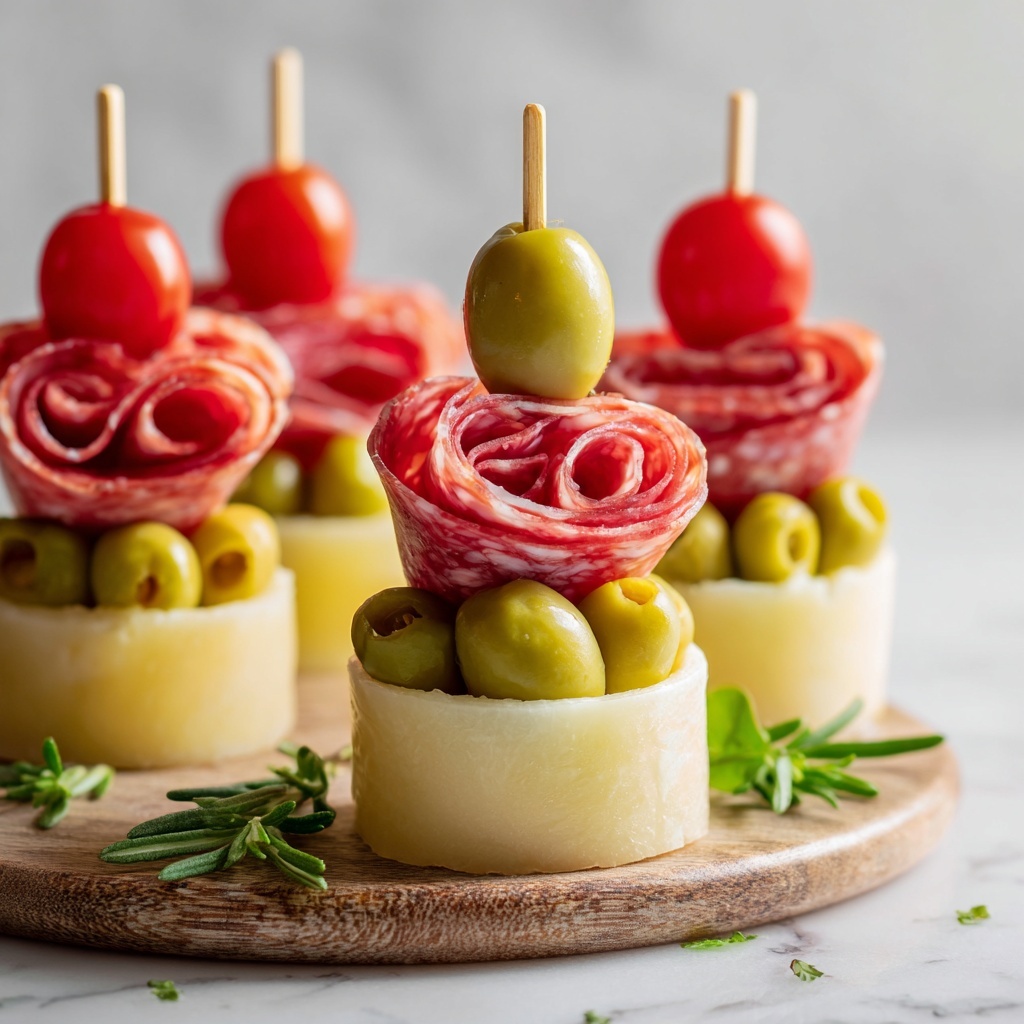
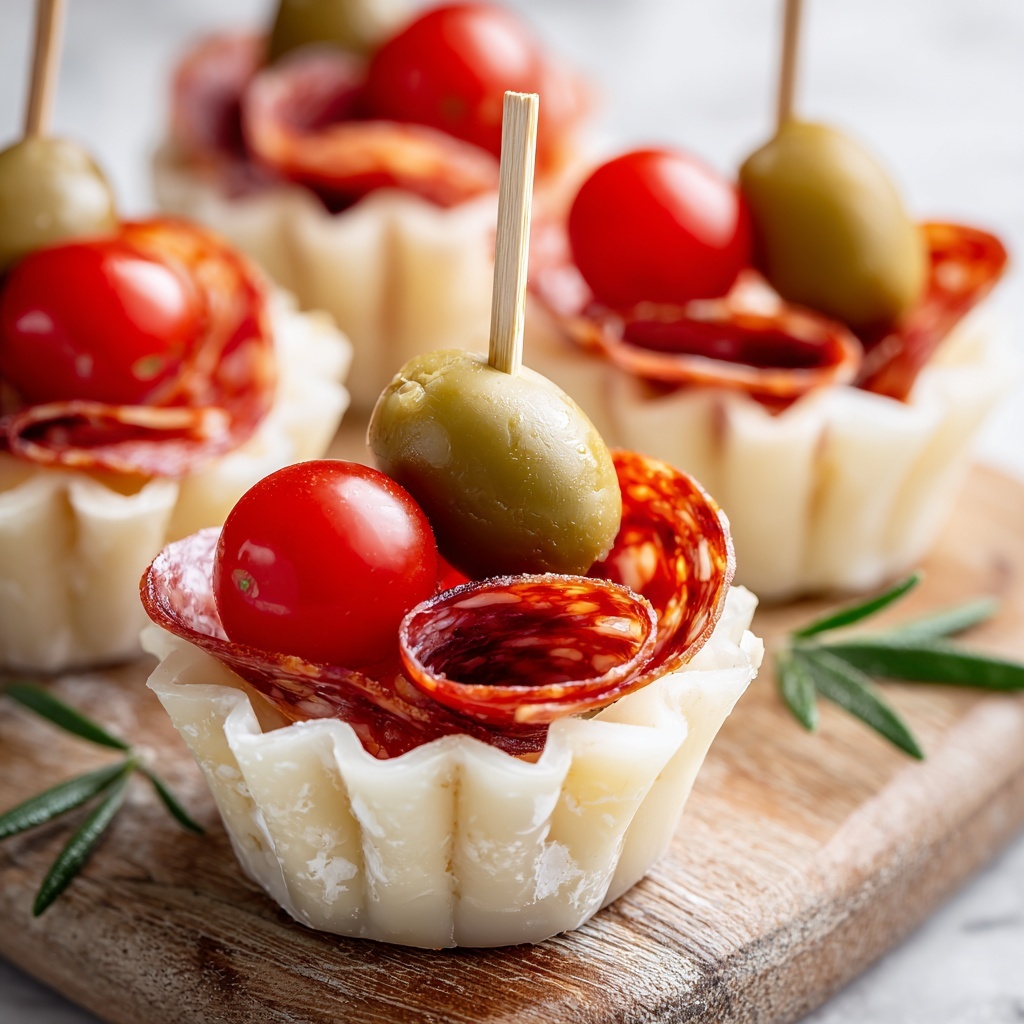
If you’re looking for a fun, easy, and utterly charming way to serve snacks at your next gathering, this Charcuterie Cups Recipe is an absolute game-changer. Imagine all the beloved flavors of a classic charcuterie board, but perfectly portioned into individual cups that are as beautiful as they are practical. Each cup bursts with a delightful medley of savory meats, creamy cheeses, fresh fruit, crunchy nuts, and crisp crackers, making it a feast for both the eyes and the palate. Whether you’re hosting a casual get-together or a festive celebration, these cups are guaranteed to impress your guests and make snacking a breeze.
Ingredients You’ll Need
The magic of this Charcuterie Cups Recipe really comes together with just a handful of simple ingredients, each bringing its own unique flavor, texture, and color to the party. From savory meats to fresh fruits, every item is essential for creating a balanced and visually appealing bite.
- Small clear plastic cups: These serve as the perfect vessel, allowing the beautiful layers of ingredients to show through.
- Breadsticks or pretzel rods: Adding crunch and a fun way to scoop or nibble along with the cup.
- Sliced salami: Folded quarters pack a punch of bold, savory flavor.
- Sliced prosciutto or ham: Thin, delicate slices bring a tender, salty contrast.
- Cubed cheddar cheese: This add sharpness and a bit of firmness to each bite.
- Cubed mozzarella or pepper jack cheese: Offers creaminess or a gentle kick, depending on your choice.
- Green grapes: Sweet and juicy, they brighten both the taste and appearance.
- Cherry tomatoes: These provide a pop of color and a refreshing burst of acidity.
- Olives: Salty and briny, they round out the complex flavor profile.
- Mixed nuts: Add a satisfying crunch and a hearty, nutty undertone.
- Crackers or pretzel bites: Small, bite-sized pieces complete the texture trio and offer more chewable goodness.
How to Make Charcuterie Cups Recipe
Step 1: Prepare Your Cups
Start by arranging the small clear plastic cups on a clean work surface. This gives you a perfect setup to assemble your layers in an orderly fashion and helps keep the process streamlined.
Step 2: Create the Base
Begin each cup by placing a small handful of mixed nuts or crackers at the bottom. This base creates a sturdy foundation and adds a delightful crunch that contrasts beautifully with the softer components.
Step 3: Layer Your Cheeses and Meats
Next, add a few bite-sized cubes of each cheese variety to the cups. Follow that with one or two folded slices of your choice of cured meats like salami and prosciutto. Folding helps the meat fit nicely while adding a sense of volume and texture to the cup.
Step 4: Add Fresh Fruit and Olives
Top off your cups with a few green grapes, a bright cherry tomato, and a couple of olives. These provide color variety and fresh, juicy bursts that make every bite interesting and well-balanced.
Step 5: Finish with a Breadstick or Pretzel Rod
Insert a breadstick or pretzel rod upright into each cup. This not only looks fantastic but also gives guests something easy to hold onto and dip into their treats.
Step 6: Chill or Serve Immediately
Your Charcuterie Cups Recipe is ready to serve right away, but if you prefer, you can refrigerate them for a short while before guests arrive. Just remember to add crackers last if you want to keep them crisp!
How to Serve Charcuterie Cups Recipe
Garnishes
To elevate your presentation, consider adding fresh herbs like rosemary or thyme sprigs as a garnish on each cup. Not only do they add aromatic appeal, but the greenery contrasts beautifully with the reds and yellows of your ingredients.
Side Dishes
Offer a few complementary dips such as honey mustard, fig jam, or a creamy ranch. These can be served on the side for guests to dip their breadsticks or crackers, enhancing the flavor experience without overwhelming the delicate balance in the cup.
Creative Ways to Present
Arrange your Charcuterie Cups Recipe on a wooden tray or slate board alongside fresh fruit and extra crackers for a grazing table effect. You can also tie festive ribbons around the cups or use colored cups to match your party theme—small details make a big impact!
Make Ahead and Storage
Storing Leftovers
Any leftover charcuterie cups can be covered tightly with plastic wrap and stored in the refrigerator for up to 24 hours. To keep everything fresh, it’s best to remove any crackers or nuts before storing and add them back before serving.
Freezing
This recipe does not freeze well due to the fresh fruits and delicate cheeses, which can lose their texture and flavor. It’s best to prepare fresh for optimum taste and presentation.
Reheating
Since this is a no-cook, cold appetizer, reheating is not necessary or recommended. Simply bring the cups out of the fridge 10 minutes before serving to help flavors open up.
FAQs
Can I substitute meats or cheeses in the Charcuterie Cups Recipe?
Absolutely! Feel free to use your favorite cured meats and cheeses—salami can be swapped for chorizo, and cheddar can be replaced with gouda or brie depending on what you like or have on hand.
How do I keep the crackers from getting soggy?
To prevent sogginess, add crackers right before serving instead of at the beginning of assembling the cups. Storing crackers separately helps them stay crisp and fresh.
Are Charcuterie Cups suitable for kids?
Yes, these cups can be kid-friendly if you choose milder cheeses and meats, and offer fun, bite-sized fruits and crackers. Just be sure to monitor for any choking hazards with younger children.
Can I make these cups vegan or vegetarian?
Definitely! Swap out meats and cheeses for plant-based alternatives, and load up on veggies, nuts, and fruits. Vegan cheeses are widely available and make a tasty substitution.
What occasions are Charcuterie Cups great for?
These cups are perfect for any social gathering—birthday parties, bridal showers, holiday celebrations, or even casual get-togethers. Their convenience and elegance make entertaining so much easier.
Final Thoughts
There’s just something so special about a Charcuterie Cups Recipe that brings a smile to any occasion. The combination of flavors, textures, and colors all packed perfectly into one delightful little cup is pure joy for hosts and guests alike. I promise once you try these, they’ll become your go-to appetizer for easy entertaining and festive fun—so go ahead, give them a whirl and watch your guests rave!
Print
Charcuterie Cups Recipe
- Prep Time: 20 minutes
- Cook Time: 0 minutes
- Total Time: 20 minutes
- Yield: 12 cups
- Category: Appetizer
- Method: No-Cook
- Cuisine: American
Description
Delightful and easy-to-assemble Charcuterie Cups are perfect individual snack cups featuring a colorful variety of cured meats, cheeses, fruits, nuts, and crunchy breadsticks. These no-cook appetizers are ideal for parties, grazing tables, and casual entertaining, offering a convenient and visually appealing way to enjoy classic charcuterie flavors in single servings.
Ingredients
Meats
- 6 ounces sliced salami, folded into quarters
- 6 ounces sliced prosciutto or ham, folded
Cheeses
- 6 ounces cubed cheddar cheese
- 6 ounces cubed mozzarella or pepper jack cheese
Produce
- 1 cup green grapes
- 1 cup cherry tomatoes
- 1/2 cup olives
Snacks and Crunchy Elements
- 1/2 cup mixed nuts
- 1/2 cup crackers or pretzel bites
- 12 breadsticks or pretzel rods
- 12 small clear plastic cups
Instructions
- Prepare the base: Arrange the 12 small clear plastic cups on a clean surface. Place a small handful of mixed nuts or crackers at the bottom of each cup to create a sturdy and flavorful base.
- Add cheeses and meats: Add a few cubes of cheddar and mozzarella (or pepper jack) cheese to each cup, followed by one or two folded slices of salami and prosciutto or ham, ensuring an even distribution of flavors inside each cup.
- Add fruits and olives: Place a few green grapes, a cherry tomato, and a couple of olives on top of the meats and cheeses in each cup, adding vibrant color and variety to the presentation.
- Insert breadsticks: Carefully insert one breadstick or pretzel rod into each cup, standing upright for an attractive and convenient edible handle.
- Serve or refrigerate: Continue assembling until all 12 cups are evenly filled. Serve the charcuterie cups immediately or cover and refrigerate until ready to serve. If storing, add the crackers just before serving to keep them crisp.
Notes
- Customize the cups with your favorite meats, cheeses, fruits, and snacks to suit your taste and dietary preferences.
- Keep all ingredients bite-sized for easy eating and a neat presentation.
- If preparing the cups ahead of time, add crackers or pretzel bites just before serving to maintain their crunchiness.
- Use clear plastic cups to showcase the colorful layers and textures within each cup.
