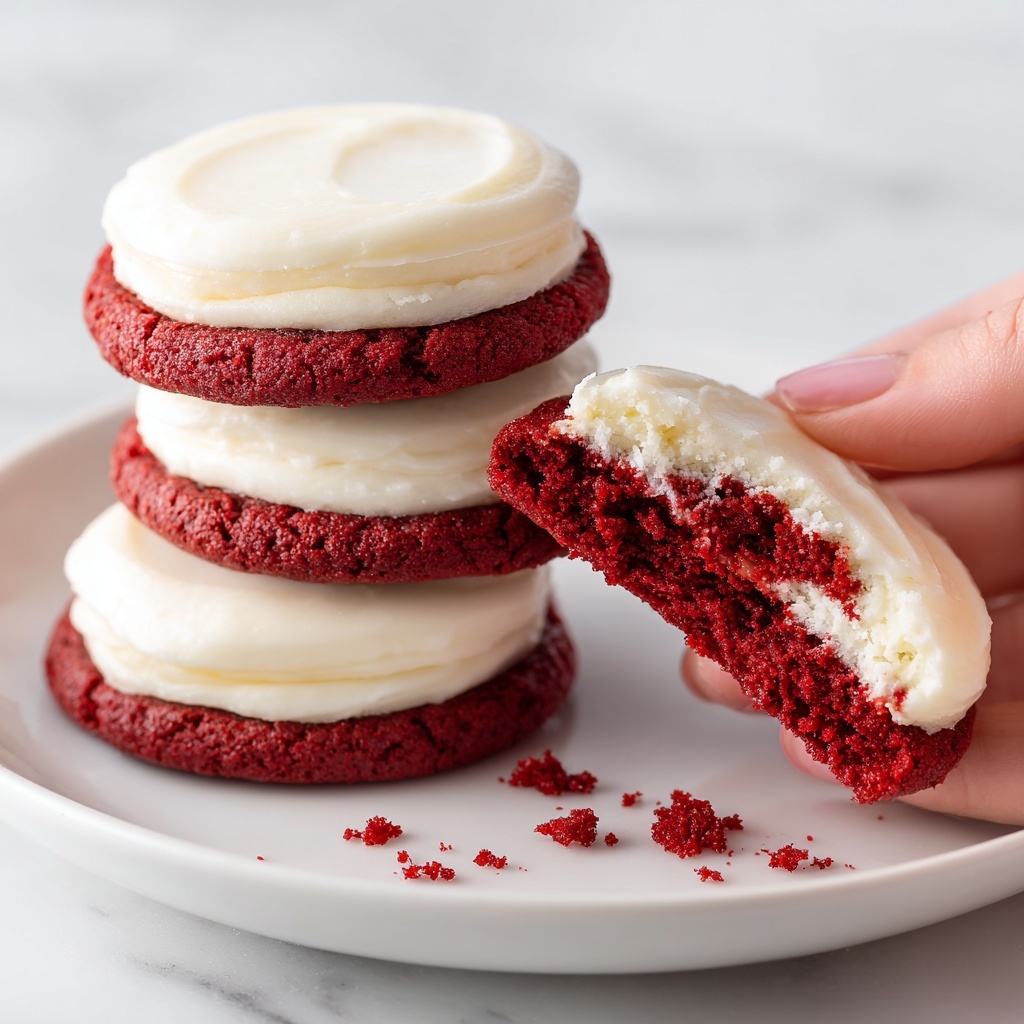
If you are looking for a truly irresistible treat to brighten your day, the Red Velvet Cookies with Cream Cheese Frosting Recipe is exactly what you need. These cookies combine the tender, slightly chewy texture of classic red velvet cake with a luscious, tangy cream cheese frosting that melts in your mouth. Each bite bursts with vibrant color and rich flavor, making them perfect for everything from a cozy afternoon pick-me-up to star dessert at your next gathering. Get ready to fall in love with this sweet indulgence that feels comforting yet wonderfully special.
Ingredients You’ll Need
The beauty of this recipe lies in its simplicity and the quality of ingredients that come together to create those iconic red velvet cookies. Each component plays a crucial role in delivering the right balance of flavor, texture, and that stunning red hue.
- 2 cups all-purpose flour: The foundation that gives the cookies their structure and softness.
- 1 tablespoon cocoa powder: Adds the subtle chocolate undertone essential to red velvet’s classic flavor.
- 1 teaspoon baking soda: Helps the cookies rise just enough for a tender crumb without becoming cakey.
- 1/2 teaspoon salt: Enhances all the sweetness and balances the flavors.
- 1 cup unsalted butter, softened: Provides rich moisture and a velvety texture.
- 1 cup sugar: Sweetens the cookies perfectly without overpowering.
- 1 cup brown sugar: Brings a hint of caramel depth and extra chewiness to the dough.
- 2 large eggs: Bind everything together while adding moisture and tenderness.
- 2 teaspoons vanilla extract: Infuses warmth and amplifies all the other flavors.
- 1 tablespoon red food coloring: The signature pop of red that makes these cookies truly unforgettable.
How to Make Red Velvet Cookies with Cream Cheese Frosting Recipe
Step 1: Preheat and Prepare
Begin by setting your oven to 350°F (175°C). This ensures the perfect baking temperature so your cookies bake evenly and develop that lovely set edge while staying soft in the center.
Step 2: Mix the Dry Ingredients
In a medium bowl, whisk together the all-purpose flour, cocoa powder, baking soda, and salt. Combining these dry ingredients ahead of time avoids clumps and ensures an even flavor distribution in every cookie.
Step 3: Cream the Butter and Sugars
Using a stand mixer or hand mixer, beat the softened butter with both the white sugar and brown sugar until the mixture is light and fluffy. This step is essential for creating a tender, chewy cookie texture, as the air you incorporate here helps leaven the dough gently.
Step 4: Add Eggs, Vanilla, and Food Coloring
To your creamed butter and sugar, add the eggs one at a time, making sure each is fully incorporated. Then stir in the vanilla extract and bold red food coloring to create that signature, eye-catching red velvet color.
Step 5: Combine Wet and Dry Ingredients
Gradually add the dry mixture into the wet ingredients, mixing until just combined. Be careful not to overmix—this keeps the cookies tender and prevents them from becoming tough.
Step 6: Portion the Dough
Drop spoonfuls of dough onto a baking sheet lined with parchment or a silicone mat. Make sure to space them well as they will spread slightly during baking.
Step 7: Bake to Perfection
Bake your cookies for 10 to 12 minutes, or until the edges are set but the centers still look soft. This timing gives that ideal chewy texture once they cool.
Step 8: Cool and Frost
Allow the cookies to cool completely on a wire rack before adding the cream cheese frosting. Frosting warm cookies can make the topping melt and lose its creamy charm.
How to Serve Red Velvet Cookies with Cream Cheese Frosting Recipe

Garnishes
Top your cookies with a sprinkle of red velvet cake crumbs or a light dusting of cocoa powder for an elegant touch. Chopped pecans or walnuts add a delightful crunch and complement the rich cream cheese frosting beautifully.
Side Dishes
Pair these delectable cookies with a simple glass of cold milk or a rich cup of hot coffee for a comforting snack. For a festive twist, serve alongside spiced chai or a creamy vanilla latte to elevate every bite.
Creative Ways to Present
Make your cookie platter pop by stacking them in a rustic wooden box lined with red and white striped paper. Or, for a party, create mini cookie sandwiches using the cream cheese frosting as the filling for a fun and fancy finger food.
Make Ahead and Storage
Storing Leftovers
Place leftover cookies in an airtight container at room temperature. They will keep their freshness and softness for up to 4 days, making them a perfect make-ahead treat for busy days.
Freezing
These Red Velvet Cookies with Cream Cheese Frosting Recipe cookies freeze beautifully. Store them unfrosted in a single layer wrapped tightly, then frost after thawing. This method helps maintain that freshly-baked texture.
Reheating
To revive chilled or frozen cookies, warm them gently in a low oven or microwave for a few seconds. This melts the frosting slightly and restores that fresh-baked warmth you crave.
FAQs
Can I use natural cocoa powder instead of Dutch-processed?
Yes, natural cocoa powder works fine but might make the cookies a bit more acidic and less tangy. Consider adding a pinch of baking soda to balance the difference if your cocoa powder is not Dutch-processed.
Does the red food coloring affect the taste?
Not at all! The red food coloring is purely for that vibrant hue that makes red velvet so iconic, and it doesn’t alter the delicious flavor in any way.
Can I make these cookies vegan or dairy-free?
For a vegan version, substitute butter with a plant-based alternative and use flax eggs instead of regular eggs. Use vegan cream cheese for the frosting to keep the authentic taste and texture.
How thick should I make the frosting layer?
Spread a moderate layer of cream cheese frosting—thin enough to complement but thick enough to give that rich, tangy kick that pairs so well with the cookie’s sweetness.
What if I don’t have a mixer to cream the butter and sugars?
You can still make the recipe by hand using a sturdy wooden spoon and some elbow grease. Just be patient and mix until the butter and sugars are well combined and slightly fluffy.
Final Thoughts
There’s something truly magical about the Red Velvet Cookies with Cream Cheese Frosting Recipe—it takes a beloved classic into cookie form with a divine frosting finish that feels like a hug in every bite. Whether you’re baking for yourself or sharing with friends and family, these cookies are sure to bring smiles and make ordinary moments a little sweeter. I can’t wait for you to try this recipe and discover your new favorite indulgence.
Print
Red Velvet Cookies with Cream Cheese Frosting Recipe
- Prep Time: 15 minutes
- Cook Time: 12 minutes
- Total Time: 27 minutes
- Yield: 24 cookies
- Category: Dessert
- Method: Baking
- Cuisine: American
Description
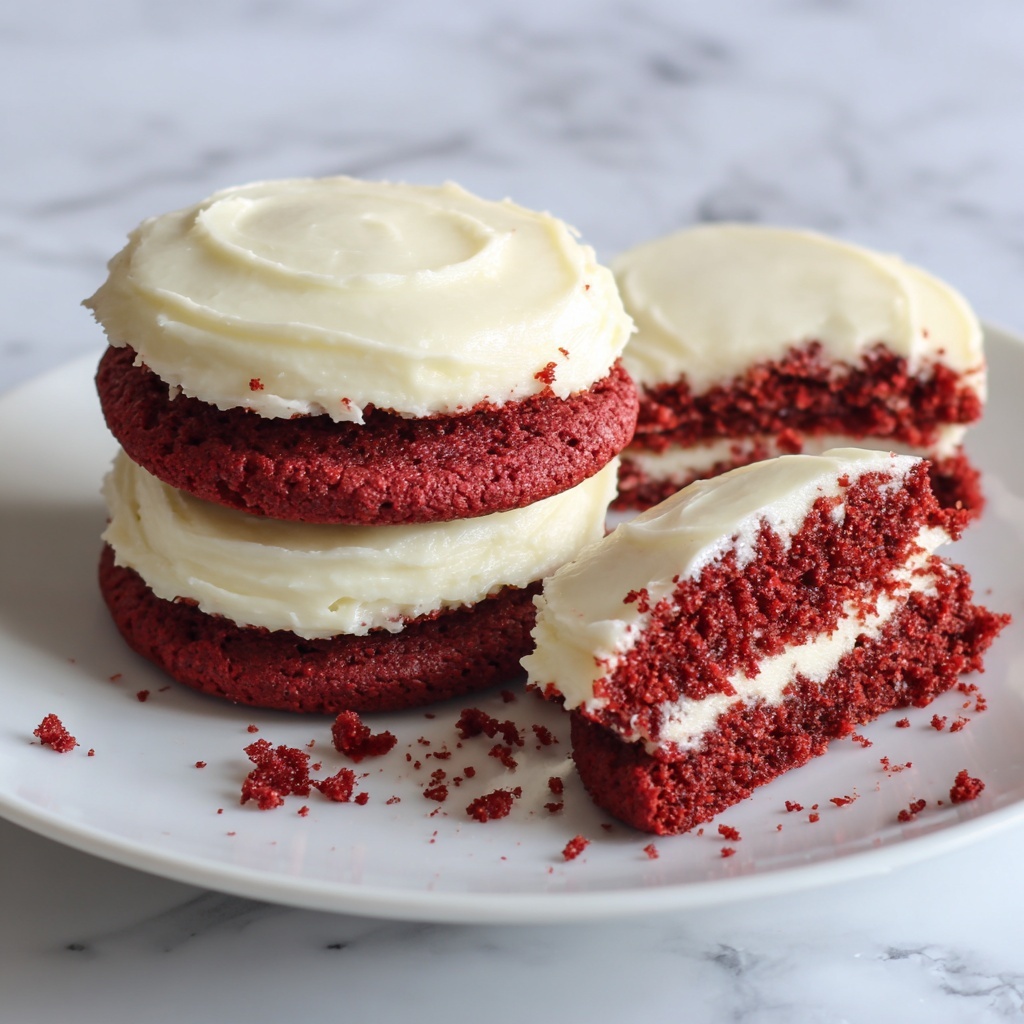
These Red Velvet Cookies with Cream Cheese Frosting are a delightful twist on the classic cake, offering a rich, cocoa-infused flavor paired with a creamy, tangy frosting. Perfectly soft with slightly crisp edges, these cookies bring a festive touch and indulgent taste to any dessert table.
Ingredients
Dry Ingredients
- 2 cups all-purpose flour
- 1 tablespoon cocoa powder
- 1 teaspoon baking soda
- 1/2 teaspoon salt
Wet Ingredients
- 1 cup unsalted butter, softened
- 1 cup sugar
- 1 cup brown sugar
- 2 large eggs
- 2 teaspoons vanilla extract
- 1 tablespoon red food coloring
Cream Cheese Frosting (optional, not fully listed in original, estimated)
- 8 oz cream cheese, softened
- 1/2 cup unsalted butter, softened
- 2–3 cups powdered sugar
- 1 teaspoon vanilla extract
Instructions
- Preheat Oven: Preheat your oven to 350°F (175°C) to ensure it reaches the ideal temperature for even baking of the cookies.
- Mix Dry Ingredients: In a medium bowl, combine the all-purpose flour, cocoa powder, baking soda, and salt, ensuring they are well incorporated for consistent texture and flavor in the cookies.
- Cream Butter and Sugars: In a separate large bowl, cream together the softened unsalted butter, granulated sugar, and brown sugar until the mixture is light and fluffy. This aerates the dough for a tender cookie.
- Add Wet Ingredients: Beat in the eggs, vanilla extract, and red food coloring to the creamed mixture until fully combined, achieving the signature red velvet color and flavor.
- Combine Mixtures: Gradually add the dry ingredients to the wet ingredients, mixing just until incorporated to avoid overmixing which can toughen the cookies.
- Form and Place Dough: Drop spoonfuls of the dough evenly spaced onto a baking sheet lined with parchment paper, allowing room for slight spreading during baking.
- Bake: Bake the cookies in the preheated oven for 10-12 minutes, or until the edges are set but the centers remain soft for the perfect chewy texture.
- Cool: Remove the cookies from the oven and let them cool completely on the baking sheet.
- Prepare Frosting: (Optional) Beat together softened cream cheese and butter until creamy. Gradually add powdered sugar and vanilla extract, beating until smooth and fluffy.
- Frost Cookies: Once cookies are completely cooled, spread or pipe the cream cheese frosting evenly over the tops for a rich finishing touch.
Notes
- Ensure cookies are completely cool before frosting to prevent melting.
- You can adjust the red food coloring amount to achieve desired intensity.
- For easier cleanup, line your baking sheet with parchment paper or a silicone baking mat.
- Store frosted cookies in an airtight container in the refrigerator for up to 5 days.
- Allow refrigerated cookies to come to room temperature before serving for the best texture.


