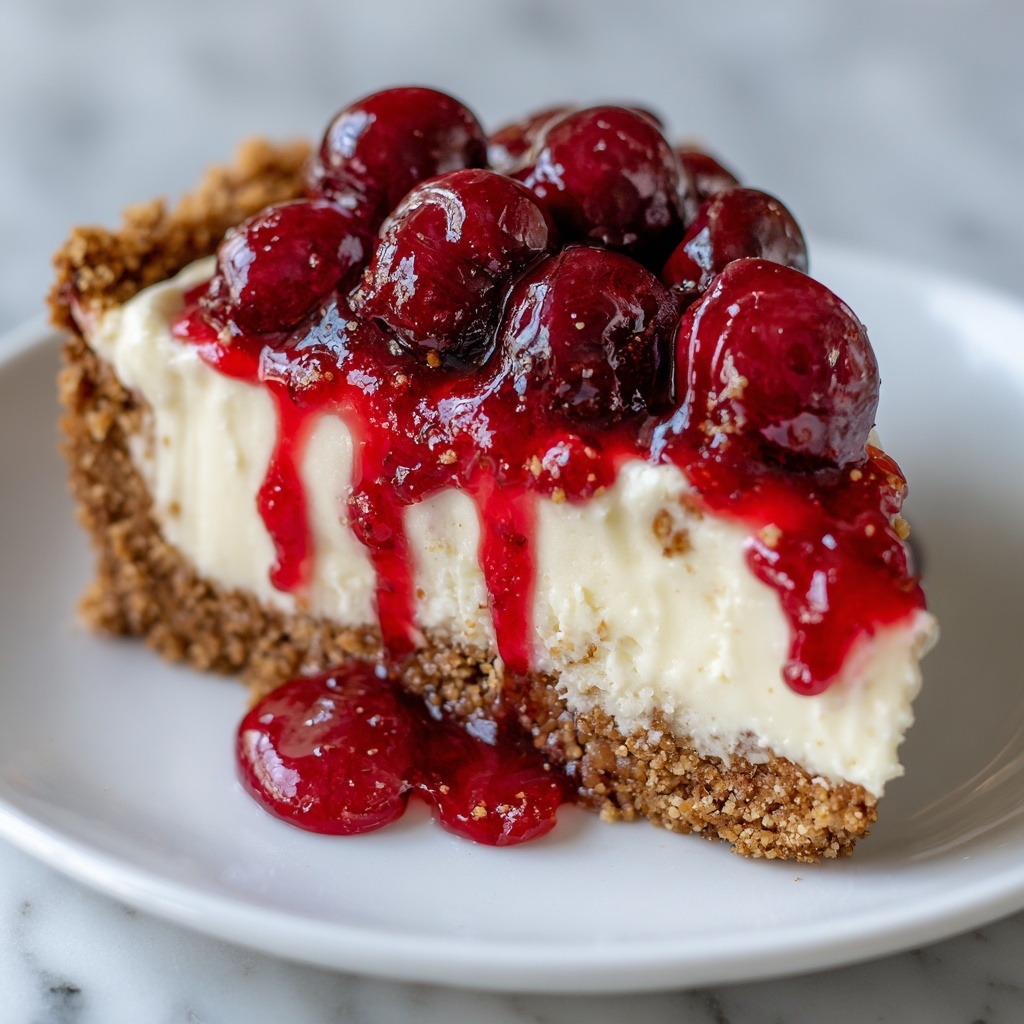
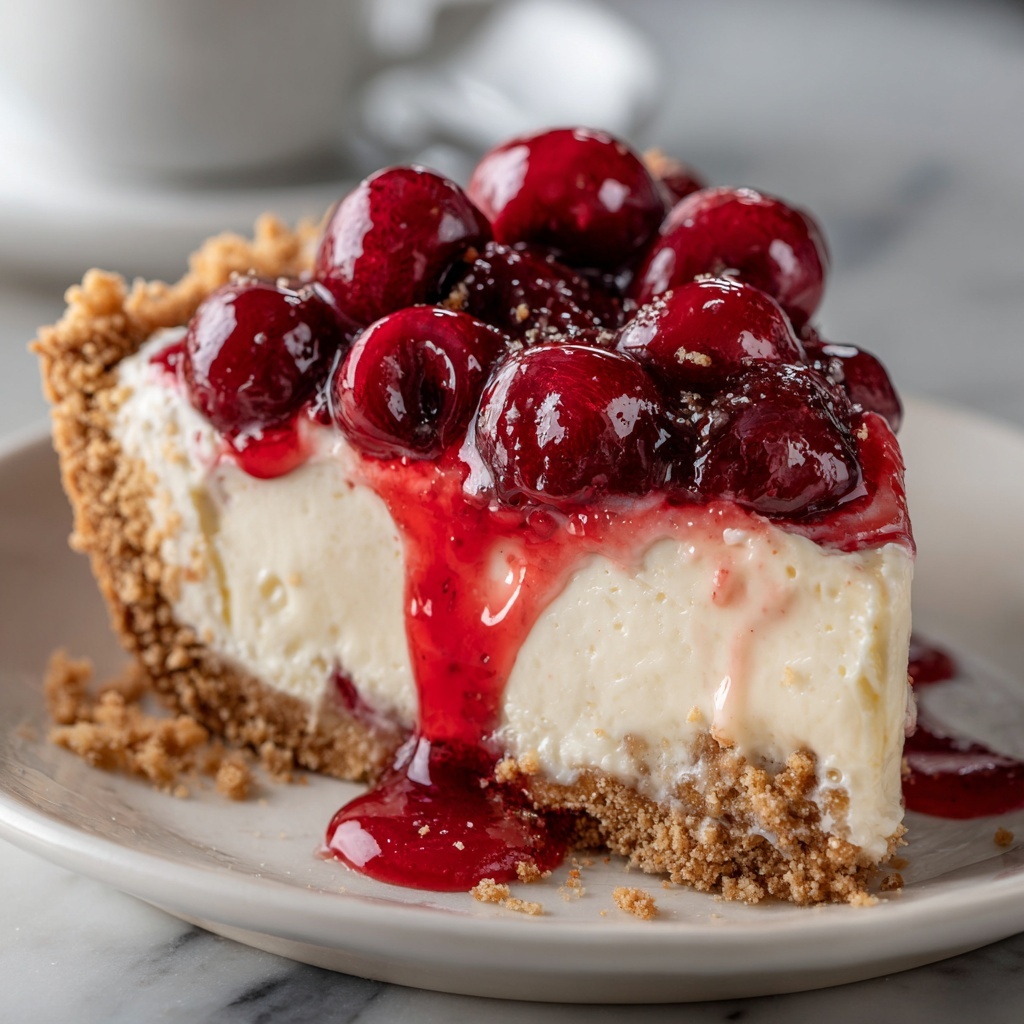
If you’re looking for a delightful dessert that’s both easy and absolutely irresistible, this No Bake Cherry Cheesecake Recipe is your new best friend in the kitchen. It combines a buttery graham cracker crust with a creamy, dreamy cheesecake filling, all topped with luscious cherry pie filling that brings a pop of color and tangy sweetness. Whether it’s a summer gathering or a cozy night in, this cheesecake offers a fresh and fuss-free way to impress your guests or treat yourself without ever turning on the oven.
Ingredients You’ll Need
All the ingredients in this No Bake Cherry Cheesecake Recipe are simple and straightforward, yet each one plays a crucial role in building the perfect balance of flavor and texture. From the crunchy graham cracker crust to the fluffy cheesecake filling and juicy cherries on top, every element contributes to the magic of the final dessert.
- Graham cracker crumbs (1 1/2 cups): Provides a crisp, slightly sweet base that holds the cheesecake together perfectly.
- Melted butter (1/4 cup): Binds the graham cracker crumbs, adding richness and depth to the crust.
- Cream cheese (3 cups, softened): The star of the filling, delivering that luscious, creamy texture cheesecake is known for.
- Powdered sugar (1 cup): Sweetens the cheesecake filling smoothly without any gritty texture.
- Vanilla extract (1 teaspoon): Adds a warm, aromatic note that enhances the overall flavor profile.
- Heavy cream (1 cup): Whipped to stiff peaks, it lightens the filling and creates a soft, airy mouthfeel.
- Cherry pie filling (1 can, 21 oz): Brings vibrant color and a burst of tart-sweet cherry flavor, finishing the cheesecake with flair.
How to Make No Bake Cherry Cheesecake Recipe
Step 1: Prepare the Crust
Start by mixing the graham cracker crumbs with the melted butter in a bowl. Stir until the mixture has the texture of wet sand – this means it’s perfectly coated and ready to press. Then, firmly press the crust mixture into the bottom of a 9-inch springform pan. This solid base will hold all that creamy cheesecake filling, so make sure it’s evenly packed. Pop it into the fridge for about 10 minutes to set while you prepare the filling.
Step 2: Make the Cheesecake Filling
In a separate bowl, beat together the softened cream cheese with powdered sugar until silky smooth and combined. Next, stir in the vanilla extract to add a warm, inviting aroma that makes the filling irresistible. Meanwhile, whip the heavy cream in another bowl until it forms stiff peaks—that’s the secret to a light and fluffy cheesecake. Gently fold the whipped cream into the cream cheese mixture to keep that airy texture intact without deflating it.
Step 3: Assemble and Chill
Spread the cheesecake filling evenly over your chilled crust, smoothing the top with a spatula so it looks pristine. Now comes the waiting game – refrigerate your cheesecake for at least 4 hours to let it set perfectly and develop those rich flavors. This step is key for the creamy filling to firm up without needing an oven.
Step 4: Add the Cherry Topping
Once the cheesecake has chilled and set beautifully, top it with the cherry pie filling. The glossy cherries bring a fresh, fruity burst to each bite and elevate the dessert’s appearance with their deep red color. Refrigerate for an additional 30 minutes so everything melds together before slicing and serving.
How to Serve No Bake Cherry Cheesecake Recipe

Garnishes
Elevate your No Bake Cherry Cheesecake Recipe by garnishing with a few fresh cherries or a sprinkle of finely chopped nuts like pistachios or almonds. A dollop of whipped cream or a drizzle of dark chocolate can also add a touch of decadence that makes the dessert feel extra special.
Side Dishes
Serving your cheesecake with a side of freshly brewed coffee or a glass of sparkling rosé can perfectly complement its sweet and tangy flavors. For a lighter touch, fresh fruit such as sliced strawberries or kiwi adds a refreshing contrast to the creamy richness.
Creative Ways to Present
Consider making individual servings by layering the cheesecake filling, crust, and cherry topping in pretty glass jars or ramekins. This adds charm for parties and makes every bite feel personalized. You can also create mini cheesecakes using a muffin tin lined with paper cups, perfect for sharing or gift-giving.
Make Ahead and Storage
Storing Leftovers
Once you’ve enjoyed your cheesecake, wrap any leftovers tightly in plastic wrap or transfer it to an airtight container to keep it fresh. Stored in the refrigerator, it will maintain its flavor and texture for up to 3 days—perfect for sneaking a slice whenever you want.
Freezing
This No Bake Cherry Cheesecake Recipe freezes beautifully. Just cover it well with plastic wrap and a layer of aluminum foil to prevent freezer burn. It can be stored for up to 1 month. When you’re ready to enjoy, thaw it overnight in the fridge for the best texture and taste.
Reheating
Since this cheesecake is best served chilled, it doesn’t require reheating. If it becomes too firm in the fridge, simply leave it at room temperature for 10-15 minutes before serving to soften slightly and enhance that creamy feel.
FAQs
Can I use fresh cherries instead of canned cherry pie filling?
Absolutely! Fresh cherries need to be cooked down with sugar and a little cornstarch to achieve a similar consistency, but they offer a wonderful natural flavor boost and a fresher taste.
Is it possible to make this cheesecake gluten-free?
Yes, simply swap the graham cracker crumbs with gluten-free crackers or an alternative gluten-free crust. The rest of the ingredients are naturally gluten-free, making it easy to enjoy this dessert if you have dietary restrictions.
How long does it take for the cheesecake to set properly?
For the best texture and slicing ease, allow the cheesecake to chill for at least 4 hours—overnight is even better if you have the time.
Can I use low-fat cream cheese or heavy cream?
While you can use low-fat alternatives, the texture and richness may be compromised. Full-fat cream cheese and heavy cream provide the iconic creamy mouthfeel that makes this recipe special.
What should I do if the crust falls apart when slicing?
If your crust is crumbly, make sure to press it firmly when preparing and allow it to chill well before adding the filling. Also, using a sharp knife warmed in hot water can help create clean slices.
Final Thoughts
This No Bake Cherry Cheesecake Recipe is a total winner for anyone craving a luscious, easy-to-make dessert that looks like it took hours to craft. Trust me, once you try it, this recipe will become a family favorite for all kinds of occasions. So, gather your ingredients, unleash your inner baker, and get ready to impress with every bite!
Print
No Bake Cherry Cheesecake Recipe
- Prep Time: 20 minutes
- Cook Time: 0 minutes
- Total Time: 4 hours 15 minutes
- Yield: 8 servings
- Category: Dessert
- Method: No-Cook
- Cuisine: American
Description
A creamy and delightful no-bake cherry cheesecake featuring a buttery graham cracker crust, smooth cream cheese filling, and topped with sweet cherry pie filling. Perfect for a quick and easy dessert that requires no oven and is ready to serve after chilling.
Ingredients
For the Crust
- 1 1/2 cups graham cracker crumbs (150g)
- 1/4 cup melted butter (60g)
For the Filling
- 3 cups cream cheese, softened (675g)
- 1 cup powdered sugar (120g)
- 1 teaspoon vanilla extract (5g)
- 1 cup heavy cream (240ml)
For the Topping
- 1 can (21 oz) cherry pie filling (595g)
Instructions
- Prepare the crust: Combine graham cracker crumbs and melted butter in a bowl. Stir thoroughly until the mixture resembles wet sand, ensuring even butter distribution.
- Form the crust: Press the crumb mixture firmly into the bottom of a 9-inch springform pan to create an even crust layer. Place in the refrigerator and chill for 10 minutes to set.
- Mix cream cheese base: In a separate bowl, beat softened cream cheese with powdered sugar until smooth and creamy. Add vanilla extract and mix until fully incorporated.
- Whip cream: In another clean bowl, beat the heavy cream until stiff peaks form, indicating it is properly whipped for folding.
- Combine filling: Gently fold the whipped cream into the cream cheese mixture using a spatula until the mixture is well combined and fluffy without deflating the whipped cream.
- Assemble cheesecake: Spread the cheesecake filling evenly over the chilled crust in the springform pan. Smooth the top with a spatula for an even finish. Refrigerate for at least 4 hours to allow it to set properly.
- Add topping and chill: Once the cheesecake is firm, spoon and spread the cherry pie filling evenly over the surface. Return the cheesecake to the refrigerator for an additional 30 minutes before serving.
- Serve: Slice the no-bake cherry cheesecake and garnish with extra cherries if desired. Serve chilled for best taste.
Notes
- Make sure the cream cheese is fully softened to ensure a smooth filling without lumps.
- Do not overmix the whipped cream when folding to maintain a light and airy texture.
- Refrigerate long enough for the cheesecake to set; patience results in better slices.
- Use a springform pan for easy removal of the cheesecake without damaging its shape.
- Optional garnishes include fresh cherries or a dusting of powdered sugar for presentation.


