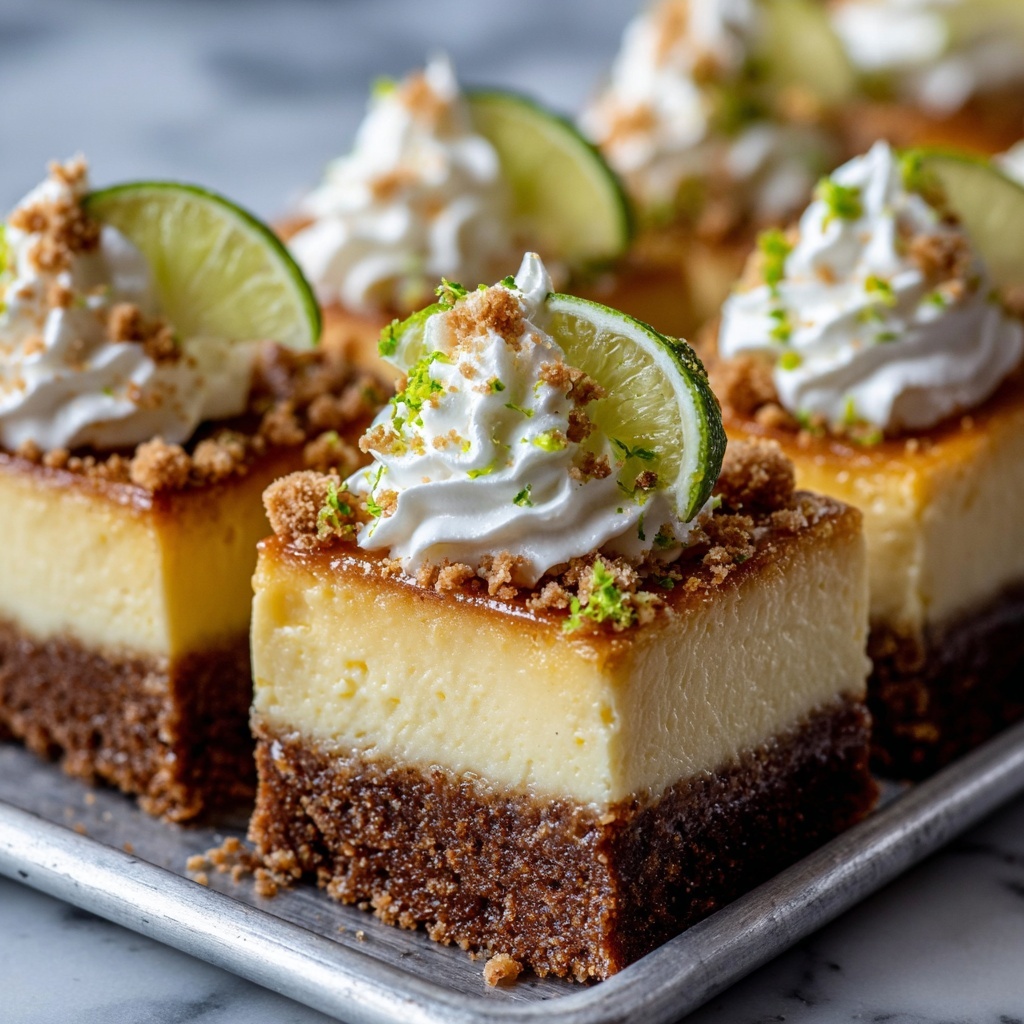
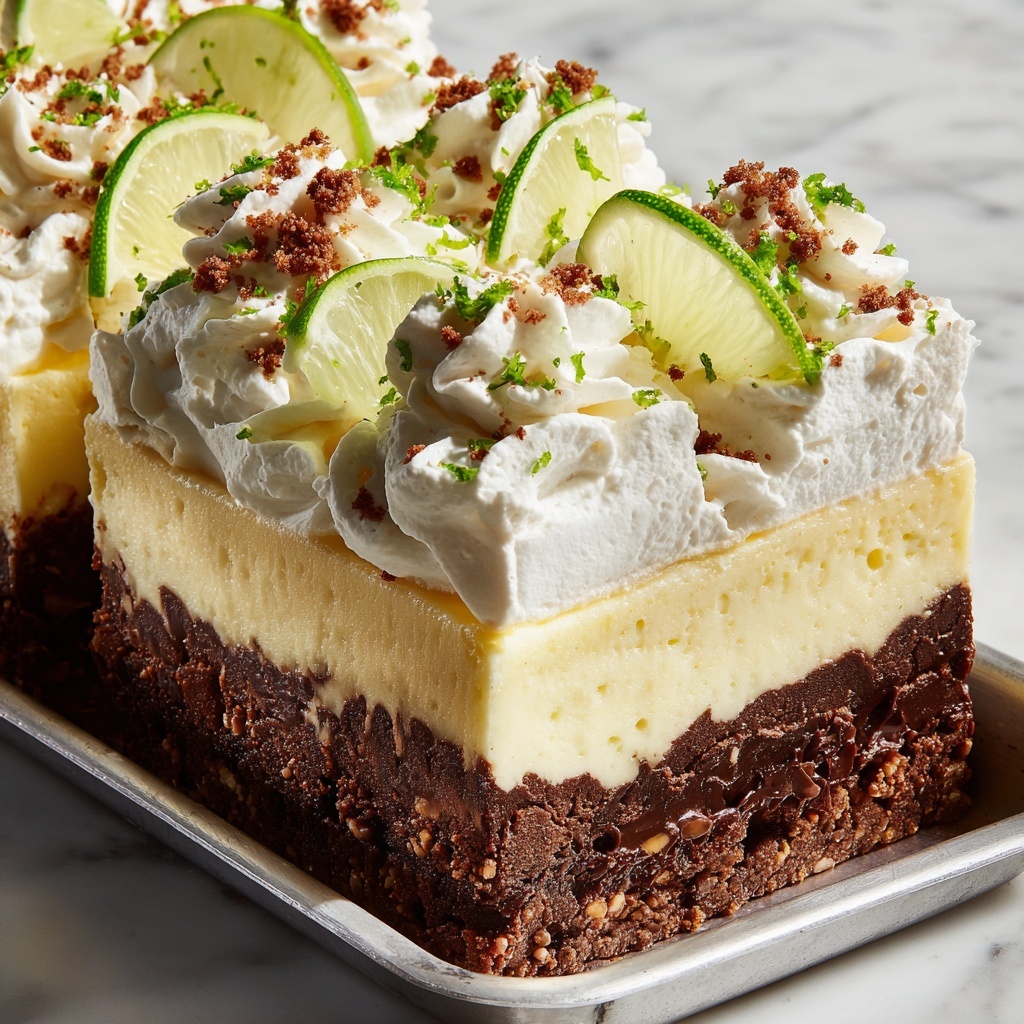
If you adore the tangy, creamy delight of a classic dessert but want something portable and easy to share, this Key Lime Pie Bars Recipe is exactly what you need. Combining the bright citrus zing of fresh lime with a buttery graham cracker crust and a luscious, custard-like filling, these bars are a heavenly bite-sized treat that brings all the breezy, sunshine vibes of Florida’s favorite pie right into your kitchen. Whether you’re serving them for a crowd or simply indulging your sweet tooth, these bars deliver that perfect balance of tart and sweet, creamy and crumbly, with every slice packed full of personality.
Ingredients You’ll Need
Whipping up this Key Lime Pie Bars Recipe couldn’t be simpler thanks to a handful of straightforward, pantry-friendly ingredients that each add their own essential flair. From the crunch of the graham cracker crust to the silky, citrus-infused filling, every component plays a starring role in making these bars irresistible.
- Graham cracker crumbs: The base for the crust, these crumbs provide a sweet, crunchy foundation that perfectly balances the tangy lime filling.
- Sugar: Just enough to sweeten the crust and the filling, ensuring a harmonious blend of flavors without overpowering the lime’s brightness.
- Unsalted butter, melted: Helps bind the crust together, adding richness and a slight toasty flavor.
- Sweetened condensed milk: This creamy ingredient is key to achieving that luscious, smooth filling with just the right amount of sweetness.
- Fresh lime juice: The star of the show, lending a fresh, zesty tang that defines the pie bars’ unforgettable character.
- Lime zest: Adds an intense pop of citrus aroma and flavor, elevating the overall lime experience.
- Large eggs: These provide structure and help the filling set perfectly without being too firm.
How to Make Key Lime Pie Bars Recipe
Step 1: Prepare the Oven and Baking Dish
Start by preheating your oven to 350°F (175°C) to ensure it’s ready for baking as soon as your crust and filling are assembled. Grease an 8×8-inch or 9×9-inch baking dish to prevent the crust from sticking, making those bars easy to slice and serve later.
Step 2: Make the Crust
In a bowl, combine graham cracker crumbs, sugar, and melted butter, mixing until everything is well blended. Press this mixture firmly into the bottom of your prepared dish, creating an even, compact layer that will hold up beautifully beneath the tangy filling.
Step 3: Whisk the Filling
In a separate bowl, whisk together sweetened condensed milk, fresh lime juice, lime zest, and eggs until the mixture is silky smooth and fully combined. This is the luscious filling that will bake into a creamy, tart Dream come true.
Step 4: Assemble and Bake
Pour your lime filling over the prepared crust, spreading it evenly to ensure every bite has that perfect balance of crust and filling. Bake in the preheated oven for 15-20 minutes until the center is set and doesn’t jiggle when shaken lightly. This signals a perfectly baked Key Lime Pie Bars Recipe ready to cool.
Step 5: Cool and Chill
Let the bars cool to room temperature first, which helps the flavors meld and the bars firm up for easier slicing. Then refrigerate for at least 2 hours — this chilling step is crucial to achieving that iconic, dense yet creamy texture these bars are loved for.
How to Serve Key Lime Pie Bars Recipe

Garnishes
These bars brighten up beautifully with simple garnishes like a dollop of whipped cream, a sprinkle of extra lime zest, or even a few fresh mint leaves. The delicate creaminess of whipped cream balances the tart lime bite, while zest adds a sparkly look and flavor boost.
Side Dishes
Pair this Key Lime Pie Bars Recipe with light, refreshing sides such as fresh fruit salads or coconut sorbet. These accompaniments complement the citrus notes and keep dessert feeling fresh and vibrant rather than overly heavy.
Creative Ways to Present
For parties, arrange the bars on a decorative platter dusted lightly with powdered sugar or lime zest for a beautiful touch. You can also serve individual bars on small dessert plates with a lime wheel or a drizzle of raspberry sauce to add a pop of color and surprise flavor.
Make Ahead and Storage
Storing Leftovers
These bars keep wonderfully in an airtight container in the refrigerator for up to 4 days. The flavors actually deepen over time, making leftovers just as delightful as freshly made slices.
Freezing
If you want to store Key Lime Pie Bars Recipe longer, wrap individual bars tightly in plastic wrap and freeze in a sealed container for up to 2 months. Thaw in the refrigerator overnight for the best texture upon serving.
Reheating
Since these bars are served chilled, reheating isn’t necessary. However, if you prefer them slightly warmer, let them sit at room temperature for 10-15 minutes before serving to soften the filling without melting the crust.
FAQs
Can I use bottled lime juice instead of fresh?
Fresh lime juice is strongly recommended because it has a brighter, more natural flavor that really makes the bars shine. Bottled lime juice may work in a pinch, but the taste won’t be quite as vibrant.
What’s the best way to cut the bars cleanly?
Use a sharp knife dipped in hot water and wiped dry between cuts. This will help you achieve neat, clean slices without crumbling the crust or leaving the filling ragged.
Can I make this recipe gluten-free?
Absolutely! Substitute the graham cracker crumbs with gluten-free graham-style crumbs or finely ground gluten-free cookies, and your bars will still be incredibly delicious.
Why is the filling sometimes runny?
If your bars are runny, they likely didn’t bake long enough or weren’t chilled adequately. Make sure to bake until the center is just set and chill for a full two hours before slicing.
Can I add other flavors to the filling?
While the traditional Key Lime Pie Bars Recipe shines on its own, feel free to experiment with a splash of coconut extract, or swirl in some passion fruit puree for an exotic twist that still respects the citrusy roots.
Final Thoughts
There is something utterly joyful about making and sharing this Key Lime Pie Bars Recipe that never gets old. Its combination of creamy tanginess and buttery crust, coupled with ease and simplicity, makes it a true go-to dessert to brighten any occasion. Once you try these bars, I promise they’ll be a beloved staple in your kitchen, perfect for sunny days, celebrations, or whenever a little slice of happiness is needed.
Print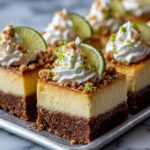
Key Lime Pie Bars Recipe
- Prep Time: 15 minutes
- Cook Time: 20 minutes
- Total Time: 2 hours 35 minutes
- Yield: 16 servings
- Category: Dessert
- Method: Baking
- Cuisine: American
Description
These tangy and creamy Key Lime Pie Bars feature a buttery graham cracker crust topped with a luscious lime-infused filling. Perfectly balanced between sweet and tart, they make a refreshing dessert that’s easy to prepare and ideal for any occasion.
Ingredients
Crust
- 1 cup graham cracker crumbs
- 1/4 cup sugar
- 1/4 cup unsalted butter, melted
Filling
- 2 cups sweetened condensed milk
- 1/2 cup fresh lime juice
- 1 tbsp lime zest
- 2 large eggs
Instructions
- Preheat Oven and Prepare Dish: Preheat your oven to 350°F (175°C) and grease an 8×8-inch or 9×9-inch baking dish to prevent sticking.
- Make the Crust: In a bowl, combine graham cracker crumbs, sugar, and melted butter. Mix until well combined to form a crumbly mixture. Press this firmly and evenly into the bottom of the prepared baking dish, creating the base for the bars.
- Prepare the Filling: In a separate bowl, whisk together the sweetened condensed milk, fresh lime juice, lime zest, and eggs. Continue whisking until the mixture is smooth and fully combined, ensuring an even lime flavor throughout.
- Assemble Bars: Pour the prepared lime filling mixture over the graham cracker crust in the baking dish. Spread it evenly for consistent baking.
- Bake: Place the baking dish in the preheated oven and bake for 15-20 minutes, or until the center is set and no longer jiggles when you gently shake the pan.
- Cool and Chill: Allow the bars to cool at room temperature. Once cooled, refrigerate them for at least 2 hours to let them fully set and develop their flavors.
- Slice and Serve: After chilling, cut the bars into 16 squares and serve chilled for a refreshing dessert.
Notes
- Use fresh lime juice and zest for the best flavor and brightness in your bars.
- Ensure the bars are fully chilled before slicing to maintain clean edges.
- Store leftover bars in an airtight container in the refrigerator for up to 3 days.
- For a more decorative touch, top with whipped cream before serving.
