If you are craving something that blends cheesy goodness with bold taco flavors in a snap, these Cheesy Taco Sticks: Quick, Customizable Comfort Food Delight Recipe will become your new go-to snack or meal. Picture warm, golden-baked dough wrapped around savory, seasoned ground beef and melty cheese, combining textures and tastes that comfort and excite every bite. This recipe not only satisfies those taco cravings but does so with a speed and ease that makes it perfect for busy weeknights or casual gatherings.
Ingredients You’ll Need
Getting this dish right relies on simple, accessible ingredients that come together to create a memorable flavor burst. Each item is carefully chosen to contribute to the ultimate texture, aroma, and richness that define the Cheesy Taco Sticks experience.
- Ground Beef: Use lean ground beef or ground turkey for a lighter twist, providing a savory protein base.
- Taco Seasoning: A packet or homemade blend adds that essential spicy and robust seasoning to the meat.
- Water: Helps the taco seasoning incorporate smoothly and keep the meat juicy without drying out.
- Refrigerator Pizza Dough: This creates the soft, yet slightly crispy outer shell that holds the filling perfectly; gluten-free dough is a great alternative.
- Colby-Jack Cheese Sticks: Melts beautifully and pairs wonderfully with taco spices; cheddar or dairy-free versions work too.
- Butter: Brushing the sticks with melted butter adds richness and a golden finish; substitute olive oil for a lighter option.
- Garlic Salt: Adds a subtle aromatic punch that complements both the crust and filling with ease.
How to Make Cheesy Taco Sticks: Quick, Customizable Comfort Food Delight Recipe
Step 1: Prepare the Ground Beef
Start by heating a skillet over medium heat. Brown the ground beef for about 5 to 7 minutes, ensuring to break it up into small pieces as it cooks. Once browned, drain any excess grease to keep the sticks from getting soggy. Then, stir in the taco seasoning and about 2 tablespoons of water. Let it simmer gently for 2 minutes so the flavors meld and the mixture thickens slightly. This step lays down the hearty, savory foundation essential to our Cheesy Taco Sticks: Quick, Customizable Comfort Food Delight Recipe.
Step 2: Roll and Cut the Dough
While the beef simmers, unwrap your refrigerated pizza dough and roll it out on a clean surface. Cutting the dough into eight even rectangles will give perfect-sized pockets to hold your filling. Working with pliable dough is such a joy because it’s forgiving and quick, setting you up for a seamless assembly process.
Step 3: Assemble the Taco Sticks
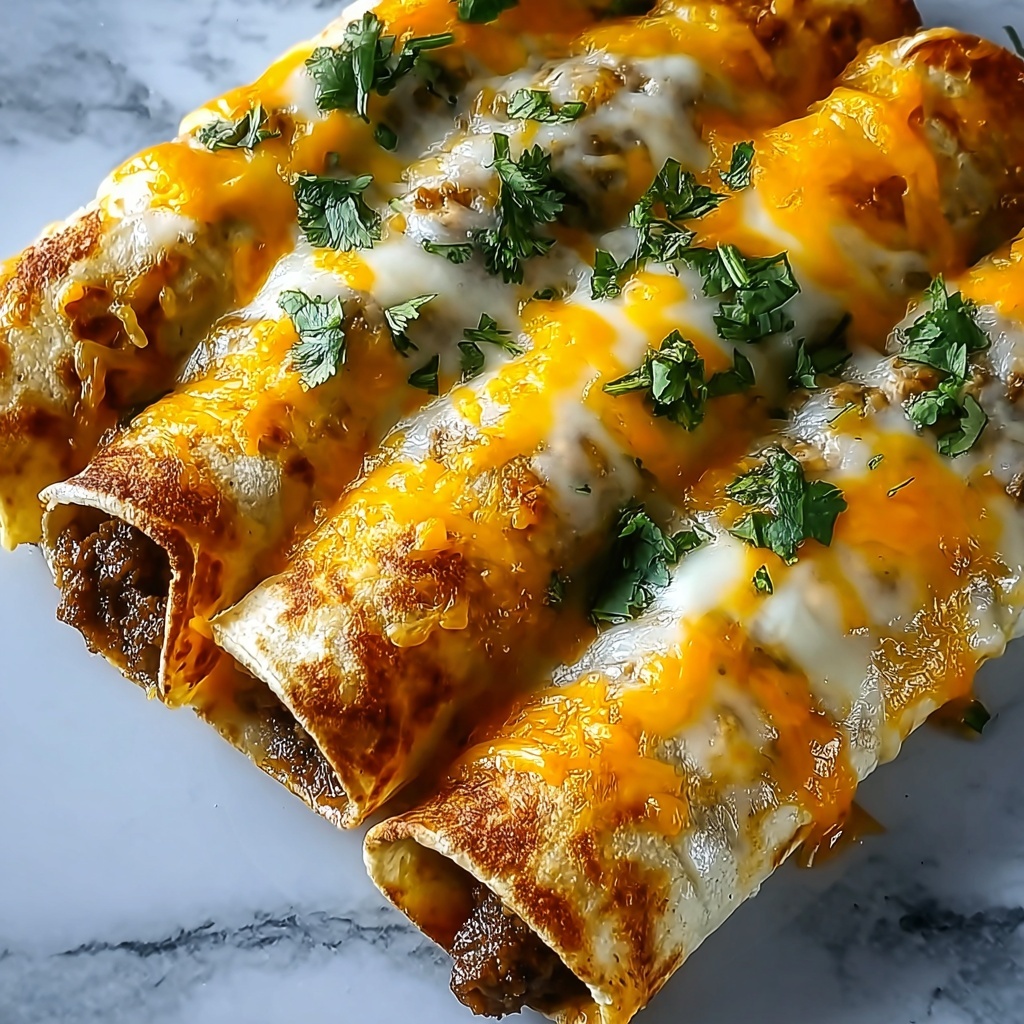
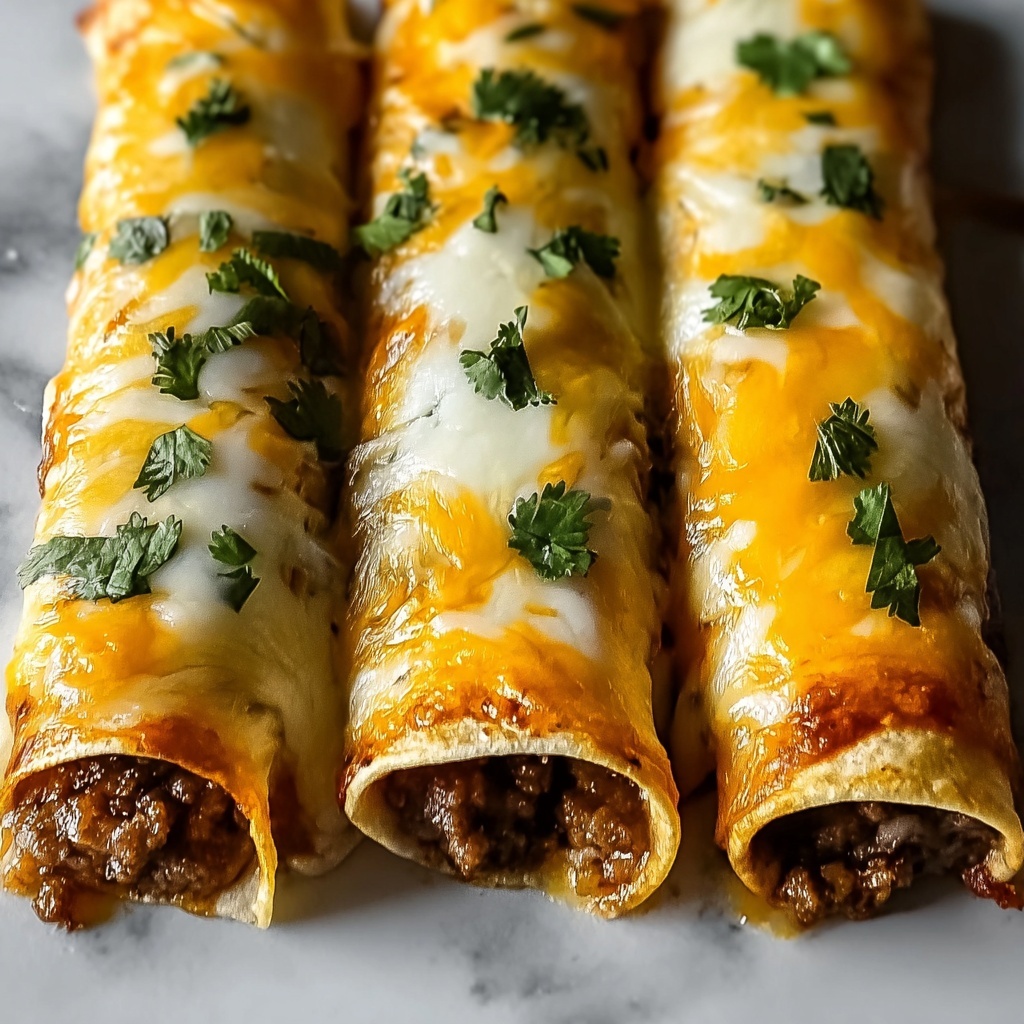
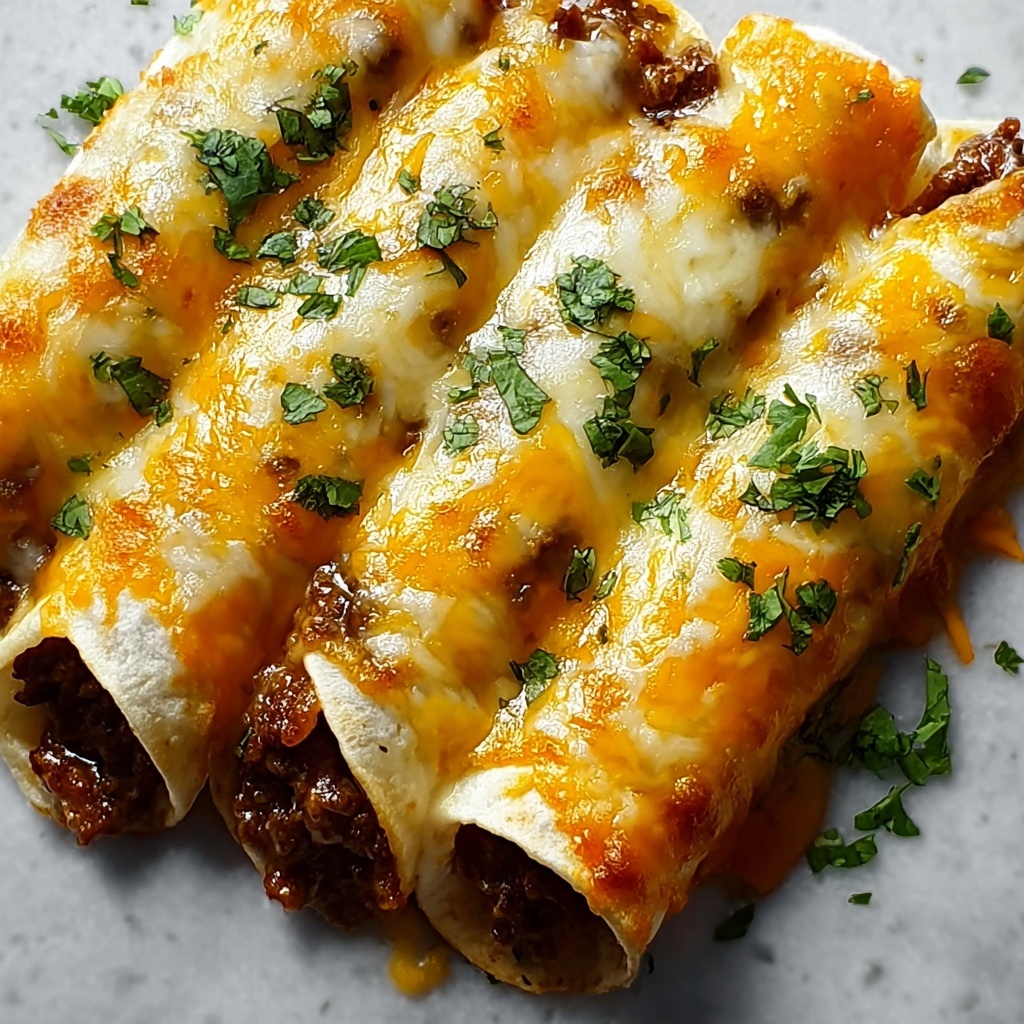
Spoon a generous amount of the seasoned beef mixture onto each dough rectangle. Top each one with a whole cheese stick. The combination of warm seasoned meat and melting cheese is what makes these sticks comforting and delicious beyond measure. Once filled, carefully roll each rectangle up tightly and pinch the seams to seal the filling inside. This ensures nothing leaks out during baking, keeping every bite tidy and delightful.
Step 4: Add the Finishing Touches
Mix melted butter with garlic salt and brush this flavorful blend all over the rolled sticks. This simple step is what transforms them from good to irresistible by creating a golden-brown, aromatic crust that lends a satisfying crunch and mouthwatering garlic undertone.
Step 5: Bake to Perfection
Place your prepared sticks on a baking sheet and pop them into your oven preheated to 425°F (220°C). Bake for about 10 to 12 minutes until the dough is beautifully golden and the cheese inside is perfectly melted. The warm aroma filling your kitchen will have everyone hovering nearby, eager to dive in.
How to Serve Cheesy Taco Sticks: Quick, Customizable Comfort Food Delight Recipe
Garnishes
Offering a little fresh garnish not only brightens the plate but also adds fresh flavor contrasts. Sprinkle chopped cilantro or fresh green onions on top just before serving to bring a pop of color and herbaceous freshness that complements the richness perfectly. A dollop of sour cream or guacamole on the side injects creamy cooling relief against the seasoned filling.
Side Dishes
These Cheesy Taco Sticks shine as a standalone snack or meal, but pairing them with crisp garden salad, tangy salsa, or a side of Mexican street corn elevates the experience. Each side dish introduces new textures and flavor profiles, supporting and enhancing the overall taco-themed feast.
Creative Ways to Present
For parties or family dinners, slice the sticks on a diagonal for attractive presentation and easy grabbing. Arrange them neatly on a colorful platter surrounded by small bowls of dipping sauces like spicy ranch, pico de gallo, or chipotle mayo. This not only makes the dish more festive but invites everyone to customize each bite just the way they like.
Make Ahead and Storage
Storing Leftovers
If you have any leftovers, let the sticks cool completely before storing them in an airtight container in the refrigerator. They stay delicious for up to 3 days, making them perfect for quick lunches or snacks later in the week without losing that fresh-baked appeal.
Freezing
To freeze, assemble your taco sticks but skip the baking step. Wrap each stick individually in plastic wrap and place them in a freezer-safe bag or container. Frozen they keep well for up to 2 months. When ready to enjoy, bake straight from frozen with a slight adjustment in baking time to ensure they cook through beautifully.
Reheating
Reheat your leftovers in an oven or toaster oven at 350°F (175°C) for about 8 to 10 minutes to regain crispiness and fully melted cheese. Microwaving is faster but can make the crust a bit soft, so use it only if time is tight and save oven reheating for the best texture and flavor.
FAQs
Can I use ground turkey instead of ground beef?
Absolutely! Ground turkey is a fantastic lean alternative that works wonderfully with taco seasoning and melts just as well inside the dough. It’s a great option if you prefer a lighter or lower-fat version of this dish.
Is there a vegetarian option for this recipe?
Yes, you can substitute the ground beef with seasoned black beans, lentils, or a plant-based meat alternative. Just make sure to cook and season them similarly, so you maintain that bold taco flavor.
Can I prep these ahead of time and bake later?
You sure can! Roll and assemble all the sticks, then cover and refrigerate them for up to 24 hours before baking. This is great for saving time right before a meal or party.
What cheese works best if I want a stronger flavor?
While Colby-Jack is mild and melty, you can swap it with sharper cheddar or even a spicy pepper jack cheese to kick up the flavor. Just pick a cheese that melts well to ensure gooey, delicious bites.
Do I have to use garlic salt in the butter brush?
Not at all! You can use fresh minced garlic, regular salt, or omit it entirely if you prefer a simpler buttery crust. Each version offers a slightly different flavor experience, so feel free to experiment.
Final Thoughts
This Cheesy Taco Sticks: Quick, Customizable Comfort Food Delight Recipe has a way of bringing joy to the table that’s hard to beat. Easy to make, endlessly versatile, and irresistibly tasty, it’s a recipe you’ll want to keep on hand whenever you’re craving that perfect blend of comfort and bold flavors. Give it a try — your taste buds will thank you!
Print
Cheesy Taco Sticks: Quick, Customizable Comfort Food Delight Recipe
- Prep Time: 7 minutes
- Cook Time: 15 minutes
- Total Time: 22 minutes
- Yield: 8 servings
- Category: Snack
- Method: Baking
- Cuisine: Mexican-American
Description
Cheesy Taco Sticks are a quick and customizable comfort food perfect for a satisfying snack or meal. Ground beef seasoned with taco spices is wrapped in pizza dough around a melty cheese stick, then baked to golden, cheesy perfection. This recipe is versatile, offering options for leaner meats, gluten-free dough, and dairy-free cheese to suit various dietary needs.
Ingredients
Meat Mixture
- 1 pound Ground Beef (or ground turkey for a leaner option)
- 1 packet Taco Seasoning (homemade for controlled sodium)
- 2 tablespoons Water (optional if beef is well-drained)
Dough & Cheese
- 1 package Refrigerator Pizza Dough (gluten-free option available)
- 8 sticks Colby-Jack Cheese Sticks (or cheddar/dairy-free cheese)
Topping
- 2 tablespoons Butter (or olive oil for a lighter option)
- 1 teaspoon Garlic Salt (fresh garlic can be substituted or omitted)
Instructions
- Preparation: Preheat your oven to 425°F (220°C) to ensure it reaches the ideal baking temperature while you prepare the filling and dough.
- Cook the Meat: In a skillet over medium heat, brown 1 pound of ground beef for about 5-7 minutes until fully cooked, then drain any excess grease to reduce fat content.
- Season the Meat: Add the taco seasoning packet and 2 tablespoons of water to the skillet, stirring well. Simmer for 2 minutes until the mixture thickens, allowing the flavors to meld.
- Prepare the Dough: Roll out the pizza dough on a clean surface and cut it into 8 equal rectangles, which will hold the filling.
- Fill and Wrap: Spoon the seasoned beef mixture onto each dough rectangle, then place one cheese stick on top of the meat. Carefully roll each rectangle tightly and pinch the seams to seal the filling inside.
- Apply the Topping: Mix melted butter with garlic salt, and brush this mixture generously over the outside of each rolled stick to enhance flavor and promote a golden crust.
- Bake: Place the prepared taco sticks on a baking sheet and bake in the preheated oven for 10-12 minutes until the dough is golden brown and the cheese inside is melted and gooey.
Notes
- For a leaner option, substitute ground turkey for ground beef.
- Use gluten-free pizza dough for a gluten-free version.
- Dairy-free cheese can replace Colby-Jack for those with lactose intolerance or dietary preferences.
- If fresh garlic is preferred, mince and add it to the melted butter instead of garlic salt.
- Ensure seams are tightly sealed to prevent cheese from leaking during baking.


