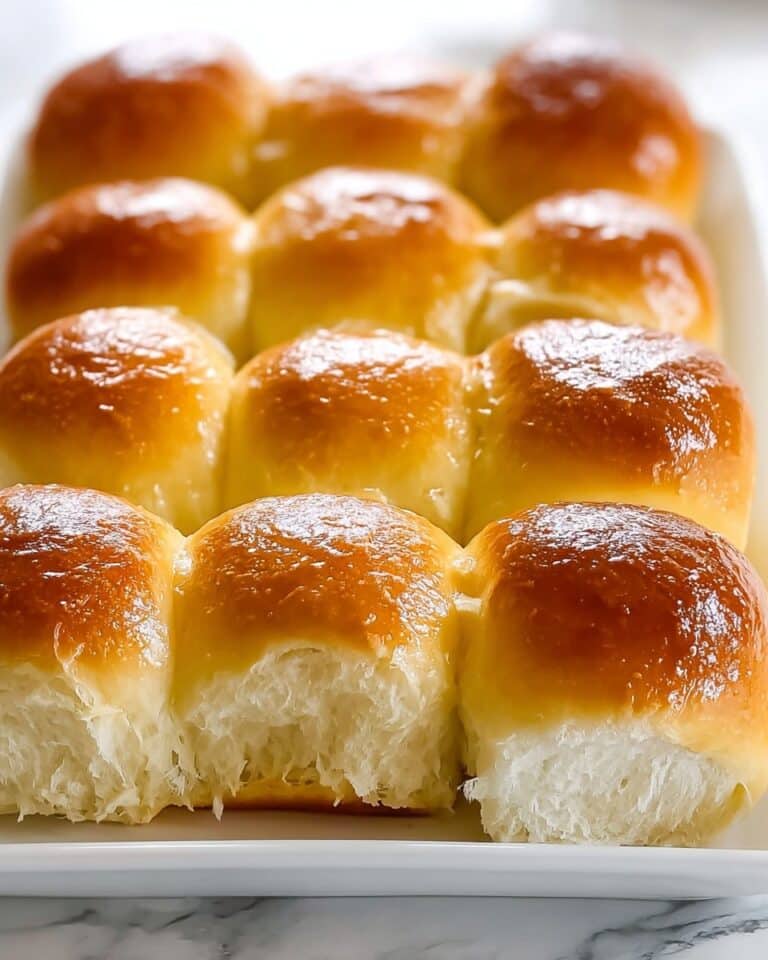
If you’ve ever longed for a bite-sized treat that’s equal parts cheesy, chewy, and utterly addictive, then Brazilian Cheese Puffs are about to be your new favorite obsession. Imagine warm, golden puffs fresh from the oven, filled with gooey cheese and carrying that irresistible aroma that makes everyone hover by the kitchen. These classic Brazilian morsels, also known as pão de queijo, are naturally gluten-free and deliver a savory experience that’s hard to beat, whether you’re serving them at a dinner party or sneaking a few straight off the baking tray.

Ingredients You’ll Need
One of the best things about Brazilian Cheese Puffs is that the ingredient list is short but mighty. Every item plays a crucial part in creating the unique flavor, texture, and puffiness that make these irresistible snacks so iconic.
- Whole milk: Provides richness and moisture, ensuring each puff is tender and flavorful.
- Vegetable oil: Keeps the dough supple and gives the puffs their signature soft chewiness.
- Salt: Just the right amount heightens the cheesy flavors and balances the richness.
- Tapioca flour: The secret to that stretchy, chewy texture and naturally gluten-free result.
- Large eggs: Help the dough puff up in the oven and create a lovely structure.
- Grated Parmesan cheese: Adds a sharp, nutty flavor that’s absolutely essential.
- Shredded mozzarella cheese: Brings meltiness and a mild, creamy cheese pull to every bite.
How to Make Brazilian Cheese Puffs
Step 1: Prep the Oven and Muffin Tin
Start by preheating your oven to 400°F. Lightly grease a mini muffin tin with oil or nonstick spray. This little bit of prep work ensures your Brazilian Cheese Puffs pop right out of the pan with no sticking and a golden exterior.
Step 2: Heat the Milk, Oil, and Salt
In a medium saucepan, combine the whole milk, vegetable oil, and salt. Warm everything over medium heat, stirring occasionally, until the mixture comes just to a gentle boil. This step helps the dough come together beautifully later on.
Step 3: Add Tapioca Flour and Stir
Once your milk mixture is hot, remove the pan from heat. Pour in all the tapioca flour at once and stir vigorously with a wooden spoon until you have a sticky, cohesive dough. It may look a little strange and elastic at first, but that’s exactly what you want—it’s the key to the puffs’ signature chew.
Step 4: Cool, Then Beat in the Eggs
Let your dough cool for about five minutes. This prevents the eggs from scrambling when you add them. Beat in the eggs one at a time, mixing well after each addition. The dough will become glossy and smooth, ready for all that glorious cheese.
Step 5: Mix in the Cheeses
Fold in the grated Parmesan and shredded mozzarella until the cheese is evenly distributed. The mixture will be thick, stretchy, and speckled with bits of cheese—perfection in the making.
Step 6: Portion and Bake
Using a spoon or small cookie scoop, fill each cup of your prepared muffin tin about three-quarters full with the batter. Pop the pan in the oven and bake for 18 to 20 minutes, until the puffs are golden brown and beautifully puffed. Serve your Brazilian Cheese Puffs warm for maximum enjoyment.
How to Serve Brazilian Cheese Puffs

Garnishes
While Brazilian Cheese Puffs are fantastic all on their own, you can dress them up with a sprinkle of fresh herbs like chives or parsley, a little extra grated Parmesan, or even a dusting of smoked paprika for color and flavor. You can also brush them lightly with melted butter and a pinch of garlic powder for an irresistibly aromatic finish.
Side Dishes
These puffs are perfectly at home alongside a fresh green salad, a bowl of soup, or as a sidekick to your favorite roasted meats. They also pair wonderfully with a platter of olives, cured meats, and fruit for a snackable appetizer spread that will have everyone reaching for more.
Creative Ways to Present
Turn your Brazilian Cheese Puffs into a party centerpiece by serving them stacked on a pretty cake stand or tucked into a lined bread basket. For an extra-special touch, offer a few dipping sauces on the side—think herbed cream cheese, spicy tomato salsa, or even a honey-mustard dip. These little puffs love to show off, so get creative with your presentation!
Make Ahead and Storage
Storing Leftovers
If you’re lucky enough to have leftovers, let your Brazilian Cheese Puffs cool completely before storing them in an airtight container at room temperature for up to two days. This keeps them soft and ready for snacking without drying out.
Freezing
Brazilian Cheese Puffs freeze beautifully! Once baked and cooled, arrange them in a single layer on a baking sheet and freeze until solid. Transfer them to a freezer bag or container, and they’ll keep for up to two months. Just thaw and reheat as needed for a quick cheesy fix.
Reheating
To bring your cheese puffs back to life, simply pop them in a toaster oven or regular oven at 350°F for about 5 minutes, or until warmed through. This revives the crisp exterior and melty, chewy interior, making them taste freshly baked all over again.
FAQs
Can I use other types of cheese in Brazilian Cheese Puffs?
Absolutely! Feel free to experiment with different cheeses like sharp cheddar, gouda, or even a little blue cheese for a twist. Just make sure to keep the total amount about the same for best texture.
Are Brazilian Cheese Puffs really gluten-free?
Yes, they are naturally gluten-free thanks to the tapioca flour. This makes them a wonderful option for anyone avoiding wheat, without sacrificing any of the delicious texture or taste.
Can I make the batter ahead of time?
It’s best to bake Brazilian Cheese Puffs right after mixing for the perfect rise and texture. However, you can portion the batter into your muffin tin and refrigerate for a few hours before baking if needed.
Why did my cheese puffs turn out dense?
If your puffs didn’t rise as expected, the dough may have been too hot when adding the eggs, or the batter was overmixed. Make sure to let the dough cool before incorporating the eggs, and mix gently once the cheese is added.
What’s the best way to serve Brazilian Cheese Puffs at a party?
Serve them warm in a lined basket or on a platter, and consider offering a few dips and garnishes so guests can customize their bites. They disappear quickly, so make a double batch if you’re hosting a crowd!
Final Thoughts
If you’re ready to wow your friends or simply treat yourself to something delightfully cheesy, don’t hesitate to whip up a batch of Brazilian Cheese Puffs. Every bite is a little taste of Brazilian comfort and celebration—give them a try and see why they’re loved around the world!
Print
Brazilian Cheese Puffs Recipe
- Total Time: 30 minutes
- Yield: 24 mini puffs 1x
- Diet: Vegetarian
Description
Brazilian Cheese Puffs, also known as pão de queijo, are small, airy, and cheesy bread rolls made with tapioca flour. They are naturally gluten-free and feature a chewy texture with a golden, crisp exterior. Perfect as an appetizer or snack, these cheese puffs combine Parmesan and mozzarella for a rich, savory flavor that melts in your mouth.
Ingredients
Wet Ingredients
- 1 cup whole milk
- 1/2 cup vegetable oil
- 2 large eggs
Dry Ingredients
- 1 teaspoon salt
- 2 cups tapioca flour
Cheeses
- 1 cup grated Parmesan cheese
- 1/2 cup shredded mozzarella cheese
Instructions
- Prepare Oven and Pan: Preheat the oven to 400°F (204°C) and lightly grease a mini muffin tin to prevent sticking.
- Make the Dough Base: In a medium saucepan, combine whole milk, vegetable oil, and salt. Heat over medium heat until the mixture reaches a gentle boil, then immediately remove from heat to prevent overcooking.
- Add Tapioca Flour: Stir in the tapioca flour all at once into the hot liquid mixture, stirring vigorously until a sticky, elastic dough forms that pulls away from the sides of the pan.
- Cool the Dough: Let the dough rest and cool for about 5 minutes so it doesn’t cook the eggs when added.
- Incorporate Eggs: Beat in the eggs one at a time, mixing well after each addition until the dough is smooth and elastic.
- Add Cheeses: Fold in the grated Parmesan and shredded mozzarella cheese thoroughly, ensuring even distribution.
- Portion Batter: Using a spoon or small scoop, drop the batter into the prepared mini muffin tin, filling each cup about three-quarters full to allow room for puffing.
- Bake: Place the muffin tin in the preheated oven and bake for 18 to 20 minutes or until the cheese puffs are puffed up and golden brown on top.
- Serve: Remove from oven and serve warm for the best texture and flavor experience.
Notes
- These cheese puffs are naturally gluten-free due to the use of tapioca flour.
- Best enjoyed fresh from the oven but can be reheated in a toaster oven to regain crispness.
- For extra flavor, consider adding a pinch of garlic powder or fresh herbs like rosemary or parsley to the dough.
- Use a mini muffin tin to create perfectly sized bite-sized puffs.
- Prep Time: 10 minutes
- Cook Time: 20 minutes
- Category: Appetizer
- Method: Baking
- Cuisine: Brazilian
Nutrition
- Serving Size: 2 puffs
- Calories: 110
- Sugar: 0 g
- Sodium: 180 mg
- Fat: 6 g
- Saturated Fat: 2 g
- Unsaturated Fat: 3 g
- Trans Fat: 0 g
- Carbohydrates: 11 g
- Fiber: 0 g
- Protein: 4 g
- Cholesterol: 20 mg
