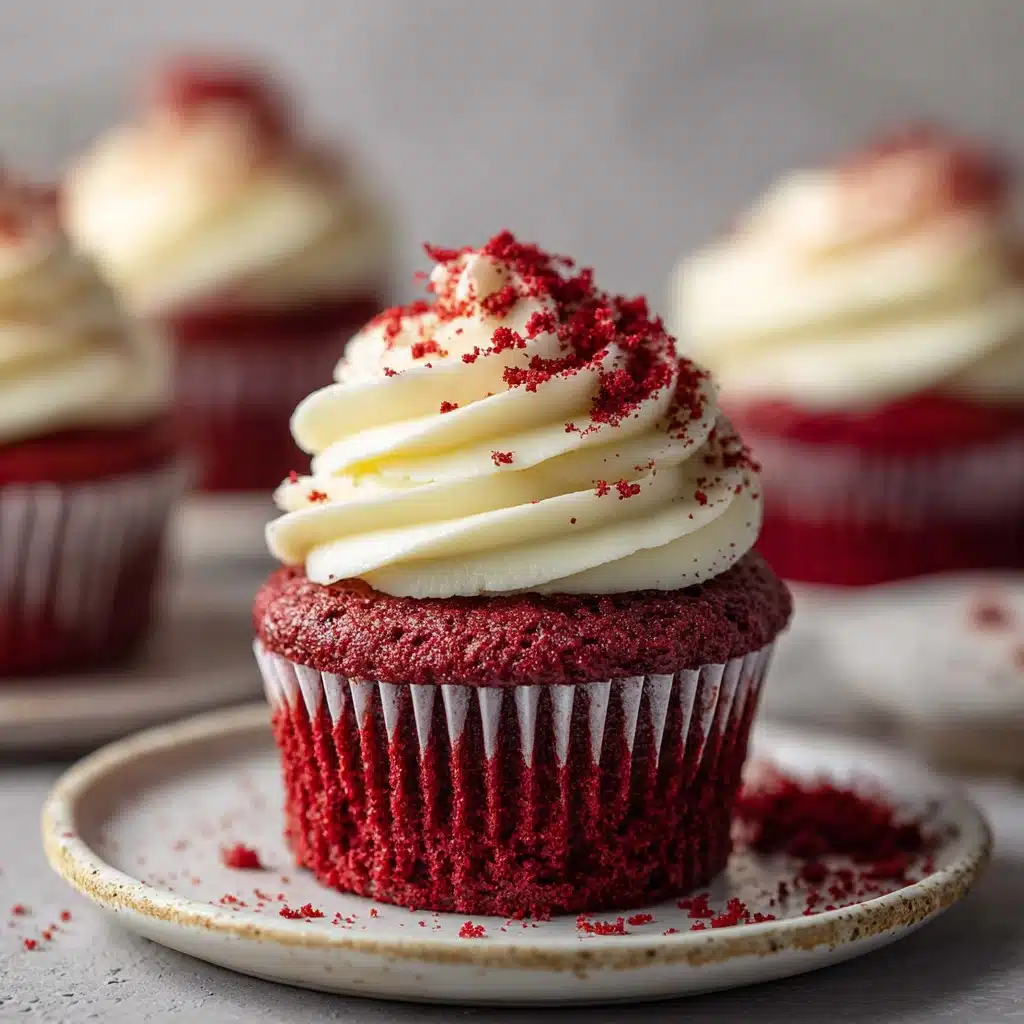
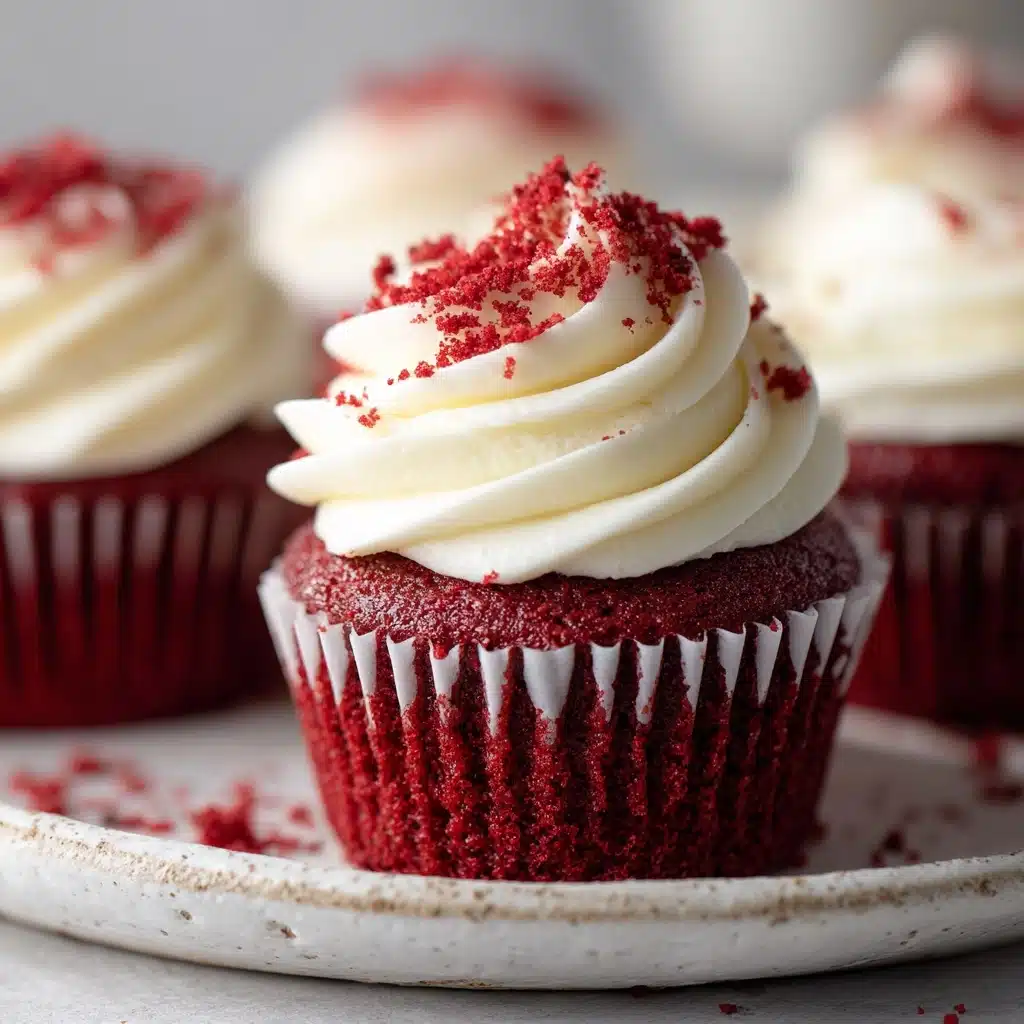
Red Velvet Cupcakes are a timeless treat that strike the perfect balance between elegance and indulgence. With their iconic crimson hue, ultra-moist crumb, and a swirl of tangy cream cheese frosting on top, these cupcakes turn any day into a celebration. Whether you’re baking for a special occasion or just craving something sweet, this classic recipe offers everything you love about Red Velvet Cupcakes—eye-catching color, rich flavor, and a dreamy texture—in a simple, approachable way.
Ingredients You’ll Need
The beauty of these cupcakes lies in their straightforward ingredient list. Each component plays a crucial role in creating the signature taste, plush texture, and brilliant color that Red Velvet Cupcakes are known for. Gather these pantry staples and a few extras, and you’re all set to bake up a batch of cupcake perfection!
- All-purpose flour: Provides structure for the cupcakes and keeps them light and tender.
- Unsweetened cocoa powder: Just a touch for subtle chocolate flavor without overpowering the red color.
- Baking soda: Gives the cupcakes their lift and helps them bake up fluffy and soft.
- Salt: Enhances the flavors and balances the sweetness.
- Unsalted butter (softened): Adds richness and moisture for a melt-in-your-mouth crumb.
- Granulated sugar: Sweetens the cupcakes and aids in aerating the butter for a lighter texture.
- Large egg: Binds the ingredients and adds tenderness.
- Buttermilk: The secret to that classic tang and ultra-soft crumb in Red Velvet Cupcakes.
- Red food coloring: Gives these cupcakes their vibrant, signature look—gel food coloring works best for depth of color.
- Vanilla extract: Adds warmth and enhances the overall flavor profile.
- White vinegar: Reacts with baking soda for extra lift and a tender texture.
- Cream cheese (softened): The star of the frosting, lending a creamy, tangy finish.
- Powdered sugar: Sweetens and thickens the frosting to the perfect consistency.
- Additional unsalted butter (softened): For the frosting, making it extra smooth and spreadable.
How to Make Red Velvet Cupcakes
Step 1: Prep Your Pan and Preheat
Start by preheating your oven to 350°F (175°C) and lining a 12-cup muffin tin with cupcake liners. This step ensures your Red Velvet Cupcakes bake evenly and pop right out of the pan when they’re done. Prepping your workspace now also makes the process seamless later.
Step 2: Mix the Dry Ingredients
In a medium bowl, whisk together the all-purpose flour, unsweetened cocoa powder, baking soda, and salt. This blend is what gives Red Velvet Cupcakes their soft, fine crumb and subtle cocoa undertone. Whisking also helps distribute the leavening agents for even rising.
Step 3: Cream the Butter and Sugar
In a large mixing bowl, beat the softened butter with the granulated sugar until it’s light, fluffy, and pale. This step is key for creating an airy texture in your cupcakes, and it only takes a few minutes with a hand mixer or stand mixer.
Step 4: Add the Wet Ingredients
Beat in the egg until fully incorporated, then add the buttermilk, red food coloring, vanilla extract, and white vinegar. This vibrant combo delivers the classic color and tangy undertone that make Red Velvet Cupcakes stand out. Mixing until smooth ensures you get a uniform hue and flavor.
Step 5: Combine Wet and Dry Ingredients
Gradually add the dry flour mixture to the wet ingredients, mixing just until combined. Be careful not to overmix, which can lead to dense cupcakes. The batter should be smooth and vividly red—ready to transform into that iconic Red Velvet Cupcake crumb.
Step 6: Fill and Bake
Divide the batter evenly among your prepared cupcake liners, filling each about two-thirds full. Bake for 18 to 20 minutes, until a toothpick inserted in the center comes out clean. Allow the cupcakes to cool in the pan for a few minutes, then transfer to a wire rack to cool completely.
Step 7: Make the Cream Cheese Frosting
While the cupcakes cool, beat together the softened cream cheese and butter until perfectly smooth. Gradually add the powdered sugar and vanilla extract, mixing until the frosting is light, fluffy, and velvety. This luscious topping is the crowning glory of every Red Velvet Cupcake.
Step 8: Frost and Enjoy
Once the cupcakes are fully cooled, frost them generously using a spatula or piping bag for a professional look. Each bite of these Red Velvet Cupcakes delivers a delightful contrast between the tangy cream cheese frosting and the tender, cocoa-infused cake.
How to Serve Red Velvet Cupcakes

Garnishes
A classic garnish for Red Velvet Cupcakes is a gentle sprinkle of red velvet cake crumbs on top of the frosting. You can also add white chocolate shavings, a dusting of cocoa powder, or even a single raspberry for a pop of color and flavor. Whatever you choose, a little extra flourish turns these cupcakes into a true showstopper.
Side Dishes
Pair your Red Velvet Cupcakes with a glass of cold milk, hot coffee, or a creamy latte for a comforting combo. If you’re serving them at a party, they look gorgeous alongside a platter of fresh berries, or you can offer a variety of mini desserts for an elegant dessert spread.
Creative Ways to Present
Try arranging your cupcakes on a tiered stand for a stunning centerpiece, or serve them in decorative cupcake wrappers for a festive touch. For special occasions, you can pipe the frosting in different patterns, top with edible glitter, or set up a DIY cupcake bar where guests add their own toppings. Let your creativity shine—Red Velvet Cupcakes are as fun to decorate as they are to eat!
Make Ahead and Storage
Storing Leftovers
If you have any cupcakes left (a rare occurrence!), store them in an airtight container in the refrigerator for up to four days. The cream cheese frosting keeps best when chilled, and the cupcakes will stay moist and flavorful.
Freezing
Red Velvet Cupcakes freeze beautifully. Simply wrap each unfrosted cupcake in plastic wrap and place in a freezer-safe bag or container. They’ll keep for up to three months. Thaw at room temperature, then frost before serving for the freshest taste and texture.
Reheating
To revive that just-baked taste, let your refrigerated cupcakes come to room temperature before enjoying. If you’re in a hurry, you can warm an unfrosted cupcake in the microwave for 10–15 seconds, then frost as desired. The frosting is best enjoyed fresh, so add it after reheating.
FAQs
Can I use natural food coloring instead of artificial?
Absolutely! While gel or liquid food coloring gives the most vibrant red, you can opt for natural alternatives like beet juice or natural food color powders. Just keep in mind that the color may be slightly less intense, but your Red Velvet Cupcakes will still be just as delicious.
What can I use instead of buttermilk?
If you don’t have buttermilk on hand, simply mix 1/2 cup of milk with 1/2 tablespoon of lemon juice or vinegar, let it sit for five minutes, and use in place of buttermilk. This quick substitute will give your cupcakes the same tangy flavor and tender crumb.
Can I make these cupcakes gluten-free?
Yes! You can swap the all-purpose flour for a good quality 1-to-1 gluten-free baking flour blend. Just be sure to check that all other ingredients are gluten-free, and your Red Velvet Cupcakes will turn out beautifully.
Why do you add vinegar to the batter?
The splash of vinegar reacts with the baking soda, helping the cupcakes rise and giving them their signature soft, fluffy texture. It also lends a subtle tang that complements the cocoa and cream cheese frosting perfectly.
Can I double this recipe for a party?
Definitely! Simply double all the ingredient amounts and bake in batches, or use two muffin tins if you have them. Red Velvet Cupcakes are always a hit at parties, so making extra is never a bad idea.
Final Thoughts
There’s nothing quite like sharing a batch of homemade Red Velvet Cupcakes with friends and family. With their dreamy red color, irresistible cream cheese frosting, and classic flavor, these cupcakes are sure to win over any crowd. So go ahead—treat yourself and your loved ones to a little slice of cupcake heaven!
Print
Red Velvet Cupcakes Recipe
- Total Time: 35 minutes
- Yield: 12 cupcakes 1x
- Diet: Vegetarian
Description
These classic Red Velvet Cupcakes are moist, tender, and perfectly balanced with a hint of cocoa flavor and a vibrant red hue. Topped with a smooth and creamy homemade cream cheese frosting, they make an irresistible dessert perfect for holidays, celebrations, or anytime indulgence.
Ingredients
Cupcake Batter
- 1 1/4 cups all-purpose flour
- 1 tablespoon unsweetened cocoa powder
- 1/2 teaspoon baking soda
- 1/4 teaspoon salt
- 1/2 cup unsalted butter (softened)
- 3/4 cup granulated sugar
- 1 large egg
- 1/2 cup buttermilk
- 2 tablespoons red food coloring
- 1 teaspoon vanilla extract
- 1/2 teaspoon white vinegar
Cream Cheese Frosting
- 8 oz cream cheese (softened)
- 1/4 cup unsalted butter (softened)
- 2 cups powdered sugar
- 1 teaspoon vanilla extract
Instructions
- Preheat the oven: Set your oven to 350°F (175°C) and line a 12-cup muffin tin with cupcake liners to prepare for baking.
- Mix dry ingredients: In a medium bowl, thoroughly whisk together the all-purpose flour, unsweetened cocoa powder, baking soda, and salt to ensure even distribution.
- Cream butter and sugar: Using a large mixing bowl, beat the softened butter and granulated sugar together until the mixture is light and fluffy, which usually takes about 3-5 minutes.
- Add wet ingredients: Beat in the egg until combined, then add the buttermilk, red food coloring, vanilla extract, and white vinegar. Mix until the batter is smooth and homogenous.
- Combine batter: Gradually incorporate the dry ingredients into the wet mixture, mixing just until combined to avoid overmixing which can make cupcakes tough.
- Fill cupcake liners: Divide the batter evenly among the cupcake liners, filling each about two-thirds full to allow room for rising.
- Bake: Place the muffin tin in the preheated oven and bake for 18–20 minutes, or until a toothpick inserted in the center of a cupcake comes out clean.
- Cool: Remove the cupcakes from the oven and let them cool completely in the tin before frosting to prevent melting the frosting.
- Prepare frosting: In a clean bowl, beat the softened cream cheese and butter together until smooth. Gradually add powdered sugar and vanilla extract, beating until the frosting is light and creamy.
- Frost cupcakes: Once cooled, frost the cupcakes using a piping bag or spatula for an attractive finish. Serve and enjoy!
Notes
- For a richer and more vibrant red color, use gel food coloring instead of liquid.
- Be careful not to overmix the batter to keep the cupcakes light and tender.
- These cupcakes can be stored in an airtight container in the refrigerator for up to 4 days.
- Bring refrigerated cupcakes to room temperature before serving for the best flavor and texture.
- Prep Time: 15 minutes
- Cook Time: 20 minutes
- Category: Dessert
- Method: Baking
- Cuisine: American
Nutrition
- Serving Size: 1 cupcake
- Calories: 320
- Sugar: 28g
- Sodium: 210mg
- Fat: 17g
- Saturated Fat: 10g
- Unsaturated Fat: 6g
- Trans Fat: 0g
- Carbohydrates: 40g
- Fiber: 1g
- Protein: 4g
- Cholesterol: 55mg


