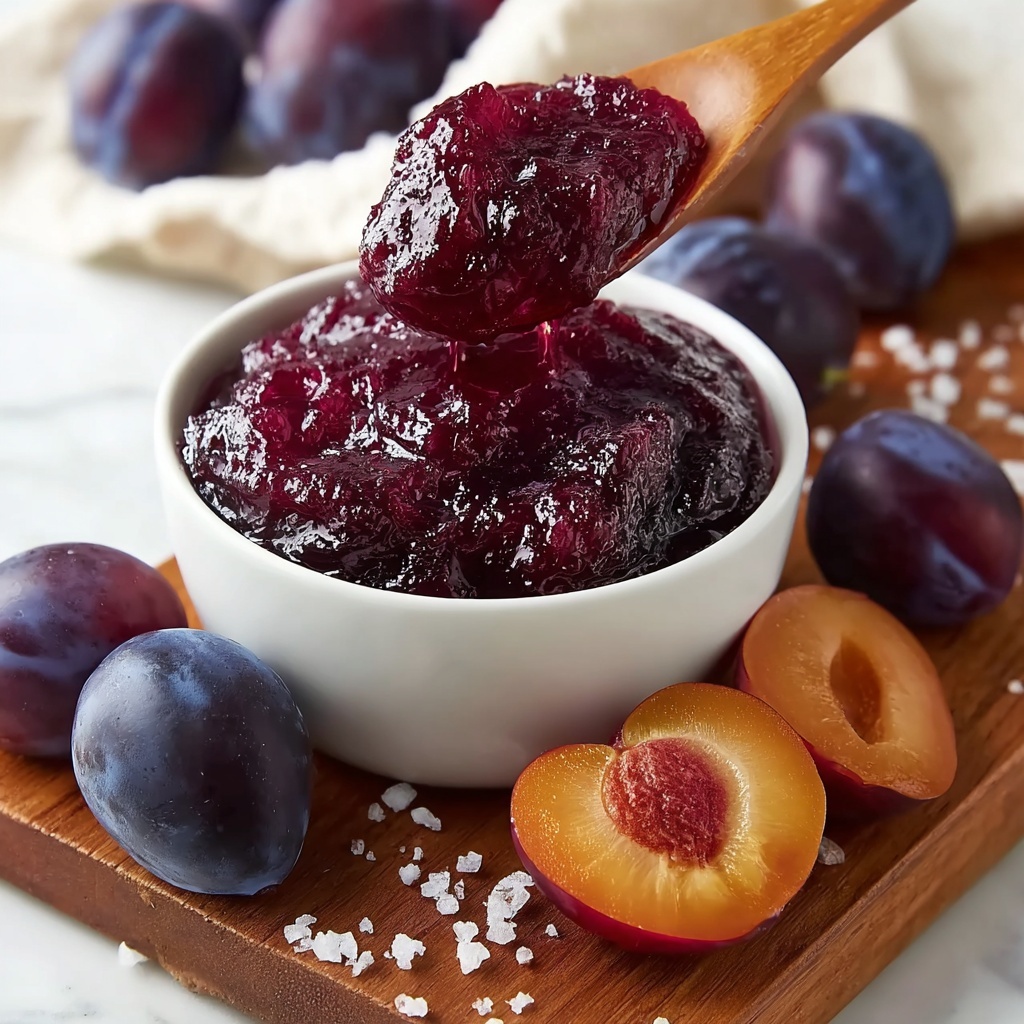
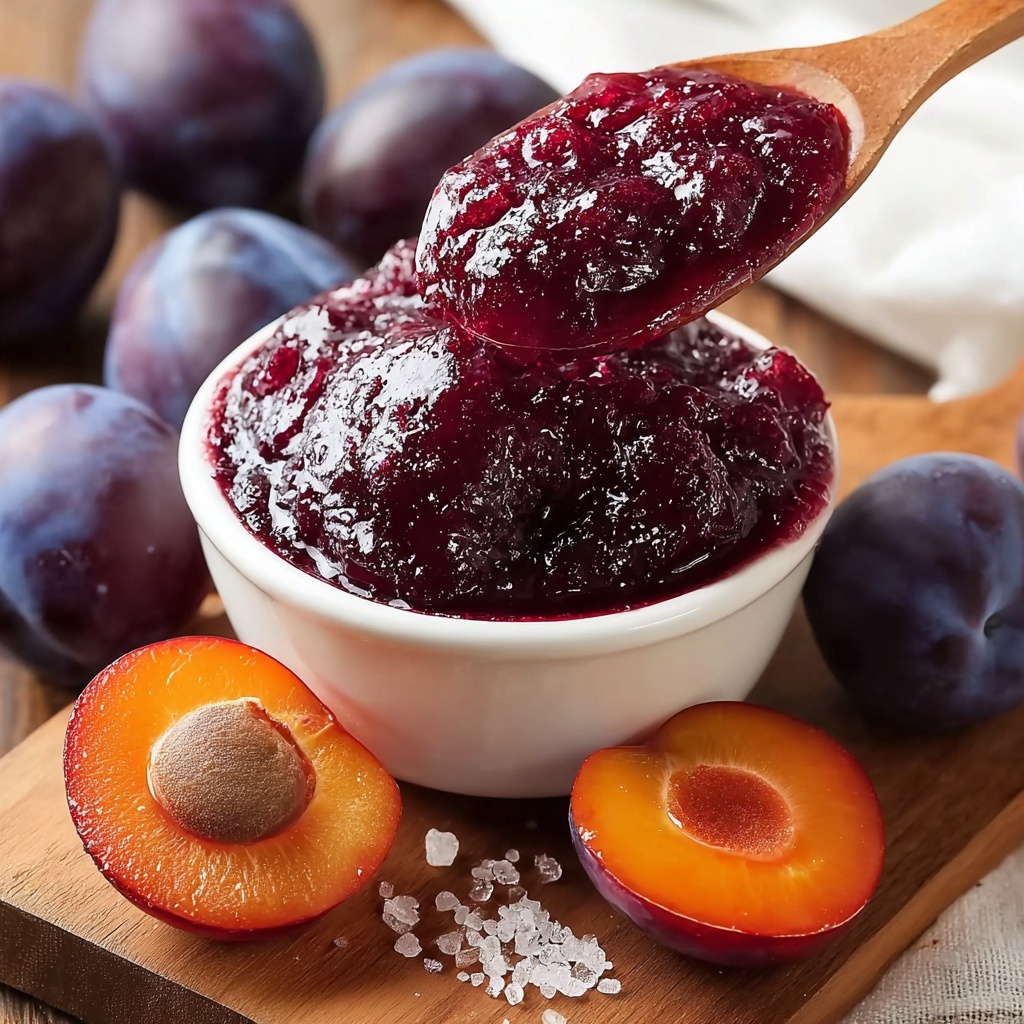
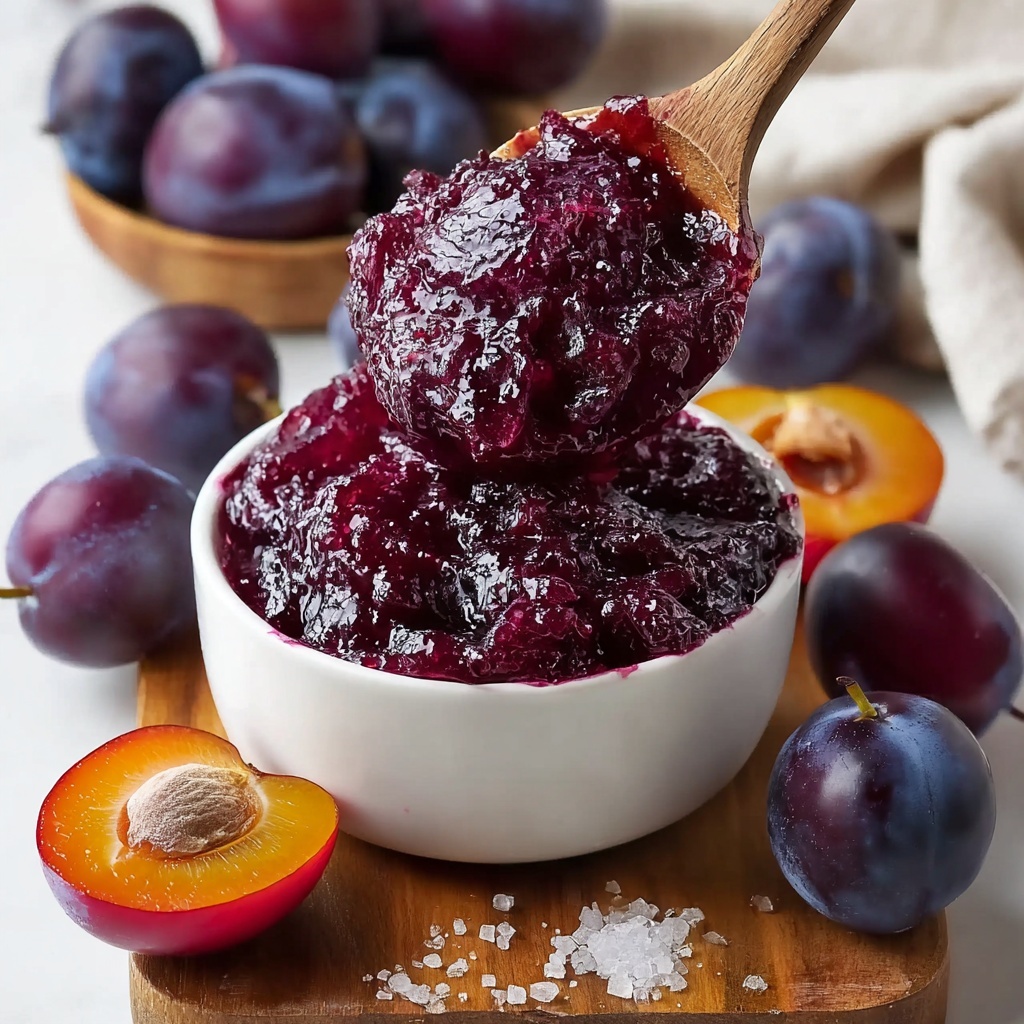
If you have an abundance of fresh plums and want a delightful way to preserve their juicy sweetness, this Easy Plum Jam Recipe is the ultimate go-to. It’s wonderfully simple yet deeply flavorful, capturing the essence of ripe plums with just a handful of pantry staples. Whether you’re a jam enthusiast or trying your hand at preserving for the first time, this recipe offers a smooth, luscious result that’s perfect spread on toast, dolloped on yogurt, or gifted to friends and family. Let’s dive into this joyful journey of turning fresh fruit into a jar of pure sunshine!
Ingredients You’ll Need
The beauty of this Easy Plum Jam Recipe lies in its straightforward ingredients, each playing a crucial role in flavor, texture, and preservation. You’ll notice how the plums bring vibrant color and natural sweetness, lemon juice adds a refreshing tang and acidity to balance the sugar, and a touch of cinnamon offers an optional warm hint that makes your jam stand out.
- 2 pounds fresh plums, pitted and chopped: The star of the show, fresh and ripe plums create the base with juicy, fruity flavor and beautiful deep purple-red hues.
- 1 1/2 cups granulated sugar: Essential for sweetness and helping the jam set properly, sugar also acts as a natural preservative.
- 1 tablespoon lemon juice: Adds brightness and tart balance while helping to activate the natural pectin in the plums, which is key for that perfect jam texture.
- 1/4 teaspoon ground cinnamon (optional): A subtle spice that enhances the fruity taste and adds warmth, but feel free to leave it out if you prefer a pure plum flavor.
How to Make Easy Plum Jam Recipe
Step 1: Prepare the Plums
Start by washing your fresh plums thoroughly to remove any dirt or residue. Next, carefully pit each plum and chop them into small pieces. This helps the fruit cook evenly and break down nicely into a jammy texture. Taking the time to prep your plums right sets a solid foundation for the rest of your jam-making adventure.
Step 2: Combine Ingredients
Throw your chopped plums into a large saucepan along with the granulated sugar and lemon juice. No need to rush here — letting this mixture sit for about 15 minutes allows the sugar to start dissolving and the plums to release their natural juices, which makes cooking smoother and helps intensify the jam’s flavor.
Step 3: Cook the Jam
Turn the heat to medium and bring your fruit mixture to a lively boil, stirring frequently to avoid sticking or burning. Once boiling, reduce the heat to let the mixture simmer gently. Allow it to cook for 25 to 30 minutes, giving the fruit plenty of time to break down and thicken into luscious jam. For a smoother consistency, feel free to mash the fruit with a potato masher or gently blend it to suit your preference.
Step 4: Test Consistency
How do you know when your jam is perfectly set? The classic wrinkle test is your best friend here. Spoon a small amount of jam onto a chilled plate, let it cool for a minute, then push it with your finger. If the surface wrinkles instead of running, congratulations — your jam is ready! If it’s still runny, just simmer a little longer and test again.
Step 5: Cool and Store
Once the jam has reached the ideal texture, remove the pan from heat and let it cool slightly. Carefully transfer your hot jam into sterilized jars using a ladle or funnel. Seal them tightly, and allow the jars to cool completely before popping them in the fridge. This step not only preserves your jam but also ensures maximum freshness and flavor for weeks to come.
How to Serve Easy Plum Jam Recipe
Garnishes
Sprinkle your plum jam with a few chopped fresh mint leaves or a tiny pinch of cinnamon on top to add a vibrant, aromatic touch that enhances the eating experience. A dollop of whipped cream or crème fraîche on the side also makes a delightful finish that’s simply irresistible.
Side Dishes
Easy plum jam is the perfect complement to warm, crusty bread or buttery croissants for breakfast or brunch. It also pairs beautifully with creamy cheeses like brie or goat cheese, making it an outstanding addition to cheese boards and savory-sweet snacks.
Creative Ways to Present
Think beyond the usual spreads by swirling plum jam into yogurt for a colorful breakfast, layering it inside cakes or thumbprint cookies for bursts of flavor, or even glazing roasted meats and vegetables for a subtly sweet finish. The versatility of this jam lets your creativity run wild!
Make Ahead and Storage
Storing Leftovers
If you have extra jam, keeping it in airtight jars in the refrigerator will keep it fresh for up to one month. The sugar and acidity help preserve the jam, but it’s always best to enjoy it sooner rather than later for peak flavor.
Freezing
For longer storage, plum jam freezes beautifully. Use a freezer-safe container or jar, leaving some headspace for expansion. When stored in the freezer, it can last up to six months without losing its taste or texture.
Reheating
Need to warm up your jam for recipes or serving? Simply heat a small amount gently in the microwave or over low stovetop heat, stirring frequently to restore that freshly made warmth. Just be careful not to scorch it.
FAQs
Can I use frozen plums?
Yes, frozen plums work well for making jam. Just thaw them completely and drain any excess liquid before starting the recipe to maintain the right consistency.
Is it necessary to add lemon juice?
Lemon juice adds essential acidity that balances sweetness and aids the natural pectin in the plums, helping the jam to set properly. While you might skip it, the texture and flavor may be affected.
How do I make the jam smoother?
If you prefer a smooth jam, you can mash the fruit as it cooks or blend it briefly after cooking for a silky texture that’s perfect for spreading.
Can I reduce the sugar amount?
Reducing sugar is possible but keep in mind it may affect the jam’s ability to set and its shelf life. Consider adding pectin or adjusting cooking times if you want less sweetness.
How long does homemade plum jam last?
When refrigerated, fresh homemade plum jam is best enjoyed within a month. Frozen jars can last up to six months, keeping that delicious flavor intact.
Final Thoughts
This Easy Plum Jam Recipe is truly a small kitchen miracle, taking a few simple ingredients and transforming them into something rich, flavorful, and heartwarming. Once you taste the sweet, tangy jam bursting with natural plum goodness, you’ll be reaching for plums all season long. So go ahead, give this recipe a try and savor the joy of homemade fruit preserves—it might just become your new favorite staple!
Print
Easy Plum Jam Recipe
- Total Time: 45 minutes
- Yield: About 3 cups (48 tablespoons) 1x
Description
This easy plum jam recipe transforms fresh, juicy plums into a sweet, luscious spread perfect for toast, desserts, or gifts. With simple ingredients like sugar, lemon juice, and an optional hint of cinnamon, this homemade jam comes together with minimal effort and cooks on the stovetop to a perfect, spreadable consistency.
Ingredients
Jam Ingredients
- 2 pounds fresh plums, pitted and chopped
- 1 1/2 cups granulated sugar
- 1 tablespoon lemon juice
- 1/4 teaspoon ground cinnamon (optional)
Instructions
- Prepare the Plums: Wash the plums thoroughly, remove the pits, and chop them into small pieces to start the jam-making process.
- Combine Ingredients: In a large saucepan, mix the chopped plums with granulated sugar and lemon juice. Allow the mixture to sit for 15 minutes so the sugar begins to draw out the juices from the plums.
- Cook the Jam: Place the saucepan over medium heat and bring the mixture to a boil while stirring frequently to prevent sticking. Then reduce the heat to a simmer and cook for 25 to 30 minutes, stirring occasionally. For a smoother jam, you can mash the fruit with a spoon or briefly blend it.
- Test Consistency: To check if the jam is set, spoon a small amount onto a chilled plate and let it cool for a minute. Push the jam gently with your finger; if it wrinkles, it is ready. If not, continue cooking a few more minutes and test again.
- Cool and Store: Remove the saucepan from heat and let the jam cool slightly. Transfer the jam to sterilized jars, seal them tightly, and allow them to cool completely before refrigerating.
Notes
- Using ripe plums enhances the natural sweetness and flavor of the jam.
- The optional ground cinnamon adds a warm, subtle spice that pairs well with plum flavor.
- Ensure jars are properly sterilized for safe storage and longer shelf life.
- Refrigerate the jam after opening and consume within a few weeks for best quality.
- If you prefer a chunkier jam, avoid blending or mashing the mixture.
- Prep Time: 15 minutes
- Cook Time: 30 minutes
- Category: Preserves
- Method: Stovetop
- Cuisine: American


