
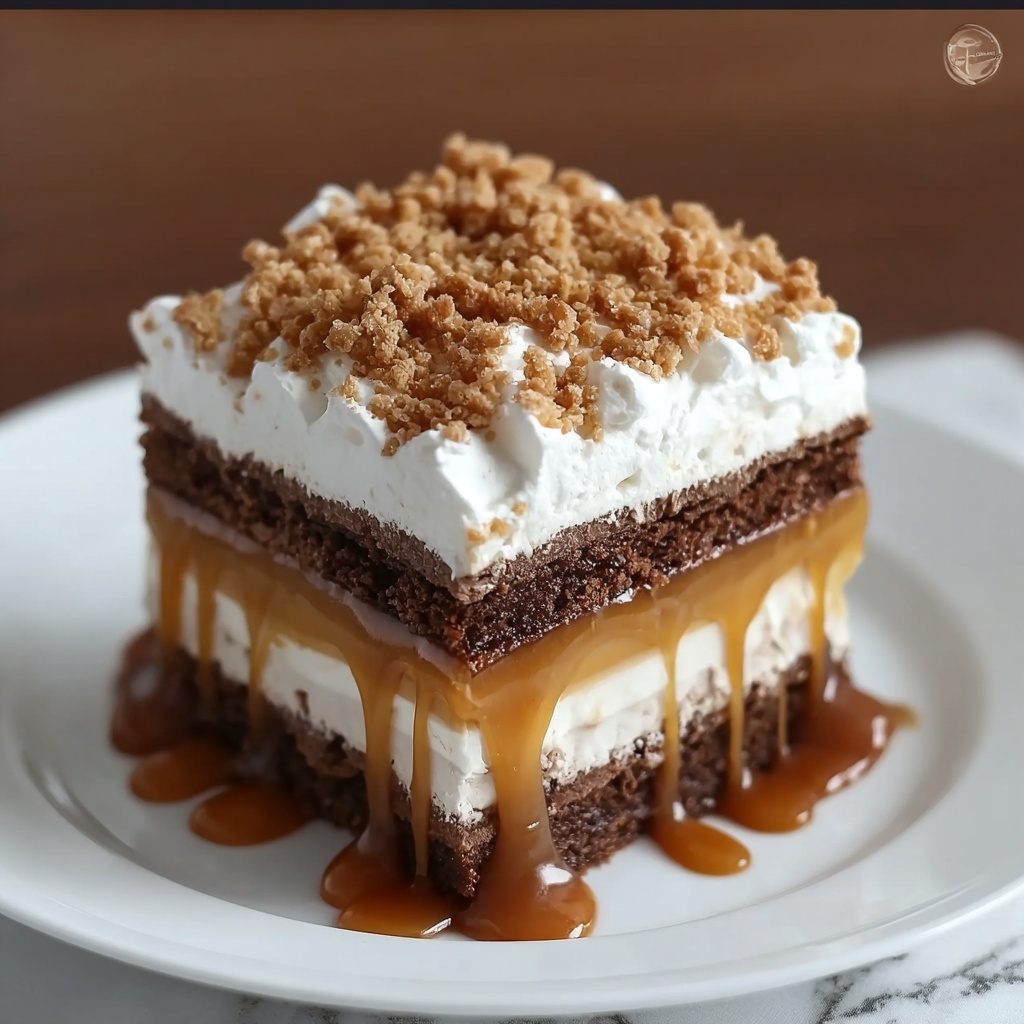
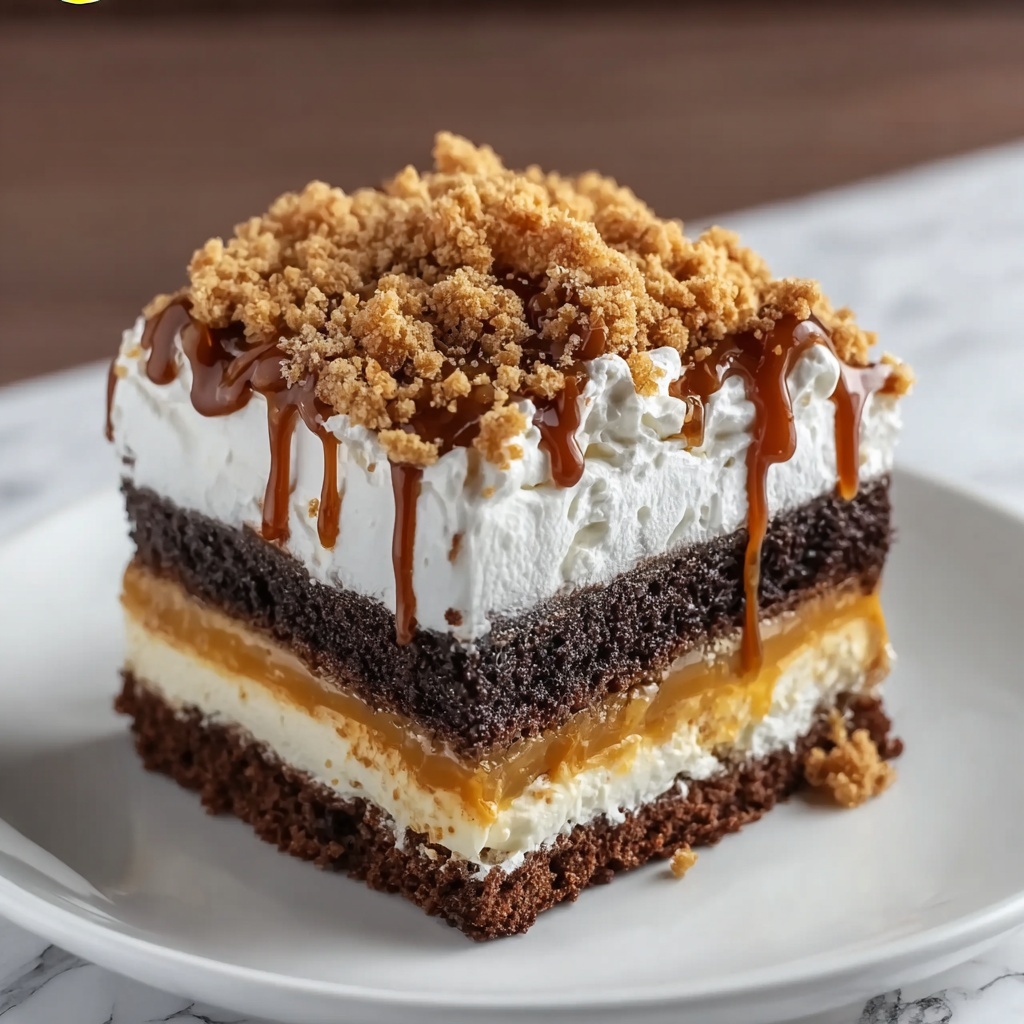
If you’re craving a dessert that perfectly balances rich chocolate, creamy caramel, and that unmistakable Butterfinger crunch, look no further than this Butterfinger Cake Recipe. It’s a luscious, show-stopping cake that combines a moist devil’s food base with a dreamy caramel and condensed milk filling, topped with fluffy Cool Whip and delightfully crunchy Butterfinger candy pieces. This cake is a crowd-pleaser that’s as fun to make as it is to eat, making it a staple for any celebration or indulgent treat.
Ingredients You’ll Need
The beauty of this Butterfinger Cake Recipe lies in its straightforward ingredient list. Each item plays a crucial role, from the deep chocolate flavor of the cake mix to the luscious sweetness of the caramel sauce, culminating in that iconic candy crunch that pulls the whole dessert together.
- Devil’s Food Cake mix: Provides a rich, moist chocolate base that’s easy and foolproof.
- Eggs, oil, and water: Follow the cake mix directions to achieve the perfect batter consistency and texture.
- Sweetened condensed milk: Adds creamy sweetness and smooth texture to the filling layer.
- Caramel sauce: Brings irresistible gooey richness that soaks into the cake’s holes.
- Cool Whip: A light, airy topping that balances the sweetness and adds a cloud-like finish.
- Butterfinger candy bars: Crushed for that signature crisp peanut-buttery crunch on top.
How to Make Butterfinger Cake Recipe
Step 1: Prepare the Cake Base
Start by preheating your oven to 350°F (175°C). Preparing the devil’s food cake batter according to the package instructions is incredibly simple. Make sure to grease your baking dish well so that the cake releases effortlessly once baked. Pour the smooth batter into a 9×13-inch pan, then bake until a toothpick inserted in the center comes out clean. This chocolate foundation builds the rich backbone of your Butterfinger Cake Recipe.
Step 2: Add the Caramel Mixture
Once your cake is baked and has cooled for about 10 minutes, it’s time for the magic. Using the handle of a wooden spoon, poke holes all over the surface—spacing them roughly one inch apart. Mix the sweetened condensed milk with caramel sauce until velvety smooth, then slowly pour this luscious blend over the cake, letting it drip into every hole. This step infuses every bite with gooey caramel goodness that makes the cake so unforgettable.
Step 3: Top the Cake
After the caramel melds into the cake and it has fully cooled, spread an even layer of softened Cool Whip across the surface. This fluffy layer provides a light contrast to the decadent cake and caramel beneath. To finish, generously sprinkle crushed Butterfinger candy bars all over the top—this is where the crunchy, peanut-buttery magic crowns your Butterfinger Cake Recipe, creating a delightful textural contrast.
Step 4: Chill and Serve
Cover your masterpiece with plastic wrap and pop it in the refrigerator for at least two hours. This chilling step allows the flavors to harmonize beautifully and firms up the texture, making slicing clean and effortless. When it’s time, cut generous squares and serve chilled, savoring the perfect balance of soft cake, rich caramel, creamy topping, and crunchy candy.
How to Serve Butterfinger Cake Recipe
Garnishes
Add an extra sprinkle of crushed Butterfinger pieces just before serving for added crunch and eye appeal. You can also dust with a bit of cocoa powder or drizzle with a little extra caramel sauce for an extra indulgent touch that will have guests reaching for seconds.
Side Dishes
This cake pairs wonderfully with a scoop of vanilla ice cream or a dollop of freshly whipped cream to complement its rich, buttery flavors. A cup of hot coffee or a glass of cold milk can balance the sweetness beautifully and round out the dessert experience.
Creative Ways to Present
For a stunning presentation, serve your Butterfinger Cake Recipe in a clear glass trifle dish to show off its layered glory. Alternatively, cut the cake into bite-sized squares and arrange them on a decorative platter with fresh berries for a festive crowd-pleaser.
Make Ahead and Storage
Storing Leftovers
Keep any leftover Butterfinger Cake covered tightly in the refrigerator to preserve its freshness. The flavors actually deepen when stored overnight, making it a great make-ahead dessert.
Freezing
If you want to save it for later, you can freeze the uncut cake tightly wrapped in plastic wrap and then foil. Thaw it overnight in the fridge before serving to maintain that perfect creamy and crunchy texture.
Reheating
Since this cake is best served chilled, reheating is not recommended. Instead, allow it to come to room temperature for about 15 minutes after refrigeration if you prefer it less cold.
FAQs
Can I use a cake mix other than Devil’s Food?
Absolutely! While Devil’s Food adds a rich chocolate punch, you can experiment with other chocolate cake mixes or even homemade recipes if you prefer. Just keep in mind the flavor profile might shift slightly.
Is there a way to make this cake from scratch instead of using a mix?
Yes, you can make a chocolate cake from scratch using cocoa powder and standard cake ingredients. However, using a box mix keeps things super easy and speedy without sacrificing flavor, which is perfect for this indulgent treat.
Can I substitute the Cool Whip topping with whipped cream?
Definitely! Freshly whipped cream can be a delicious, less processed alternative and adds a wonderful lightness to the cake. Just ensure it’s whipped to soft peaks for easy spreading.
What if I don’t have Butterfinger bars on hand?
While Butterfinger bars are iconic in this recipe, you can try crushed peanut butter cups or other peanut-butter-rich candies for a similar crunch and flavor. It won’t be quite the same but still delicious!
How long does the Butterfinger Cake last in the fridge?
This cake keeps well for up to 4 days in the refrigerator when properly covered. After that, the topping may start to lose its freshness, so it’s best enjoyed sooner rather than later.
Final Thoughts
This Butterfinger Cake Recipe is one of those desserts that feels like a warm hug with a playful crunch. It’s easy enough to whip up for any occasion yet special enough to impress your family and friends. I can’t recommend it highly enough for your next dessert adventure — prepare to fall in love at first bite!
Print
Butterfinger Cake Recipe
- Prep Time: 20 minutes
- Cook Time: 30 minutes
- Total Time: 2 hours 50 minutes
- Yield: 12 servings
- Category: Dessert
- Method: Baking
- Cuisine: American
Description
This Butterfinger Cake is a decadent and irresistible dessert that combines a rich chocolate cake base with a luscious caramel and sweetened condensed milk filling, topped with fluffy Cool Whip and crunchy Butterfinger candy bars. Perfectly moist with gooey caramel centers and a crunchy topping, this crowd-pleasing cake is ideal for celebrations or any special occasion.
Ingredients
For the Cake:
- 1 box Devil’s Food Cake mix (or your favorite chocolate cake mix)
- Eggs, oil, and water (as directed on the cake mix box)
For the Filling:
- 1 can (14 ounces) sweetened condensed milk
- 1 jar (12 ounces) caramel sauce
For the Topping:
- 1 tub (8 ounces) Cool Whip, thawed
- 3–4 Butterfinger candy bars, crushed
Instructions
- Prepare the Cake Base: Preheat your oven to 350°F (175°C). Prepare the cake mix according to the package instructions, using the specified amounts of eggs, oil, and water. Pour the batter into a greased 9×13-inch baking dish and bake for the time recommended on the box or until a toothpick inserted into the center comes out clean. Once baked, allow the cake to cool for about 10 minutes.
- Add the Caramel Mixture: Using the handle of a wooden spoon, poke holes evenly spaced about 1 inch apart all over the warm cake. In a small bowl, combine the sweetened condensed milk and caramel sauce until smooth. Slowly pour this mixture over the cake, ensuring it seeps evenly into the holes throughout.
- Top the Cake: Let the cake cool completely to room temperature. Then spread the thawed Cool Whip evenly over the top. Crush the Butterfinger candy bars and generously sprinkle the pieces over the Cool Whip layer to add a crunchy, sweet finish.
- Chill and Serve: Cover the cake with plastic wrap and refrigerate for at least 2 hours to allow the flavors to meld and the cake to set properly. When ready, slice the cake into servings and enjoy the perfect combination of moist cake, caramel filling, whipped topping, and crunchy candy.
Notes
- For best results, be sure not to overbake the cake, as it will continue to set while cooling.
- The holes poked into the cake help the caramel mixture soak in for extra moisture and flavor.
- Chilling the cake for at least 2 hours is essential to allow the filling to set and for easy slicing.
- You can substitute Cool Whip with homemade whipped cream if preferred.
- Store any leftovers covered in the refrigerator and consume within 3-4 days for freshness.

