“`html
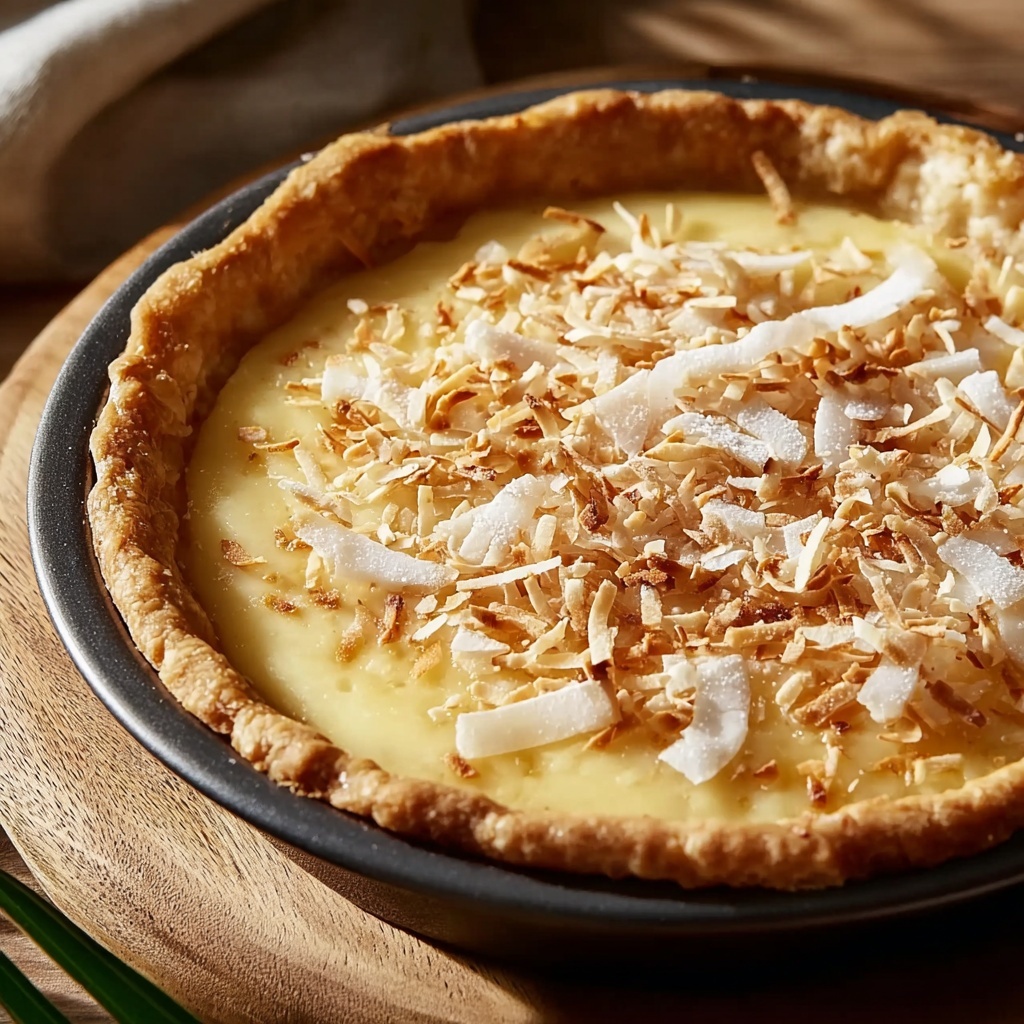
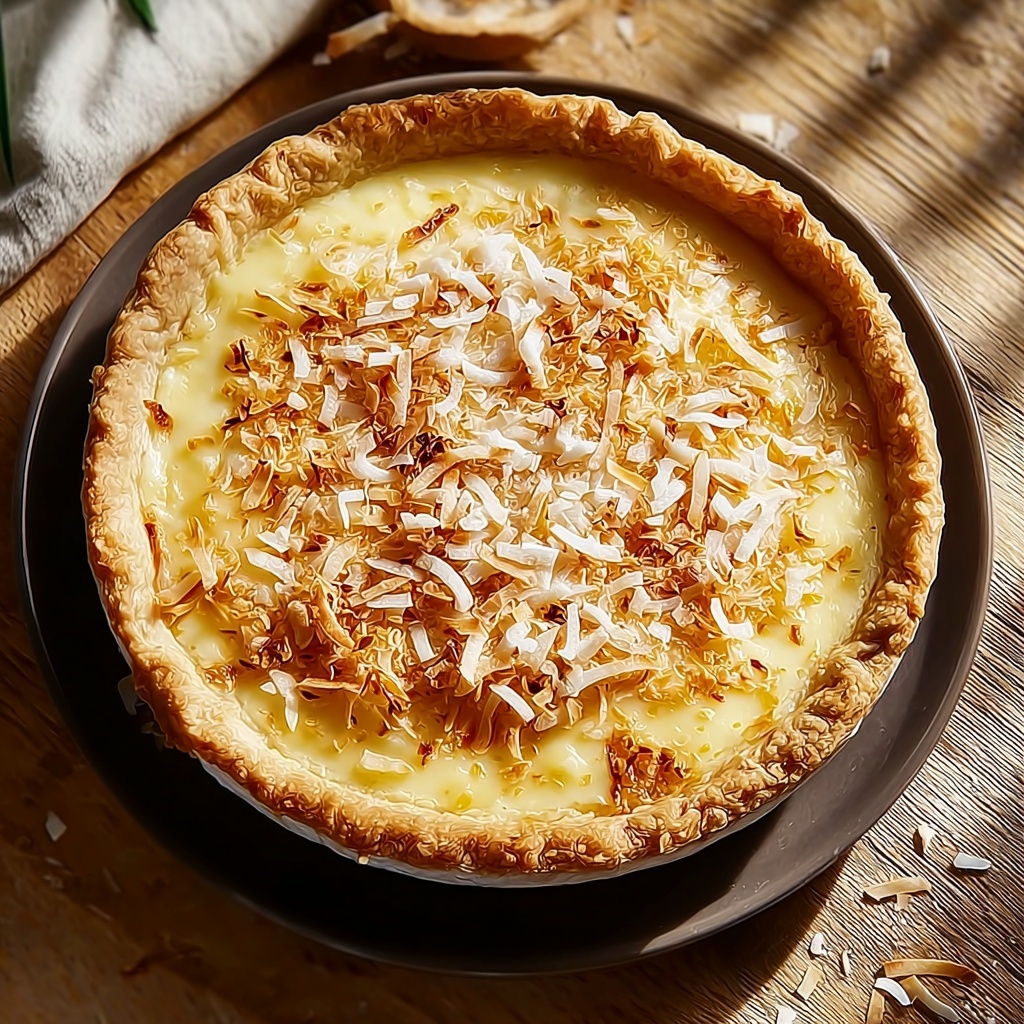
If you’re craving a dessert that tastes like a tropical escape and comfort all rolled into one, this Classic Coconut Pie Recipe is exactly what you need. With a flaky, buttery crust and a rich, custardy filling packed with shredded coconut, every bite feels like a little celebration of sweet, creamy goodness. Whether you choose sweetened or unsweetened coconut, the blend of textures and flavors will have you reaching for seconds before you know it. Perfectly balanced and beautifully golden, this pie is a timeless treat you’ll want to share with friends and family again and again.
Ingredients You’ll Need
Gathering simple, pantry-friendly ingredients is the first step to this mouthwatering coconut delight. Each component plays a crucial role— from the flaky crust to the luscious filling— ensuring every bite is packed with flavor, creaminess, and texture.
- 1 ½ cups all-purpose flour: The fundamental base for a tender, flaky crust that holds your filling perfectly.
- ½ cup unsalted butter, chilled and cubed: Adds richness and flakiness to the crust, giving a buttery aroma that’s irresistible.
- ¼ tsp salt: Enhances the sweetness and balances the flavors in both crust and filling.
- 3-4 tbsp ice-cold water: Helps bring the dough together without making it tough.
- 1 cup shredded coconut: Whether sweetened or unsweetened, it’s the star ingredient that delivers that authentic coconut flavor and chewiness.
- 1 cup granulated sugar: Sweetens the filling just right without overpowering the natural coconut taste.
- 3 large eggs: Provide structure and a creamy texture to the custard filling.
- 1 cup milk (or coconut milk for extra flavor): Adds moisture and creaminess that make the filling luscious.
- 1 tsp vanilla extract: Brings warmth and depth, enhancing the coconut’s natural sweetness.
- ¼ cup melted butter: Adds richness and smoothness to the filling’s texture.
- 2 tbsp all-purpose flour (or cornstarch): Acts as a gentle thickener for the custard, ensuring it sets perfectly.
- A pinch of salt: Balances the sweetness and highlights the coconut flavor.
- ¼ cup toasted shredded coconut (for garnishing): Provides a crunchy, toasty contrast that finishes the pie beautifully.
How to Make Classic Coconut Pie Recipe
Step 1: Make the Crust
Start by combining the all-purpose flour and salt in a bowl. Cut in the cold, cubed butter with a pastry cutter or fork until the mixture resembles coarse crumbs, a key step to achieving that flaky texture everyone loves. Slowly add the ice-cold water, tablespoon by tablespoon, mixing just until the dough holds together. Form the dough into a disk, wrap it tightly in plastic, and chill it in the fridge for at least one hour to relax the gluten and firm up the butter.
Step 2: Prepare the Filling
In a large bowl, whisk together sugar, eggs, milk, melted butter, vanilla extract, flour, and a pinch of salt until you get a smooth, velvety custard base. Then gently fold in the shredded coconut; this is where your pie begins to sing with tropical, chewy goodness. The combination of ingredients ensures a creamy, rich filling with just the right thickness once baked.
Step 3: Assemble and Bake
Preheat your oven to 350°F (175°C) to get it ready for baking. Roll out the chilled dough on a floured surface to fit a 9-inch pie dish, pressing it gently into the dish and trimming any excess. Pour your luscious coconut filling into the crust and spread evenly. Pop the pie into the oven and bake for 45 to 50 minutes. Keep an eye on it; once the filling sets and the top turns a warm golden color, it’s done. If the crust edges brown too quickly during baking, cover them lightly with foil to prevent burning.
Step 4: Cool and Garnish
After baking, patience is key—allow the pie to cool completely to let the custard set and the flavors meld beautifully. Once cooled, sprinkle the toasted shredded coconut on top for a lovely crunch and an extra layer of coconut flavor that makes this Classic Coconut Pie Recipe truly unforgettable.
How to Serve Classic Coconut Pie Recipe

Garnishes
Besides the toasted shredded coconut sprinkled on top, you can add a dollop of freshly whipped cream or even a drizzle of caramel sauce to amp up the indulgence factor. A few fresh berries also complement the pie’s sweetness and add a splash of color for a stunning presentation.
Side Dishes
This pie pairs wonderfully with a simple cup of coffee or a dollop of vanilla ice cream for contrast in temperature and texture. If serving at a gathering, fresh fruit salad or lightly spiced chai tea can be excellent companions, balancing the pie’s richness.
Creative Ways to Present
For a fun twist, serve individual mini pies or tartlets using this same Classic Coconut Pie Recipe filling. You could also cut the pie into bite-sized squares and arrange them on a platter for a party-friendly treat that’s as pretty as it is delicious.
Make Ahead and Storage
Storing Leftovers
Once cooled, cover your coconut pie tightly with plastic wrap or foil and store it in the refrigerator. It will stay delicious and fresh for up to 3 days, making it a perfect make-ahead dessert for busy weeks or special occasions.
Freezing
If you want to keep your pie for longer, wrap it securely in plastic wrap and then aluminum foil before freezing. It freezes well for up to one month. When you’re ready to enjoy, thaw it overnight in the fridge to maintain its texture and flavor.
Reheating
For that just-baked warmth sensation, gently reheat individual slices in the microwave for about 20-30 seconds or place the whole pie in a low oven (around 300°F or 150°C) for 10-15 minutes. Just be careful not to overheat, so the filling doesn’t curdle or dry out.
FAQs
Can I use shredded coconut that isn’t sweetened?
Absolutely! You can use either sweetened or unsweetened shredded coconut depending on your sweetness preference. Unsweetened will make the pie a bit less sweet, so you can always adjust the sugar amount slightly to suit your taste.
Is there a dairy-free version of this Classic Coconut Pie Recipe?
Yes! Swap out the regular milk for coconut milk and use a dairy-free butter alternative for both the crust and filling. This will preserve the rich coconut flavor while keeping it dairy-free.
Can I make the crust ahead of time?
Definitely. You can prepare the pie crust dough up to 2 days ahead and keep it wrapped in the refrigerator. Just let it sit at room temperature for 10 minutes before rolling it out to make it easier to handle.
How do I know when the pie filling is fully baked?
The filling should be mostly set but still have a slight jiggle in the center when you gently shake the pie. It will firm up more as it cools. Avoid overbaking, or the custard can crack or become rubbery.
Can I substitute cornstarch for flour in the filling?
Yes, cornstarch works well as a thickener and can be used instead of flour for a slightly glossier finish. Use the same amount called for in the recipe to keep the filling consistent.
Final Thoughts
This Classic Coconut Pie Recipe is a wonderful way to bring a tropical touch to your table with timeless and satisfying results. From the tender crust to the luscious coconut-filled custard, this pie is sure to become a beloved favorite in your dessert rotation. I can’t wait for you to try it and share this sweet, coconutty joy with the people you love!
“`
Print
Classic Coconut Pie Recipe
- Prep Time: 30 minutes
- Cook Time: 50 minutes
- Total Time: 2 hours 10 minutes
- Yield: 8 servings
- Category: Dessert
- Method: Baking
- Cuisine: American
Description
This Classic Coconut Pie recipe combines a flaky homemade crust with a rich and creamy coconut filling, offering a delightful dessert perfect for any occasion. The pie features a luscious blend of shredded coconut, eggs, milk, and vanilla, baked to golden perfection and topped with toasted coconut for added texture and flavor.
Ingredients
For the Crust:
- 1 ½ cups all-purpose flour
- ½ cup unsalted butter, chilled and cubed
- ¼ tsp salt
- 3–4 tbsp ice-cold water
For the Filling:
- 1 cup shredded coconut (sweetened or unsweetened)
- 1 cup granulated sugar
- 3 large eggs
- 1 cup milk (or coconut milk for extra flavor)
- 1 tsp vanilla extract
- ¼ cup melted butter
- 2 tbsp all-purpose flour (or cornstarch)
- A pinch of salt
For Garnishing:
- ¼ cup toasted shredded coconut
Instructions
- Make the Crust: Combine the all-purpose flour and salt in a large bowl. Cut in the chilled, cubed unsalted butter using a pastry cutter or a fork until the mixture resembles coarse crumbs. Gradually add ice-cold water, one tablespoon at a time, mixing continuously until the dough just comes together. Form the dough into a disk, wrap it tightly in plastic wrap, and refrigerate for at least 1 hour to chill.
- Roll Out the Dough: On a lightly floured surface, roll out the chilled dough to fit a 9-inch pie dish. Carefully transfer the dough to the pie dish, pressing it evenly into the bottom and sides. Trim any excess dough from the edges.
- Prepare the Filling: In a large mixing bowl, whisk together granulated sugar, eggs, milk (or coconut milk), melted butter, vanilla extract, flour (or cornstarch), and a pinch of salt until the mixture is smooth and well combined. Gently fold in the shredded coconut until evenly distributed.
- Assemble and Bake: Preheat the oven to 350°F (175°C). Pour the prepared filling into the pie crust, spreading it evenly. Bake the pie for 45 to 50 minutes, or until the filling is set and the top is golden brown. To prevent the crust edges from over-browning, cover them with aluminum foil halfway through the baking process if needed.
- Cool and Garnish: Remove the pie from the oven and allow it to cool completely on a wire rack. Once cooled, garnish the top with the toasted shredded coconut for added texture and enhanced coconut flavor. Slice and serve.
Notes
- Use coconut milk instead of regular milk to intensify the coconut flavor.
- Cover the pie crust edges with foil halfway through baking to prevent burning.
- Refrigerate the dough for at least one hour to ensure a flaky crust.
- For a gluten-free version, substitute the all-purpose flour in the crust and filling with a gluten-free flour blend.
- Serve chilled or at room temperature depending on your preference.

