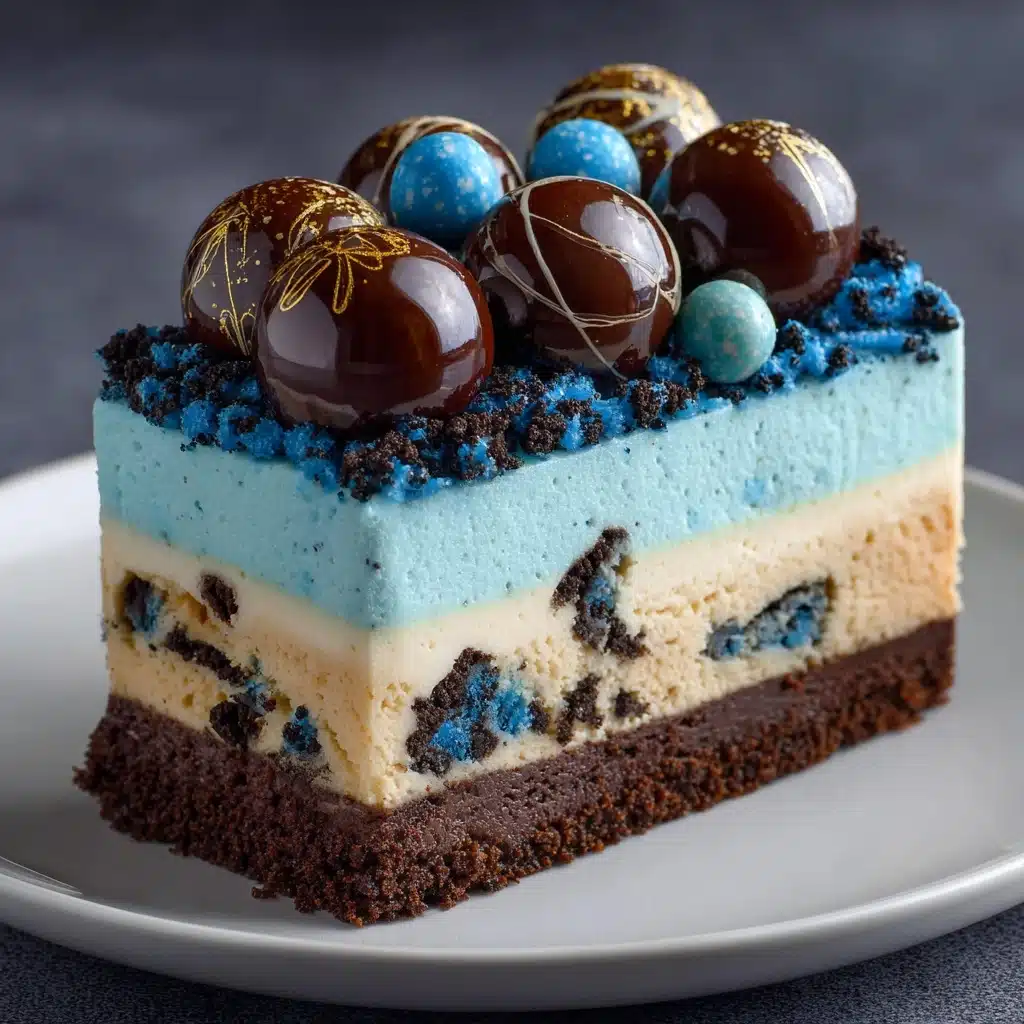
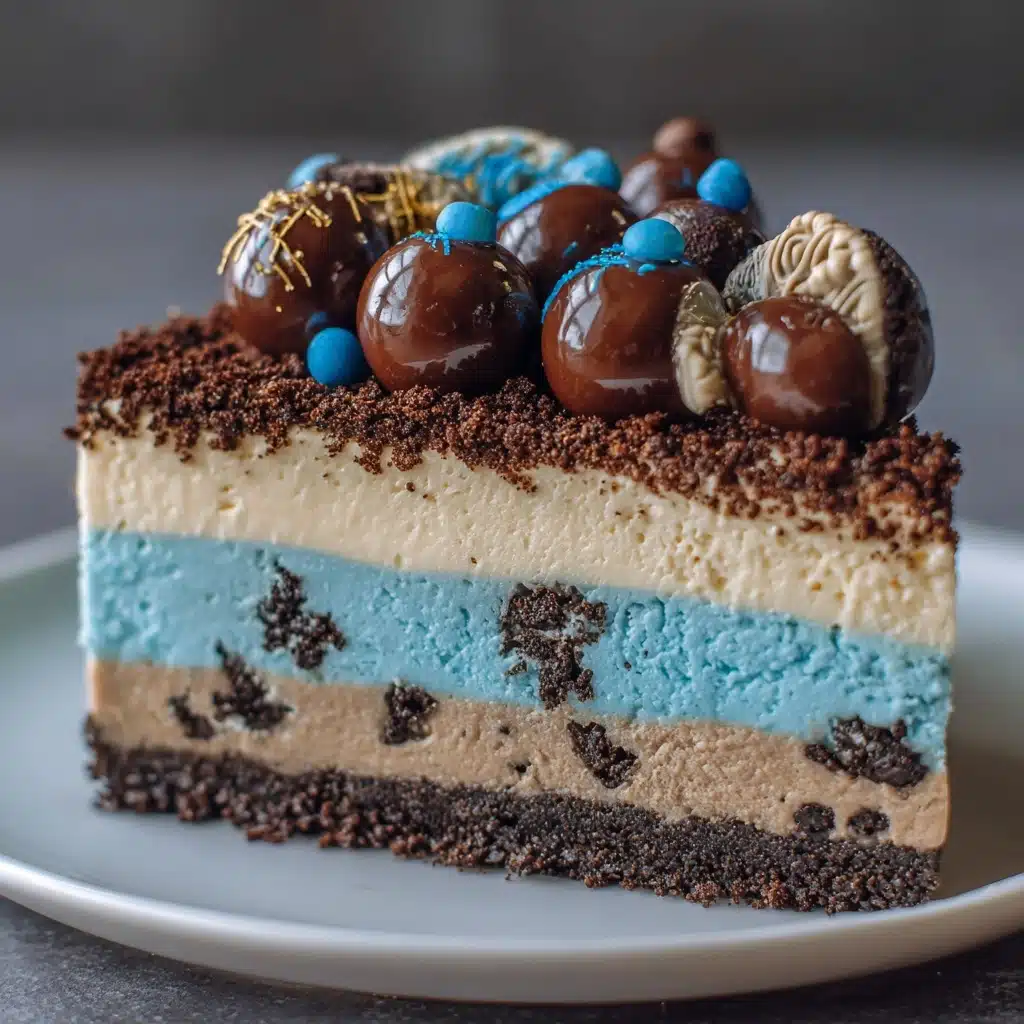
If you’ve ever wanted to bring pure joy to the dessert table, Cookie Monster Cheesecake: A Fun and Indulgent Treat is your ticket! This whimsical cheesecake bursts with bright blue color, big cookie chunks, and playful toppings that turn every slice into a celebration. Whether you’re baking for a birthday, a family gathering, or simply to treat yourself, this showstopper is guaranteed to make everyone smile. The velvety, creamy filling pairs perfectly with a chocolate cookie crust, and the best part? It’s as much fun to make as it is to eat!
Ingredients You’ll Need
Every magical bite starts with simple, familiar ingredients. Each one plays a starring role in creating that iconic taste, dreamy texture, and signature Cookie Monster pop of color. Here’s what you’ll need and why it matters:
- Chocolate sandwich cookies (like Oreos): These form the irresistible, chocolatey base that supports the whole cheesecake.
- Melted butter: Helps the cookie crust bind together and adds richness.
- Cream cheese (softened): The heart of any cheesecake, lending creamy, tangy goodness to every bite.
- Granulated sugar: Sweetens the filling just enough to balance the tartness of the cream cheese.
- Large eggs: Provide structure and ensure a smooth, custardy texture.
- Vanilla extract: Rounds out the flavors with a warm, comforting note.
- Sour cream: Makes the filling extra silky and adds a gentle tang.
- Heavy cream: Contributes to the cheesecake’s luscious, melt-in-your-mouth feel.
- Blue gel food coloring: The secret to that vibrant Cookie Monster blue—go for gel to avoid thinning the batter!
- Chopped chocolate chip cookies: Speckled throughout the filling for bursts of classic cookie flavor.
- Chopped chocolate sandwich cookies: Double down on the cookie fun with even more texture and crunch inside.
- Whipped cream or whipped topping: Adds a cloud-like finish that’s perfect for piling on top.
- Mini chocolate chip cookies: The ultimate playful garnish—who can resist a mini cookie?
- Mini chocolate sandwich cookies: Tuck these in for Cookie Monster’s signature look and extra crunch.
- Additional crushed cookies for garnish: Sprinkle with abandon for a bakery-worthy finish.
How to Make Cookie Monster Cheesecake: A Fun and Indulgent Treat
Step 1: Prepare the Pan and Oven
Begin by preheating your oven to 325°F (163°C). Line the bottom of a 9-inch springform pan with parchment paper and give the sides a light coating of grease. This simple prep step ensures your Cookie Monster Cheesecake: A Fun and Indulgent Treat will release easily, making for picture-perfect slices every time.
Step 2: Make the Chocolate Cookie Crust
Pulse your chocolate sandwich cookies in a food processor until they turn into fine, sandy crumbs. Mix in the melted butter until everything is evenly coated and starts to look like delicious wet sand. Press this mixture firmly into the bottom of your prepared pan and just a bit up the sides—you want a good, sturdy base! Bake for 8 minutes, then let it cool while you start on the filling.
Step 3: Whip Up the Blue Cheesecake Filling
In a large bowl, beat the softened cream cheese with the sugar until the mixture is luxuriously smooth and creamy. Add the eggs one at a time, mixing gently after each to keep things fluffy. Stir in the vanilla, sour cream, and heavy cream. Now comes the fun part: add the blue gel food coloring a few drops at a time until you reach that iconic Cookie Monster shade! Fold in the chopped chocolate chip cookies and sandwich cookies—these bits will dot your cheesecake with pockets of cookie bliss.
Step 4: Bake to Perfection
Pour that gorgeous blue cheesecake batter over the cooled crust and smooth the top with a spatula. Bake for 55 to 65 minutes, watching for the center to be just set with a slight jiggle. Once done, turn off the oven, crack the door, and let the cheesecake cool inside for an hour. This gentle cooling helps prevent cracks and keeps your Cookie Monster Cheesecake: A Fun and Indulgent Treat looking flawless.
Step 5: Chill and Decorate
After its oven nap, transfer the cheesecake to the fridge for at least 4 hours or overnight—patience pays off! When it’s time to serve, crown your masterpiece with swirls of whipped cream, a scatter of mini cookies, and plenty of extra crushed cookies for that unmistakable Cookie Monster flair. Each slice is a party all by itself!
How to Serve Cookie Monster Cheesecake: A Fun and Indulgent Treat

Garnishes
The magic is in the finishing touches! Pile on generous clouds of whipped cream, nestle mini cookies on top, and don’t hold back with the cookie crumbles. These playful garnishes not only make your Cookie Monster Cheesecake: A Fun and Indulgent Treat Instagram-ready, but also add extra flavor and crunch that everyone will love.
Side Dishes
Since this cheesecake is already a star, keep sides simple and refreshing. A bowl of fresh berries or a scoop of vanilla ice cream complements its richness perfectly without stealing the show. If you’re hosting a party, a platter of assorted cookies or a tray of milk shooters adds to the fun, kid-friendly vibe.
Creative Ways to Present
Lean into the playful spirit! Try serving individual slices with a mini cookie tucked into each, or make mini Cookie Monster Cheesecakes in a muffin tin for adorable, single-serve treats. For birthdays, top each piece with a candle or add candy eyes for that unmistakable Cookie Monster look. However you present it, your cheesecake is guaranteed to spark smiles.
Make Ahead and Storage
Storing Leftovers
Wrap any leftover Cookie Monster Cheesecake: A Fun and Indulgent Treat tightly in plastic wrap or store in an airtight container. It will stay fresh and fabulous in the fridge for up to 5 days. The flavors actually deepen a bit after a day, making leftovers just as delightful as the first slice.
Freezing
This cheesecake freezes beautifully! Slice and wrap each piece individually, or wrap the whole cheesecake (minus the toppings) in a double layer of plastic wrap and foil. Freeze for up to 2 months. To serve, thaw overnight in the fridge and decorate with whipped cream and cookies just before serving for best texture and taste.
Reheating
Cheesecake is best enjoyed chilled, but if you like a slightly softer texture, let slices sit at room temperature for 15–20 minutes before serving. Avoid microwaving, as it can affect the creamy texture and toppings.
FAQs
Can I make Cookie Monster Cheesecake: A Fun and Indulgent Treat without a springform pan?
Absolutely! While a springform pan makes serving easier, you can use a deep 9-inch cake pan lined with parchment. Just be sure to let the cheesecake cool completely and use the parchment to lift it out gently.
How do I get the perfect Cookie Monster blue color?
Gel food coloring is your best friend here. Start with a few drops and add more as needed until you hit that vibrant blue. Because gel is concentrated, you’ll get bold color without making the batter too runny.
What’s the best way to cut neat cheesecake slices?
Use a long, sharp knife dipped in hot water and wiped dry between cuts. This trick helps you glide through the creamy filling and crunchy crust for picture-perfect slices.
Can I use low-fat cream cheese or a dairy-free alternative?
You can substitute low-fat cream cheese or a dairy-free option, but keep in mind the texture may be slightly less rich and creamy. The result will still be delicious and fun!
Can I make this recipe ahead for a party?
Definitely! In fact, Cookie Monster Cheesecake: A Fun and Indulgent Treat tastes best when chilled overnight. Decorate just before serving to keep the toppings fresh and vibrant.
Final Thoughts
If you’re looking for a dessert that’s as fun to make as it is to eat, Cookie Monster Cheesecake: A Fun and Indulgent Treat is truly a must-try. It’s guaranteed to win hearts, spark conversation, and create memories at any gathering. Give it a whirl—your taste buds (and your inner child) will thank you!
Print
Cookie Monster Cheesecake: A Fun and Indulgent Treat Recipe
- Total Time: 6 hours
- Yield: 12 slices 1x
- Diet: Vegetarian
Description
Cookie Monster Cheesecake is a delightful and visually fun dessert featuring a vibrant blue cream cheese filling studded with chunks of chocolate chip and chocolate sandwich cookies, all nestled on a rich chocolate cookie crust. Perfect for parties or a playful treat, this recipe combines the creamy indulgence of cheesecake with the nostalgic crunch of cookies for a unique and kid-friendly dessert.
Ingredients
For the crust:
- 24 chocolate sandwich cookies (like Oreos)
- 5 tablespoons melted butter
For the filling:
- 3 (8-ounce) blocks cream cheese, softened
- 3/4 cup granulated sugar
- 3 large eggs
- 1 teaspoon vanilla extract
- 1/2 cup sour cream
- 1/4 cup heavy cream
- Blue gel food coloring, a few drops
- 1/2 cup chopped chocolate chip cookies
- 1/2 cup chopped chocolate sandwich cookies
For the topping:
- 1 cup whipped cream or whipped topping
- Mini chocolate chip cookies
- Mini chocolate sandwich cookies
- Additional crushed cookies for garnish
Instructions
- Preheat and Prepare Pan: Preheat your oven to 325°F (163°C). Line the bottom of a 9-inch springform pan with parchment paper and grease the sides to prevent sticking.
- Make the crust: Using a food processor, pulse chocolate sandwich cookies into fine crumbs. Combine the crumbs with melted butter until the mixture is evenly moistened. Press this mixture firmly onto the bottom and slightly up the sides of the pan to form the crust. Bake for 8 minutes, then remove and let cool completely.
- Prepare the filling: In a large mixing bowl, beat the softened cream cheese and granulated sugar together until smooth and creamy. Add the eggs one at a time, mixing on low speed after each addition to incorporate without overbeating. Stir in vanilla extract, sour cream, and heavy cream until fully combined.
- Add color and cookies: Add a few drops of blue gel food coloring to achieve the iconic Cookie Monster blue. Gently fold in the chopped chocolate chip cookies and chopped chocolate sandwich cookies, distributing them evenly throughout the filling.
- Assemble and bake: Pour the filling mixture over the cooled crust and smooth the top with a spatula. Bake in the preheated oven for 55 to 65 minutes, or until the center is just set but still slightly jiggly to the touch.
- Cool the cheesecake: Turn off the oven and crack the door open; let the cheesecake cool inside the oven for 1 hour to prevent cracking. Afterward, transfer the cheesecake to the refrigerator and chill for at least 4 hours or preferably overnight to fully set.
- Add topping and serve: Before serving, spread whipped cream or whipped topping over the cheesecake. Decorate with mini chocolate chip cookies, mini chocolate sandwich cookies, and sprinkle additional crushed cookies on top to create the fun and iconic Cookie Monster appearance.
Notes
- Use gel food coloring to maintain the cheesecake’s texture without thinning the batter while achieving vibrant blue color.
- This recipe can be adapted to make mini cheesecakes using a muffin tin; reduce baking time to approximately 20–22 minutes accordingly.
- Ensure cream cheese is softened properly to avoid lumps in the filling.
- Allow the cheesecake to cool gradually for best texture and to minimize cracking.
- Prep Time: 25 minutes
- Cook Time: 1 hour
- Category: Dessert
- Method: Baking
- Cuisine: American
Nutrition
- Serving Size: 1 slice
- Calories: 510
- Sugar: 32g
- Sodium: 360mg
- Fat: 35g
- Saturated Fat: 20g
- Unsaturated Fat: 13g
- Trans Fat: 0g
- Carbohydrates: 42g
- Fiber: 1g
- Protein: 7g
- Cholesterol: 125mg


