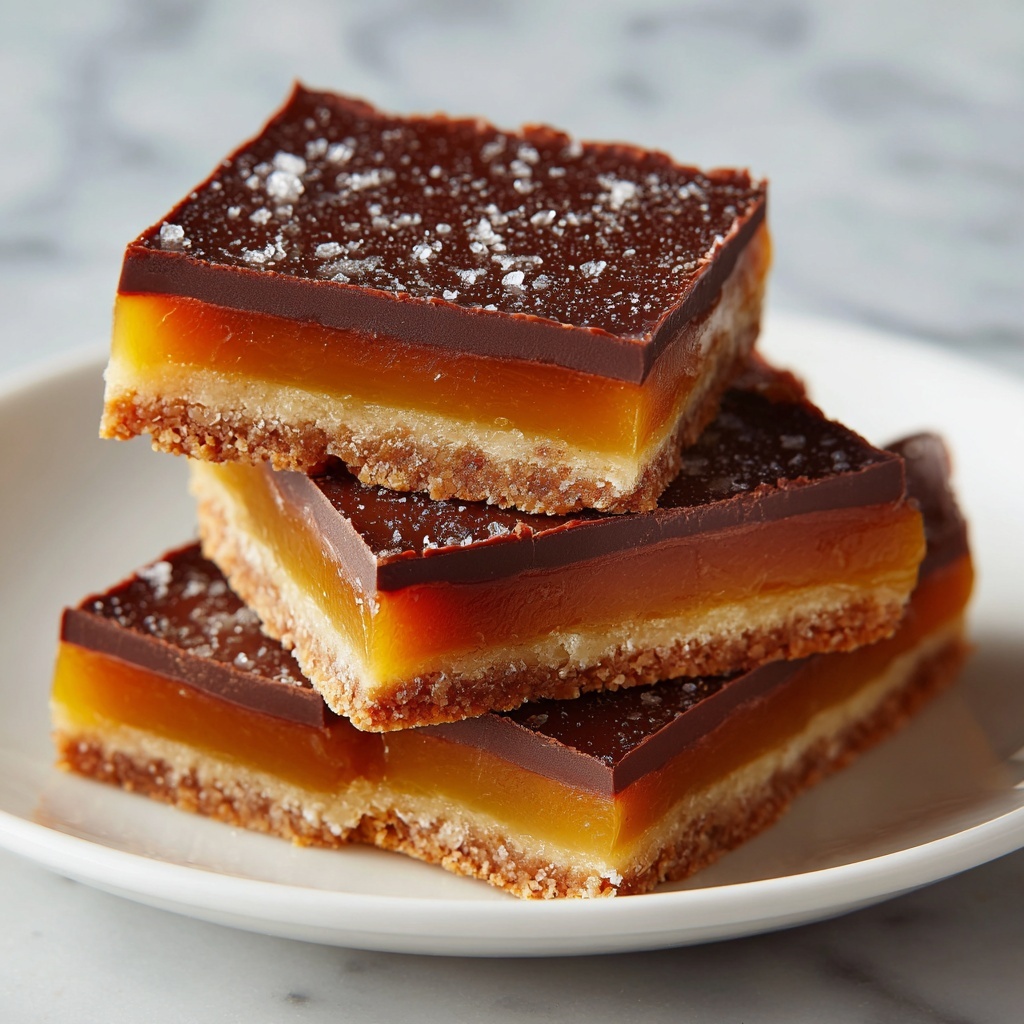
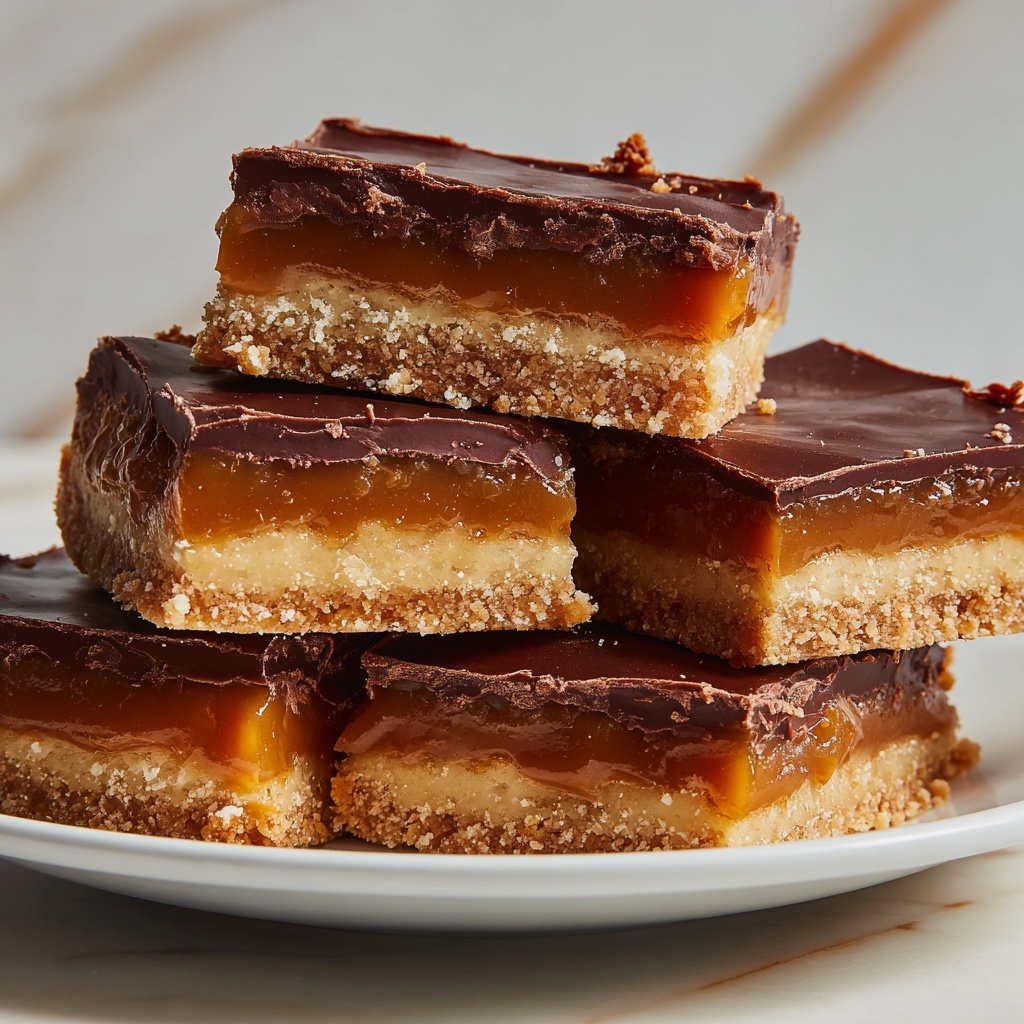
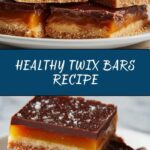
If you’ve ever craved the sweet, crunchy delight of a treat bar but wished there was a better-for-you version, then this Healthy Twix Bars Recipe is going to become your new best friend. Combining the perfect balance of rich chocolate, nutty almond flour, and a hint of natural sweetness from maple syrup, these bars deliver all the satisfaction of a classic candy bar without the guilt. Trust me, whether you want a quick energy boost, a lunchbox treat, or a post-workout indulgence, these bars check every box with wholesome ingredients and irresistible flavor.
Ingredients You’ll Need
All the magic starts with some simple, wholesome ingredients that work together to create the perfect texture, flavor, and color in your Healthy Twix Bars Recipe. Every item plays an important role, giving you layers of taste and that signature chewy-crunchy bite.
- Almond flour: This forms the crunchy, nutty base that’s packed with protein and a great gluten-free alternative to regular flour.
- Unsweetened cocoa powder: Adds rich chocolate flavor without any added sugar, enhancing the depth of taste.
- Maple syrup: A natural sweetener that brings warmth and moisture to the bars, keeping them soft yet firm.
- Natural peanut butter: Provides creaminess and a hint of salty richness, balancing out the sweetness perfectly.
- Coconut oil: Helps bind everything together while giving the bars a smooth, melt-in-your-mouth texture.
- Sea salt: Just a pinch to elevate all the flavors by adding a subtle savory contrast.
- Vanilla extract: Enhances all the other flavors with its fragrant, sweet aroma.
- Dark chocolate chips: Used to create the luscious chocolate coating that makes these bars feel truly indulgent.
How to Make Healthy Twix Bars Recipe
Step 1: Mix the Dry Ingredients
Start by combining the almond flour, cocoa powder, and sea salt in a mixing bowl. This blend gives the base its foundation—nutty, chocolaty, and slightly savory—which means every bite will have that perfect bite and flavor.
Step 2: Add the Wet Ingredients
Next, mix in the maple syrup, natural peanut butter, coconut oil, and vanilla extract. Stir these together thoroughly until the mixture becomes uniform and slightly sticky. This step is crucial as it binds all the ingredients together to form the chewy, satisfying texture you want in your bars.
Step 3: Form the Base
Line a baking dish with parchment paper and evenly spread the mixture across it. Press down firmly to create a uniform layer for that classic Twix bar foundation. Getting this layer even will ensure your bars set properly and slice nicely later.
Step 4: Chill the Base
Place the baking dish in the refrigerator for about 20 minutes to allow the base to firm up. This chilling time helps the ingredients meld together and sets the stage for the chocolate topping.
Step 5: Melt and Spread the Chocolate
While the base chills, melt the dark chocolate chips in a microwave-safe bowl using short bursts and stirring in between to avoid burning. Once melted, remove the base from the fridge and pour the chocolate evenly over the top, using a spatula to spread it smoothly for a perfect glossy finish.
Step 6: Final Chill and Cut
Return the dish to the refrigerator for another 30 minutes, allowing the chocolate to harden completely. When set, lift the parchment out and cut the creation into 12 bars. Now you’re ready to enjoy your homemade, guilt-free indulgence!
How to Serve Healthy Twix Bars Recipe

Garnishes
Sprinkle a tiny pinch of flaky sea salt over the chocolate layer right after spreading it for an extra burst of flavor contrast. You can also add finely chopped nuts or a drizzle of melted peanut butter for a pretty, gourmet touch that makes these bars look as good as they taste.
Side Dishes
Pair these bars with a fresh fruit salad or a warm cup of herbal tea for a balanced snack experience. The natural sweetness of the bars complements tart fruits like berries, while tea refreshes your palate without overwhelming those rich flavors.
Creative Ways to Present
Arrange your Healthy Twix Bars Recipe on a pretty platter lined with parchment paper and serve as a delightful treat for gatherings or lunchboxes. You could also wrap individual bars in wax paper tied with twine for an adorable homemade gift or party favor that friends will rave about.
Make Ahead and Storage
Storing Leftovers
Keep your bars fresh by storing them in an airtight container in the refrigerator. They’ll stay delicious and firm for up to one week, making them ideal for quick grab-and-go snacks any time you need an energy boost.
Freezing
For longer storage, wrap bars individually in plastic wrap and place them in a freezer-safe bag. Frozen bars keep beautifully for up to two months. Just thaw them in the fridge overnight before enjoying to preserve their texture and flavor.
Reheating
These bars are best enjoyed chilled or at room temperature, but if you want to soften them slightly, microwave a bar for about 10 seconds. This warms the chocolate just enough without melting the bars completely, retaining the wonderful chewy texture.
FAQs
Can I substitute any ingredients in the Healthy Twix Bars Recipe?
Absolutely! If you’re allergic to peanuts, try almond or cashew butter instead. Maple syrup can be swapped with honey or agave nectar, though the flavor will vary slightly. Just keep the measurements the same for the best results.
How long do Healthy Twix Bars last?
When refrigerated, these bars stay fresh for about a week. If you plan to keep them longer, freezing is your friend and they can last up to two months. Just make sure they’re stored in an airtight container for optimal freshness.
Are these bars suitable for a gluten-free diet?
Yes! Since the recipe uses almond flour instead of wheat flour, these Healthy Twix Bars Recipe are naturally gluten-free, making them a fantastic treat for anyone avoiding gluten.
Can I make this recipe vegan?
Definitely. The recipe is mostly plant-based already. Just ensure your chocolate chips are dairy-free and use a vegan-friendly maple syrup, which is usually the case.
What is the best way to cut the bars without crumbling?
Wait until the bars are fully chilled so the chocolate is set firm. Use a sharp knife and press down gently but firmly in a single motion to avoid breaking apart. Wiping the knife clean between cuts also helps keep edges neat.
Final Thoughts
There’s something incredibly rewarding about making your own treats, especially when they taste this good and are packed with wholesome ingredients. This Healthy Twix Bars Recipe will quickly become your favorite sweet snack with its perfect balance of chocolatey, nutty, and sweet flavors. Give it a try, and soon you’ll have a batch ready anytime you want a little bite of happiness!
Print
Healthy Twix Bars Recipe
- Prep Time: 10 minutes
- Cook Time: 0 minutes
- Total Time: 45 minutes
- Yield: 12 bars
- Category: Snack
- Method: No-Cook
- Cuisine: American
- Diet: Gluten Free
Description
These Healthy Twix Bars offer a nutritious twist on the classic candy bar. Made with wholesome ingredients like almond flour, natural peanut butter, and dark chocolate, these no-bake treats satisfy your sweet tooth while providing a good dose of healthy fats and protein. Perfect for a guilt-free snack or dessert, they come together quickly and require just refrigeration to set.
Ingredients
Bar Base
- 1 cup almond flour
- 1/2 cup unsweetened cocoa powder
- 1/4 teaspoon sea salt
- 1/4 cup maple syrup
- 1/2 cup natural peanut butter
- 1/4 cup coconut oil
- 1 teaspoon vanilla extract
Chocolate Topping
- 1/2 cup dark chocolate chips
Instructions
- Mix dry ingredients: In a mixing bowl, combine the almond flour, unsweetened cocoa powder, and sea salt. Stir well to evenly distribute the ingredients.
- Add wet ingredients: Add the maple syrup, natural peanut butter, coconut oil, and vanilla extract to the dry mixture. Stir thoroughly until a smooth, uniform batter forms.
- Prepare the base: Line a baking dish with parchment paper, then spread the mixture evenly inside to form the bar base layer.
- Chill base: Place the baking dish in the refrigerator and let the base set for about 20 minutes until firm.
- Melt chocolate: Melt the dark chocolate chips in a microwave-safe bowl by heating in short intervals and stirring until smooth and fully melted.
- Top with chocolate: Remove the base from the fridge and pour the melted chocolate over it. Use a spatula to spread the chocolate evenly over the top layer.
- Set chocolate layer: Return the baking dish to the fridge for approximately 30 minutes to allow the chocolate topping to solidify completely.
- Slice and serve: Once set, remove the bars from the fridge, cut into 12 bars, and serve.
Notes
- Ensure the peanut butter is natural with no added sugars for a healthier bar.
- You can substitute maple syrup with honey if preferred, but flavor and sweetness may vary.
- Use high-quality dark chocolate with at least 70% cocoa content for the best taste and health benefits.
- Store bars in an airtight container in the refrigerator to maintain freshness for up to one week.
- For a nut-free option, substitute almond flour with seed flour like sunflower seed flour and use sunflower seed butter instead of peanut butter.
