
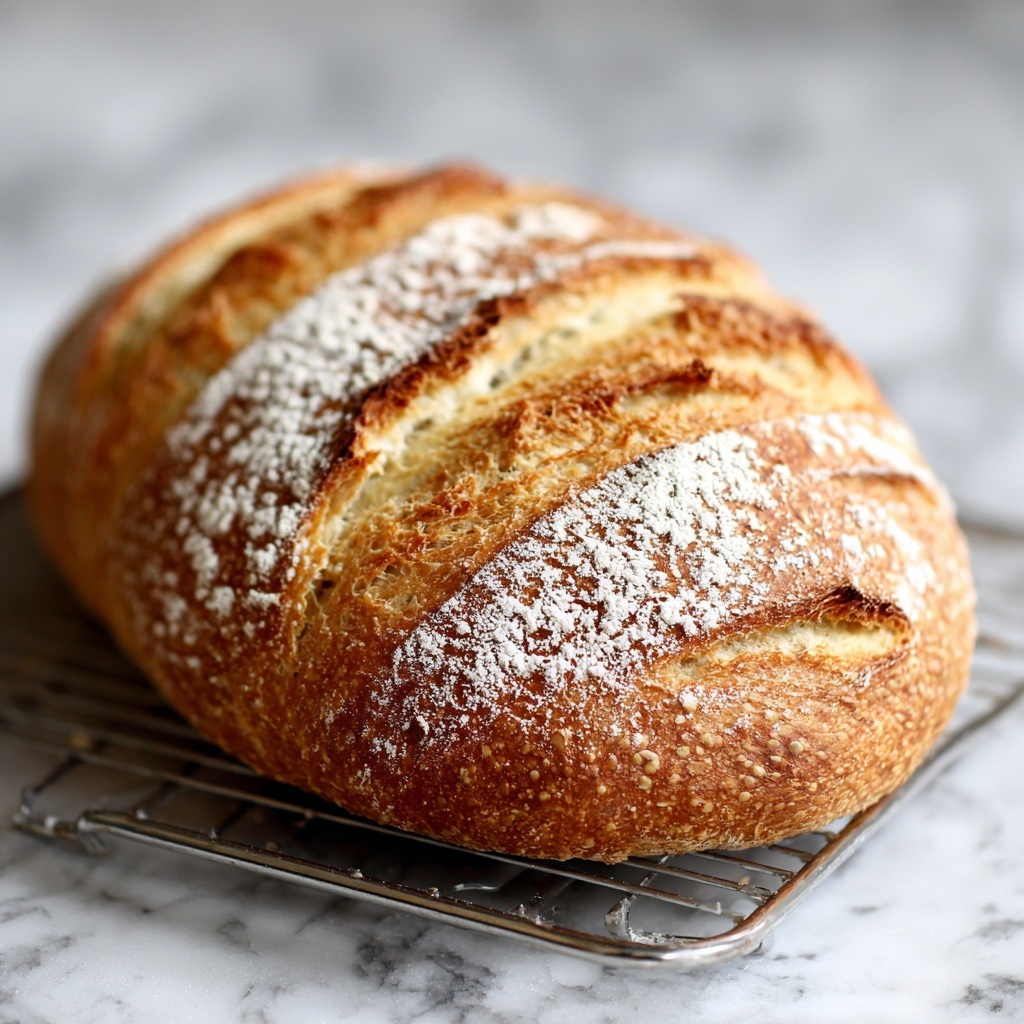
If you have ever dreamed of creating artisan-quality bread right in your own kitchen, then this Homemade Sourdough Batard Bread Recipe is going to be a game-changer for you. This recipe brings together the magic of a slow fermentation process with simple, wholesome ingredients to produce a loaf with a crusty exterior, an open crumb, and a delightful tangy flavor that only sourdough can offer. Whether you’re a seasoned baker or a curious beginner, making this batard bread at home is one of the most rewarding experiences, filling your kitchen with the intoxicating aroma of freshly baked bread and giving you a real sense of accomplishment.
Ingredients You’ll Need
This recipe calls for ingredients that are simple but essential, each playing a unique role in the texture, flavor, and structure of your sourdough batard. It’s truly amazing how a few pantry staples can come together to create something this special.
- 500 g bread flour (unbleached, high-protein flour like King Arthur): Provides the strong gluten structure needed for that perfect chewy crumb.
- 350 g water (room temperature): Hydrates the flour and activates the yeast and enzymes for fermentation.
- 10 g salt (fine sea salt): Enhances flavor and controls fermentation.
- 2.5 g instant yeast: Kickstarts fermentation for a reliable rise alongside natural yeast action.
- 5 g diastatic malt powder: Boosts yeast activity and helps develop a beautiful golden crust.
- 0.5 g ascorbic acid powder: Strengthens the dough by improving gluten formation.
- 100 g bread flour (for poolish): Used to prepare the poolish, a flavorful pre-ferment that adds complexity.
- 100 g water (for poolish): Keeps the poolish hydrated, encouraging vigorous yeast activity.
- 0.5 g instant yeast (for poolish): Ensures the poolish develops with the right bubbly texture.
How to Make Homemade Sourdough Batard Bread Recipe
Step 1: Prepare the Poolish
Start by mixing 100 grams of bread flour, 100 grams of water, and 0.5 grams of instant yeast in a bowl. Stir until smooth, cover, and let it rest at room temperature for about 12 hours. This slow fermentation gives the poolish a bubbly surface and slightly domed shape, which is your visual cue that it’s ready to add deep flavor and texture to the dough.
Step 2: Autolyse Phase
In a large bowl, whisk together 400 grams of bread flour with 250 grams of water until no dry flour remains. Cover this mix and let it rest for 30 minutes. Autolyse is like a little workout for the dough, aligning gluten strands so the dough becomes easier to handle and develops that signature chewiness.
Step 3: Mix in the Rest
Sprinkle 10 grams of salt, 2 grams of instant yeast, 5 grams of diastatic malt powder, and 0.5 grams of ascorbic acid powder over your autolysed dough. Add the entire poolish and fold everything together until well combined, forming a uniform dough. This step brings all your flavor, strength, and texture components together.
Step 4: Bulk Fermentation with Stretch-and-Folds
Set your dough aside at 75°F for bulk fermentation, performing four stretch-and-fold cycles every 30 minutes. Imagine reaching under the dough, lifting, and folding it over itself from all sides. This technique strengthens the gluten network and traps air, helping your batard develop a light and open crumb without intense kneading. Aim for a total bulk fermentation time of about 2 hours.
Step 5: Cold Fermentation
Transfer the dough to a lightly oiled container and refrigerate for 12 to 18 hours. This slow, cold ferment doesn’t just deepen the flavor; it also gives you flexibility in baking timing, allowing the dough to develop beautiful complexity overnight or throughout your day.
Step 6: Pre-shaping and Resting
Once your cold ferment is done, turn the dough out onto a floured surface and gently flatten it into a rectangle. Fold the dough by bringing the top third down and the bottom third up, then rotate and repeat. Let the dough rest seam side up for about 15 minutes to relax before final shaping.
Step 7: Final Shaping into a Batard
After resting, dust your work surface with flour and flatten the dough into a 10×8-inch rectangle. Fold the sides toward the center and seal the seams with your fingertips. Turn the dough seam side down and roll it into a 12-inch long batard loaf. Place it on parchment paper, cover with a proofing basket liner or a towel, and proof at room temperature until it gently springs back when poked—about 60 to 75 minutes.
Step 8: Baking Your Bread
Preheat your oven to 475°F with a baking stone or steel on the middle rack and a steam pan at the bottom, both for at least 45 minutes. Transfer the loaf (on parchment) to the hot stone, score a 6-inch slash down the center with a lame, then quickly add 1 cup of hot water to the steam pan and close the door. Bake for 15 minutes, reduce temperature to 440°F, remove the steam pan after another 15 minutes, and finish baking until the crust is a rich, deep golden brown.
Step 9: Cooling
Remove your loaf carefully with the parchment paper and place it on a cooling rack. Resist the temptation to slice it right away—letting it cool for about 2 hours ensures the crumb finishes setting properly and gives you that perfect texture and flavor in every bite.
How to Serve Homemade Sourdough Batard Bread Recipe
Garnishes
This batard bread shines on its own but can be enhanced beautifully with simple garnishes. A generous slather of cultured butter, a sprinkle of flaky sea salt, or a drizzle of herb-infused olive oil can elevate its rustic charm effortlessly.
Side Dishes
Because of its sturdy yet tender crumb, this bread pairs wonderfully with soups, stews, and hearty salads. Think a creamy tomato bisque or a fresh mixed greens salad with goat cheese—both benefit from the bread’s ability to soak up flavors and add satisfying texture.
Creative Ways to Present
Try slicing the batard thick for rustic toast topped with smashed avocado, a runny poached egg, and pepper flakes. Or hollow it out to create an edible bread bowl perfect for dips like spinach artichoke or chili. The possibilities for presentation are as delicious as they are fun!
Make Ahead and Storage
Storing Leftovers
To keep your Homemade Sourdough Batard Bread fresh, wrap it tightly in a linen bread bag or a clean kitchen towel, and store it at room temperature for up to three days. Avoid plastic bags, which can make the crust soggy, as you want to preserve that perfect crunch!
Freezing
If you want to enjoy this bread over time, slice it before freezing to make portioning easier. Wrap the slices or whole loaf tightly in plastic wrap followed by aluminum foil, then freeze for up to three months. Thaw slowly at room temperature for the best results.
Reheating
To revive your sourdough batard’s fresh-baked magic, sprinkle the crust lightly with water and warm it in a 375°F oven for 5 to 10 minutes. This will restore the crust’s crispness and heat the crumb gently, making every slice taste like it just came out of your oven.
FAQs
What is a batard bread?
A batard is a classic French loaf shape that’s shorter and rounder than a baguette but longer than a boule. It has an open crumb and a crusty exterior, making it perfect for slicing and serving in a variety of ways.
Can I make this bread without diastatic malt powder?
Yes, you can skip the diastatic malt powder if it’s not available. It helps with fermentation and crust color, but your bread will still turn out delicious with a slightly lighter crust and flavor.
Why does this recipe use both yeast and a poolish?
The combination of instant yeast and poolish gives the bread a balanced rise and a complex, mildly tangy flavor. The poolish develops flavor over time, while the instant yeast ensures a reliable and predictable fermentation process.
How can I tell when the bread is properly proofed?
The best test is the poke test: gently press the dough with your finger, and if the indentation springs back slowly but remains slightly visible, it is ready to bake. If it springs back quickly, it needs more time; if it doesn’t spring back, it may be overproofed.
Do I need a baking stone or steel for this recipe?
While a baking stone or steel isn’t absolutely necessary, it dramatically improves oven spring and crust development by providing steady, intense heat. If you don’t have one, use an inverted heavy baking sheet and place a pan of hot water on the oven floor for steam.
Final Thoughts
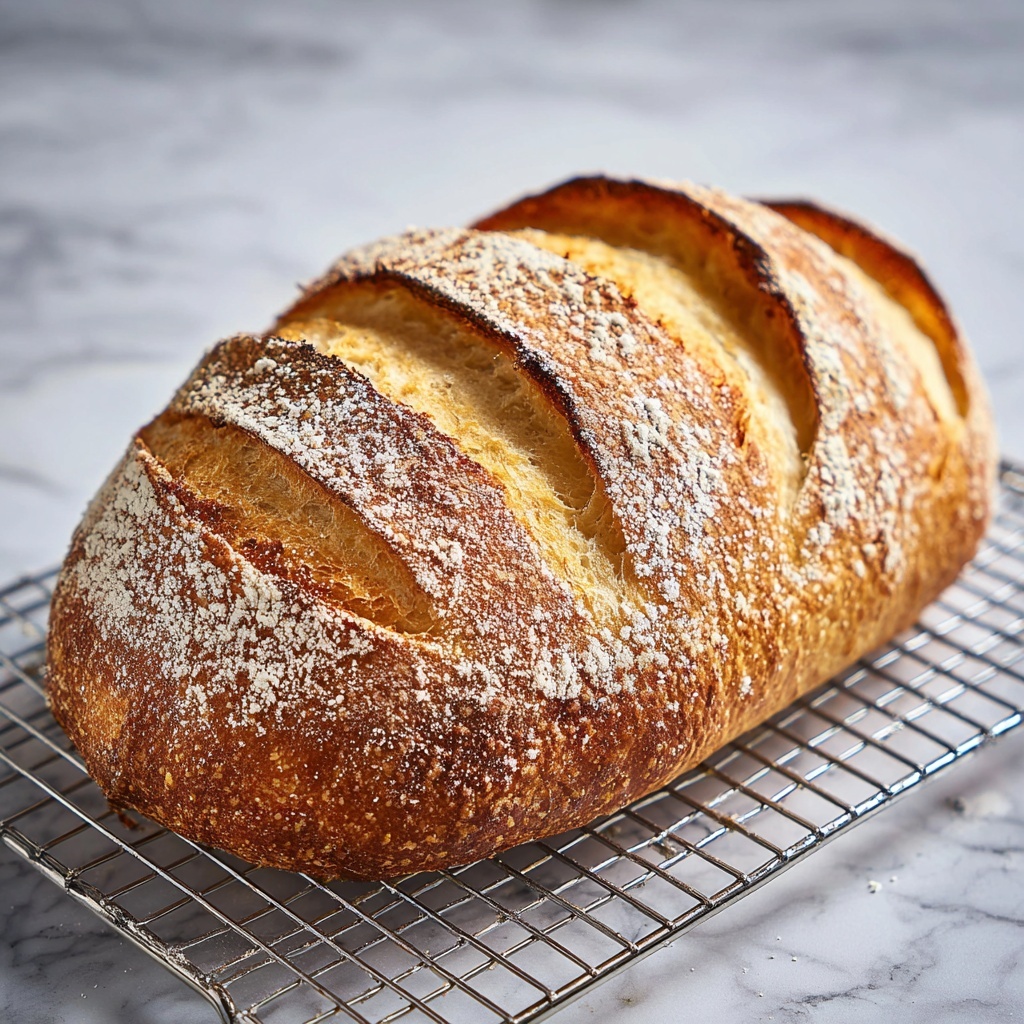
There is something truly magical about pulling a golden, crackling loaf of sourdough batard from your own oven. This Homemade Sourdough Batard Bread Recipe invites you to slow down and savor the process of baking, rewarding you with a versatile, flavorful loaf that enhances nearly any meal. So gather your ingredients, embrace the gentle rhythm of fermentation, and enjoy the delicious satisfaction of making your own artisan bread at home.
Print
Homemade Sourdough Batard Bread Recipe
- Prep Time: 12 hours 45 minutes
- Cook Time: 45 minutes
- Total Time: 13 hours 30 minutes
- Yield: 1 loaf (about 1.5 lbs)
- Category: Bread
- Method: Baking
- Cuisine: French
- Diet: Vegetarian
Description
This Homemade Sourdough Batard Bread recipe guides you through creating a flavorful, crusty loaf using a poolish starter and traditional baking techniques. Featuring a long fermentation process and steam-assisted baking, this bread boasts a complex flavor profile with an airy crumb and a deep golden crust.
Ingredients
Poolish
- 100 g bread flour (unbleached, high-protein flour like King Arthur)
- 100 g water (room temperature)
- 0.5 g instant yeast
Dough
- 400 g bread flour (unbleached, high-protein flour like King Arthur)
- 250 g water (room temperature)
- 10 g salt (fine sea salt)
- 2 g instant yeast
- 5 g diastatic malt powder
- 0.5 g ascorbic acid powder
Instructions
- Prepare the Poolish: In a bowl, mix 100 g bread flour, 100 g water, and 0.5 g instant yeast. Stir until smooth, cover, and let it rest at room temperature for 12 hours until it develops bubbles and a slightly domed surface, indicating readiness.
- Autolyse the Dough: In a large bowl, whisk together 400 g bread flour and 250 g water until no dry flour remains. Cover the bowl and rest the mixture for 30 minutes to align gluten strands, easing dough handling.
- Mix Dough Ingredients: Sprinkle 10 g salt, 2 g instant yeast, 5 g diastatic malt powder, and 0.5 g ascorbic acid powder over the autolysed dough. Add the entire poolish and fold until incorporated into a uniform dough.
- Bulk Fermentation with Stretch-and-Folds: Every 30 minutes during a 2-hour bulk fermentation at 75°F, perform four stretch-and-folds by reaching under one side of the dough, stretching it up, folding it over, and rotating the bowl 90°. This strengthens the dough and develops air pockets.
- Cold Fermentation: Transfer the dough to a lightly oiled container, cover, and refrigerate for 12 to 18 hours to deepen flavor and allow flexible baking timing.
- Pre-shape the Dough: Turn the dough onto a floured surface, flatten into a rectangle, fold the top third down and bottom third up, then rotate 90° and repeat. Rest seam side up for 15 minutes.
- Final Shaping: Dust the surface with flour and flatten the dough into a 10×8-inch rectangle. Fold sides toward center, seal seams with fingertips, turn seam side down, and roll into a 12-inch long batard. Place on parchment and cover for proofing.
- Final Proof: Proof at room temperature (70°F to 75°F) for 60 to 75 minutes until it passes the poke test—slow spring back upon gentle poke.
- Preheat and Bake: Preheat oven to 475°F with a baking stone or steel on the middle rack and steam pan on the floor for at least 45 minutes. Transfer the loaf with parchment to the stone, score a 6-inch slash down the center, pour 1 cup hot water into steam pan, and close oven door. Bake 15 minutes, reduce temperature to 440°F, bake 15 more minutes, remove steam pan, and bake until crust is deep golden brown.
- Cool: Remove loaf using parchment and place on a cooling rack. Allow to cool completely for about 2 hours before slicing.
Notes
- Using a baking stone or steel with steam improves crust texture and oven spring.
- Diastatic malt powder enhances yeast activity and crust browning.
- Ascorbic acid powder strengthens gluten and boosts rise.
- Cold fermentation develops deeper flavor and flexible schedule.
- Perform stretch-and-folds gently to avoid degassing the dough.
- Allow the bread to cool fully to finish the crumb setting before slicing.


