Description
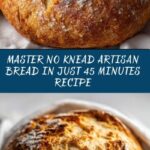
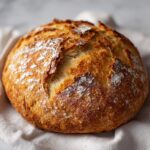
This Master No Knead Artisan Bread recipe lets you enjoy freshly baked, crusty artisan bread at home with minimal effort. Using simple ingredients and no kneading required, this method produces a soft, airy interior and a crunchy golden crust in just about 45 minutes of active hands-on time plus rise periods. Perfect for beginners and bread lovers seeking a rustic, homemade loaf with a professional bakery feel.
Ingredients
Scale
Dry Ingredients
- 2 cups All-purpose flour
- 2 tablespoons All-purpose flour (for dusting and shaping)
- 1 teaspoon Active dry yeast
- 1 teaspoon Sugar
- 1 teaspoon Salt
- Extra flour as needed (to prevent sticking)
Wet Ingredients
- 1 cup Lukewarm water (100-110°F for activating yeast)
Instructions
- Bloom the Yeast: Dissolve the sugar in lukewarm water, then sprinkle the active dry yeast on top. Let the mixture sit for 10-15 minutes until it becomes frothy, indicating the yeast is active and ready to use.
- Mix Dry Ingredients: In a large bowl, combine 2 cups of all-purpose flour with the salt. Pour in the yeast mixture and stir until it forms a soft, sticky dough.
- Shape the Dough: Lightly spray a bowl with oil. Turn the sticky dough out onto a floured board, sprinkle extra flour to prevent sticking, and shape it gently into a smooth ball.
- First Rise: Place the dough in the oiled bowl and cover tightly with plastic wrap. Allow it to rise at room temperature for about 2 hours or until it has doubled in size.
- Prepare for Second Rise: If the dough has been refrigerated, bring it back to room temperature. Shape it again into a ball and let it rise for an additional hour, allowing for better texture and flavor development.
- Preheat Oven: Preheat your oven to 450°F, which is ideal for developing a crispy, golden crust on the bread.
- Heat the Casserole: Place a covered casserole or Dutch oven in the oven while preheating. When hot, carefully remove it from the oven and transfer the dough onto parchment paper inside the casserole. Cover with the lid and return it to the oven.
- Bake the Bread: Bake the bread covered for 25-30 minutes. Remove the lid for the last 5-10 minutes of baking to allow the crust to brown and crisp up beautifully.
- Cool and Enjoy: Remove the bread from the oven and transfer it to a wire rack. Let it cool completely before slicing for the best texture and flavor.
Notes
- The key to this recipe is allowing the dough to rise fully, which develops flavor without the need to knead.
- Using a covered casserole or Dutch oven traps steam and helps form a crispy crust.
- Ensure the water temperature is lukewarm, about 100-110°F, to activate the yeast without killing it.
- You can refrigerate the dough after the first rise and bake it the next day, just allow it to come to room temperature before baking.
- Use parchment paper to easily transfer the dough and prevent sticking inside the hot casserole.