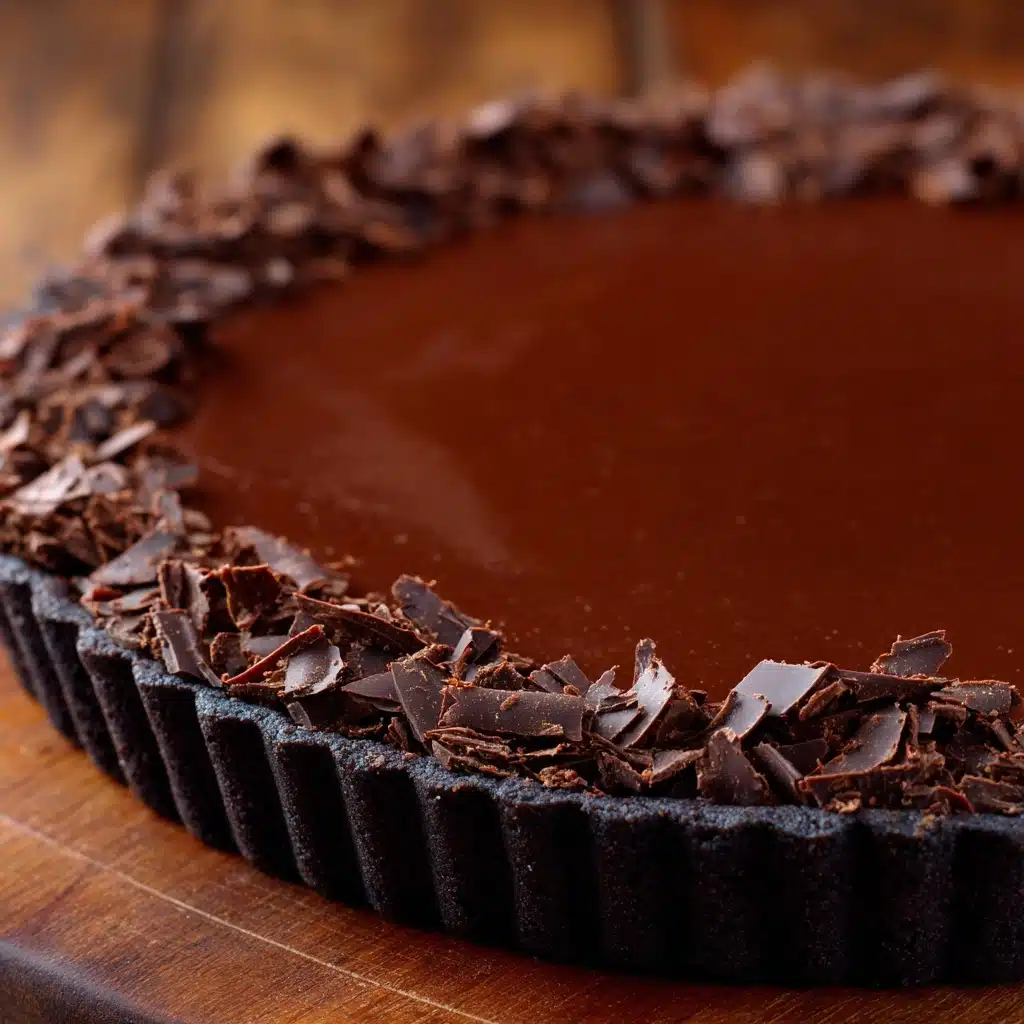
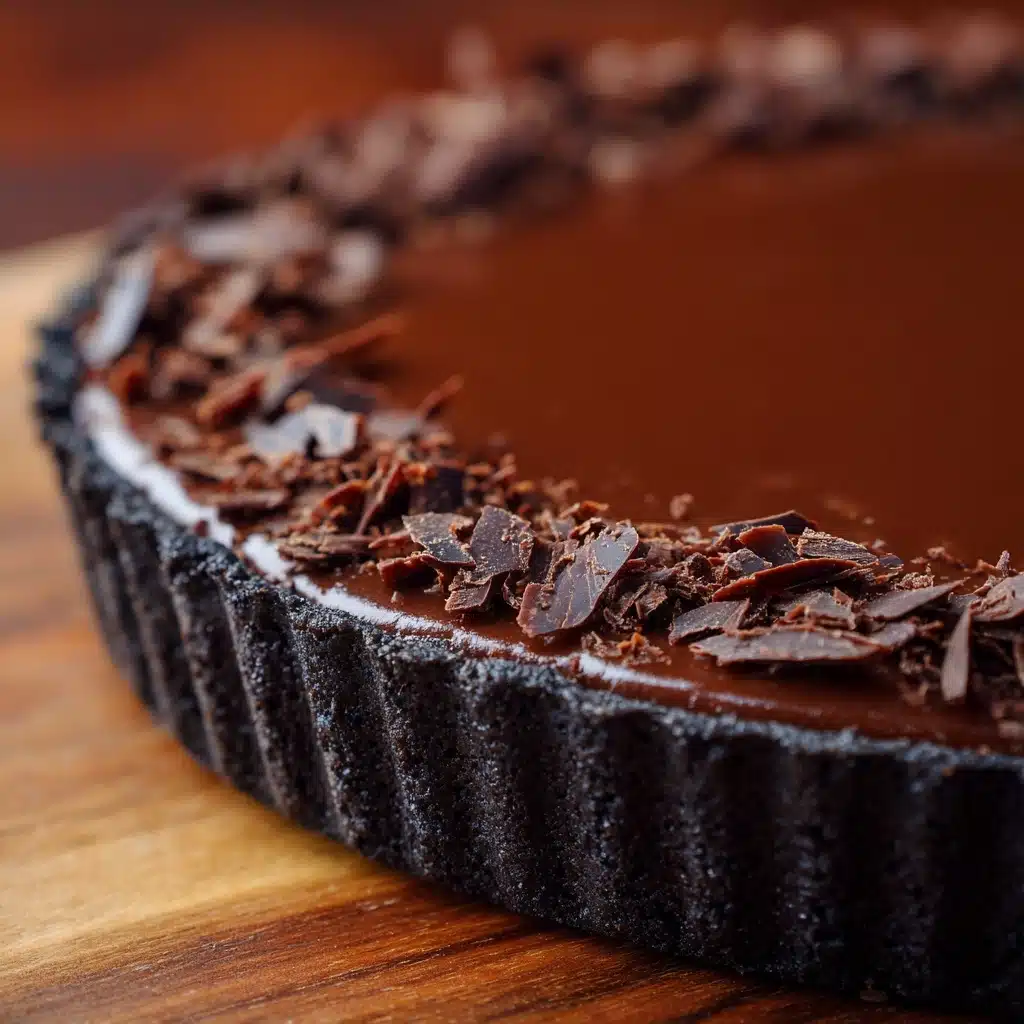
If you’re in the mood for a sweet treat that’s pure comfort and a total crowd-pleaser, look no further than No-Bake Chocolate Pudding Pie. This luscious dessert is all about rich, silky chocolate filling nestled in a buttery crust and topped with pillowy clouds of whipped topping. It’s the kind of recipe that’s as easy as it is irresistible, making it perfect for last-minute gatherings, weeknight cravings, or that moment when you just want to indulge in something chocolatey and nostalgic. Trust me, every bite is a little celebration!
Ingredients You’ll Need
-
Pie Crust
- 1 pre-made graham cracker or chocolate cookie crust (9-inch)
Pudding Filling
- 1 package (3.9 oz) instant chocolate pudding mix
- 2 cups cold milk
- 1/2 teaspoon vanilla extract (optional)
- 8 ounces whipped topping (like Cool Whip), thawed
Garnish (optional)
- Chocolate shavings, mini chocolate chips, or whipped cream
How to Make No-Bake Chocolate Pudding Pie
Step 1: Whisk the Pudding
In a medium mixing bowl, pour in the instant chocolate pudding mix and cold milk. Give it a good whisk for about 2 minutes, until it thickens up and looks glossy and smooth. If you’re using vanilla extract, add it in now to boost the flavor—trust me, that little bit makes a big difference.
Step 2: Fold in the Whipped Topping
Next, gently fold in half of the thawed whipped topping. Use a spatula and light strokes to keep the mixture airy and mousse-like. This step transforms your pudding into a creamy, dreamy filling that feels like a chocolate cloud.
Step 3: Fill the Crust
Pour that luscious filling into your pre-made crust, smoothing it out with the back of a spoon or a spatula. Be sure to get it all the way to the edges so every slice has the perfect ratio of filling to crust.
Step 4: Top with More Whipped Topping
Dollop the remaining whipped topping over the pie and spread it out evenly. Swirl it with your spatula for a pretty, bakery-style finish—because a little flourish goes a long way!
Step 5: Chill and Set
Pop your pie in the refrigerator for at least 4 hours. This time allows the filling to set up beautifully, making for clean slices and the perfect chilled bite.
Step 6: Garnish and Serve
Right before serving, add your favorite garnishes—chocolate shavings, mini chocolate chips, or even extra whipped cream. Each adds a little extra magic to your No-Bake Chocolate Pudding Pie!
How to Serve No-Bake Chocolate Pudding Pie

Garnishes
For a show-stopping finish, sprinkle chocolate shavings, mini chips, or a dusting of cocoa powder over the top. You can even drizzle a little chocolate syrup or scatter a few fresh berries for a pop of color and flavor. The right garnish makes every slice of No-Bake Chocolate Pudding Pie look absolutely irresistible.
Side Dishes
This pie pairs beautifully with a scoop of vanilla ice cream or a handful of fresh, juicy strawberries on the side. If you’re serving it at a party, try pairing it with a hot cup of coffee or a tall glass of cold milk for pure nostalgic bliss.
Creative Ways to Present
Want to wow your guests? Spoon the filling into individual parfait glasses for personal-sized No-Bake Chocolate Pudding Pie cups. Or, use a cookie cutter to cut fun shapes out of the pie for a playful twist. You can even layer the ingredients in mason jars for a fun, portable dessert at picnics or potlucks!
Make Ahead and Storage
Storing Leftovers
To keep your No-Bake Chocolate Pudding Pie fresh, cover it tightly with plastic wrap or foil and store it in the refrigerator. It’ll stay delicious and creamy for up to three days—if it lasts that long!
Freezing
If you want to make it even further ahead, you can freeze the pie (without garnishes) for up to one month. Wrap it well to prevent freezer burn, and thaw in the fridge overnight before serving. The texture will be a bit firmer, but still totally dreamy.
Reheating
No reheating needed here! This pie is meant to be served chilled, straight from the fridge. In fact, it’s even better when it’s icy-cold and perfectly set.
FAQs
Can I use homemade whipped cream instead of whipped topping?
Absolutely! Freshly whipped cream gives a richer, more decadent flavor. Just make sure it’s whipped to stiff peaks so it holds up when folded into the pudding and spread on top.
What can I use if I don’t have a pre-made crust?
You can easily make your own by combining crushed graham crackers or chocolate cookies with melted butter, then pressing the mixture into a pie dish. Chill it for about 30 minutes before adding the filling.
Can I use a different flavor of pudding?
Of course! This pie works with vanilla, butterscotch, or even banana pudding mix. It’s a great way to customize your No-Bake Chocolate Pudding Pie to suit any craving.
How do I get clean slices when serving?
For neat slices, dip a sharp knife in hot water and wipe it between cuts. This helps glide through the creamy filling and keeps each piece looking picture-perfect.
Is this recipe gluten-free?
The filling itself is typically gluten-free, but the crust often contains gluten. Use a certified gluten-free crust and pudding mix to make your No-Bake Chocolate Pudding Pie safe for gluten-sensitive guests.
Final Thoughts
If you’re looking for a fuss-free dessert that brings big smiles with minimal effort, you can’t beat No-Bake Chocolate Pudding Pie. It’s a recipe everyone should have in their back pocket—simple, classic, and always a hit. Give it a try, and watch how quickly it disappears at your next gathering!
Print
No-Bake Chocolate Pudding Pie Recipe
- Total Time: 4 hours 10 minutes
- Yield: 8 servings 1x
- Diet: Non-Vegetarian
Description
This No-Bake Chocolate Pudding Pie is a creamy, easy-to-make dessert featuring a rich chocolate pudding filling in a crisp graham cracker or chocolate cookie crust, topped with fluffy whipped topping. Perfect for quick preparation and chilled to set, it offers a decadent treat without turning on the oven.
Ingredients
Pie Crust
- 1 pre-made graham cracker or chocolate cookie crust (9-inch)
Pudding Filling
- 1 package (3.9 oz) instant chocolate pudding mix
- 2 cups cold milk
- 1/2 teaspoon vanilla extract (optional)
- 8 ounces whipped topping (like Cool Whip), thawed
Garnish (optional)
- Chocolate shavings, mini chocolate chips, or whipped cream
Instructions
- Prepare the Pudding: In a medium mixing bowl, whisk together the instant chocolate pudding mix and cold milk for about 2 minutes, until the mixture thickens.
- Add Vanilla: Stir in the vanilla extract if using to enhance the flavor of the pudding.
- Fold in Whipped Topping: Gently fold in half of the whipped topping into the pudding mix until smooth and well combined, creating a creamy filling.
- Fill the Crust: Pour the pudding and whipped topping mixture into the prepared crust and smooth the top evenly with a spatula.
- Top the Pie: Spread the remaining whipped topping over the pudding layer for a fluffy finish.
- Chill: Refrigerate the pie for at least 4 hours, or until set and fully chilled for the best texture.
- Garnish and Serve: Before serving, optionally garnish the pie with chocolate shavings, mini chocolate chips, or additional whipped cream for extra visual appeal and taste.
Notes
- For a richer flavor, use chocolate milk instead of regular milk or add a tablespoon of espresso powder to the pudding mix.
- This pie can be made a day in advance and stored covered in the refrigerator to improve flavor melding.
- Use a chocolate cookie crust for a deeper chocolate taste variation.
- Ensure the whipped topping is fully thawed to fold in smoothly.
- Prep Time: 10 minutes
- Cook Time: 0 minutes
- Category: Dessert
- Method: No-Bake
- Cuisine: American
Nutrition
- Serving Size: 1 slice
- Calories: 290
- Sugar: 20g
- Sodium: 330mg
- Fat: 15g
- Saturated Fat: 10g
- Unsaturated Fat: 4g
- Trans Fat: 0g
- Carbohydrates: 36g
- Fiber: 1g
- Protein: 3g
- Cholesterol: 5mg


