
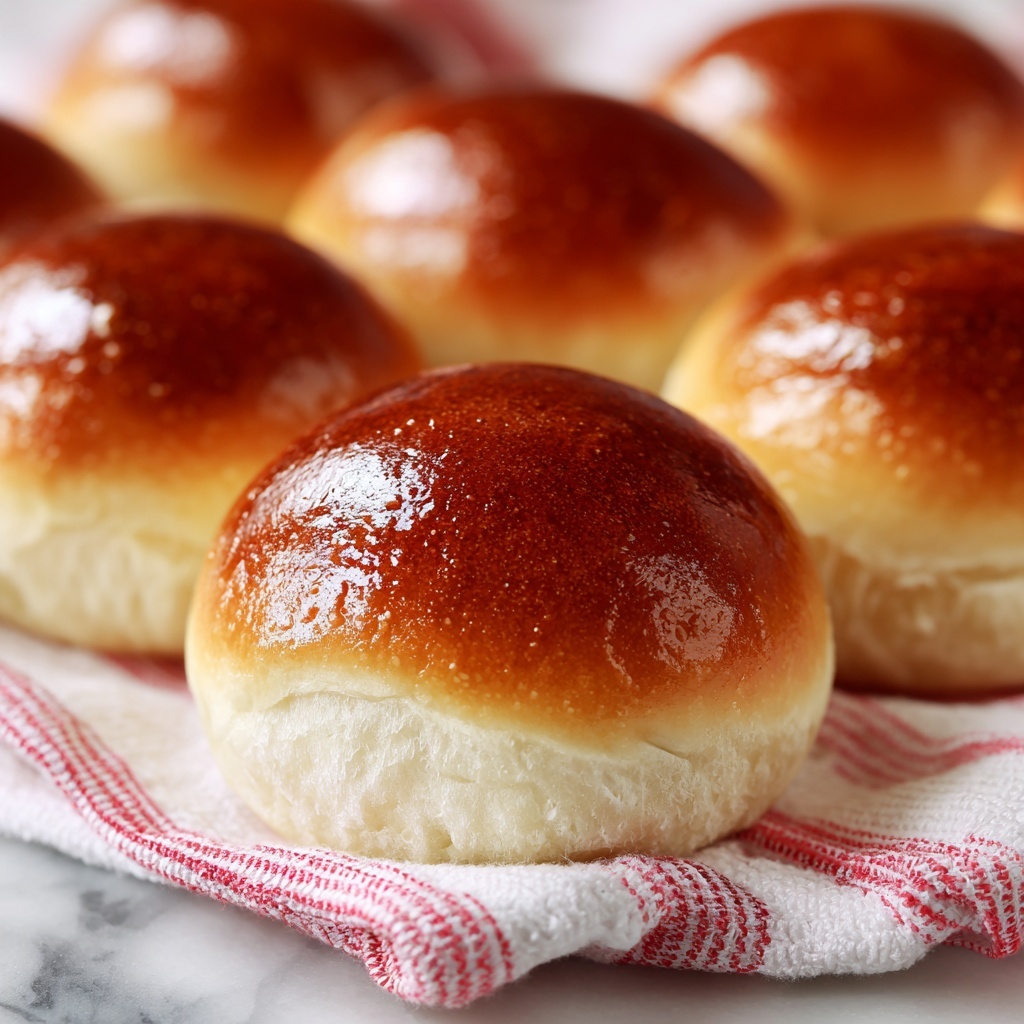
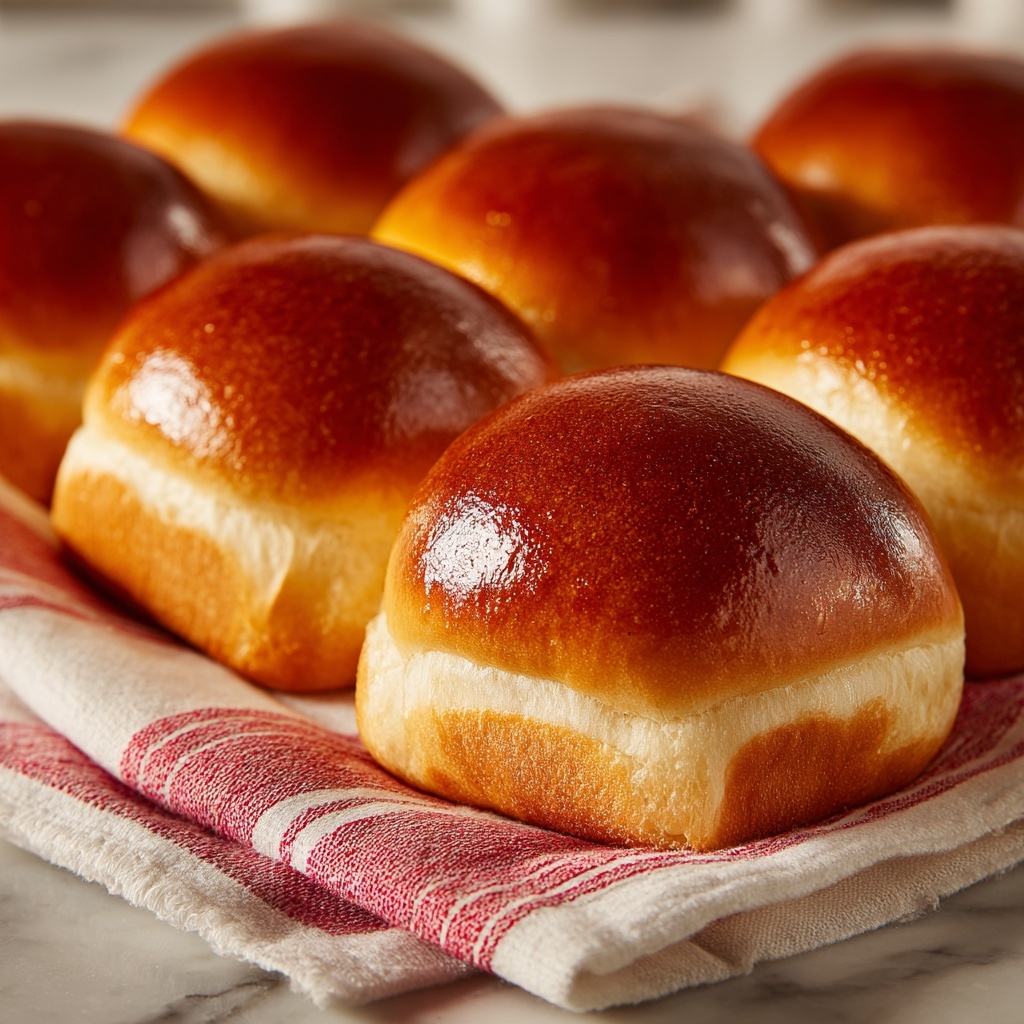
There is something truly comforting about homemade bread, and few things capture that warm, nostalgic feeling better than an Old Fashioned Yeast Rolls Recipe. These rolls are delightfully soft, tender, and irresistibly buttery, perfect for soaking up gravy or simply enjoying fresh from the oven. The slow rise and traditional ingredients come together beautifully to create rolls that bring a cozy, timeless touch to any meal.
Ingredients You’ll Need
These ingredients are simple staples you likely have on hand, yet each plays a vital role in the texture and flavor of your bread. From the yeast that gives the rolls their airy rise to the butter that adds rich softness, this combination is classic for a reason.
- 1/2 cup warm water (110°F/43°C): Perfect temperature to activate the yeast without killing it.
- 1 packet active dry yeast (about 2 1/4 teaspoons): The essential leavening agent that makes the rolls fluffy.
- 1/4 cup granulated sugar: Adds sweetness and feeds the yeast for a good rise.
- 1/2 cup whole milk, warmed: Provides creaminess and moisture for tender dough.
- 1/4 cup unsalted butter, softened: Adds richness and keeps the rolls soft inside.
- 1 large egg: Binds ingredients and gives the rolls structure and color.
- 1 teaspoon salt: Balances sweetness and enhances all other flavors.
- 3 1/2 to 4 cups all-purpose flour: The backbone of the dough, adding structure and chewiness.
- 2 tablespoons melted butter (for brushing): Brushed on top after baking for a shiny, flavorful finish.
How to Make Old Fashioned Yeast Rolls Recipe
Step 1: Activate the Yeast
Start by combining the warm water with sugar in a mixing bowl, then sprinkle the yeast on top. Let it sit for about 5 minutes until the mixture becomes frothy. This bubbling action tells you the yeast is alive and ready to work its magic in your Old Fashioned Yeast Rolls Recipe.
Step 2: Mix in the Wet Ingredients
Next, add the warmed milk, softened butter, egg, and salt to the yeast mixture. Mixing these ingredients ensures the dough will be rich and flavorful, setting the stage for tender, fluffy rolls.
Step 3: Incorporate the Flour
Begin stirring in 3 1/2 cups of all-purpose flour gradually. The dough should start coming together but still be slightly sticky. Add more flour as needed, one tablespoon at a time, just until the dough pulls away from the sides of the bowl. This process gives the rolls the perfect chewy texture we all love.
Step 4: Knead the Dough
Turn your dough onto a lightly floured surface and knead it for about 8 to 10 minutes. This step is key for developing gluten, which helps the rolls rise and become beautifully soft on the inside while holding their shape perfectly.
Step 5: First Rise
Place the dough in a greased bowl, cover it with a warm towel or plastic wrap, and let it rise in a warm spot until doubled in size, roughly 1 to 1 1/2 hours. This patient rising stage develops incredible flavor and lightness.
Step 6: Form the Rolls
Gently punch down the dough to release air, then divide it into 12 equal pieces. Shape each piece into a smooth ball and place them evenly spaced in a greased baking pan. This simple shaping helps each roll bake evenly and rise into soft, pillowy perfection.
Step 7: Second Rise
Cover the pan loosely and let the rolls rise again for 30 to 45 minutes until puffy and almost touching. This final rise brings the rolls to their height and fluffiness.
Step 8: Bake and Butter
Bake your rolls in a preheated 375°F (190°C) oven for 15 to 20 minutes or until golden brown on top. Right when they come out of the oven, brush them with melted butter to add a glossy shine and extra moisture that will keep them delightfully soft.
How to Serve Old Fashioned Yeast Rolls Recipe
Garnishes
While these rolls are delicious on their own, you can sprinkle a little flaky sea salt or brush with a garlic herb butter for an extra flavor boost. A dusting of freshly chopped rosemary or thyme also pairs wonderfully with the warm, buttery notes.
Side Dishes
Old Fashioned Yeast Rolls Recipe pairs elegantly with hearty meals like roast chicken, savory stews, or holiday turkey dinners. They’re perfect for soaking up gravy or enjoying alongside a fresh garden salad with a drizzle of vinaigrette.
Creative Ways to Present
For a charming twist, serve these rolls warm wrapped in a cloth napkin inside a rustic basket. You can also slice and stuff them with melted cheese and herbs for an irresistible pull-apart treat. They make a wonderful base for mini sliders at your next gathering too!
Make Ahead and Storage
Storing Leftovers
Keep leftover rolls fresh by storing them in an airtight container or tightly sealed plastic bag at room temperature for up to 2 days. This keeps them soft while maintaining their delicate crumb.
Freezing
If you want to enjoy your Old Fashioned Yeast Rolls Recipe later, wrap cooled rolls individually in plastic wrap and place in a freezer-safe bag. Frozen rolls stay fresh for up to 3 months and thaw quickly when you need them.
Reheating
Reheat frozen or day-old rolls by wrapping them in foil and warming in a 300°F (150°C) oven for 10 to 15 minutes. For a quick fix, microwave wrapped in a damp paper towel for about 20 seconds to bring back that fresh-baked softness.
FAQs
Can I use instant yeast instead of active dry yeast?
Absolutely! If using instant yeast, you can mix it directly with the flour without proofing it in water first. Adjust the liquid slightly if needed, and expect a slightly faster rise time.
What can I do if my dough is too sticky?
Sticky dough is normal, but if it’s difficult to handle, sprinkle in a little more flour, one tablespoon at a time, until it feels manageable but still soft and elastic.
Why do my rolls come out dense?
Dense rolls usually mean the dough didn’t rise enough or the yeast was inactive. Make sure your water temperature is right to activate the yeast and give the dough time to double during both rises.
Can I make these rolls gluten-free?
Substituting gluten-free flour can be tricky because gluten provides structure and elasticity. You may want to use a specialized gluten-free flour blend designed for yeast breads and follow any additional instructions on the packaging for best results.
Is it okay to use cold ingredients?
It’s best to use warm water and milk to activate the yeast properly. Cold ingredients can slow yeast activity and result in slower or incomplete rising, affecting the texture of your rolls.
Final Thoughts
There is something truly magical about baking from scratch, especially when it comes to this cherished Old Fashioned Yeast Rolls Recipe. These rolls will warm your kitchen and your heart with every soft, buttery bite. Whether you’re serving them for a special holiday meal or a simple family dinner, they’re guaranteed to become a beloved classic on your table. I can’t wait for you to try making them yourself—you’ll feel like you’ve brought a little tradition and love right into your home!
Print
Old Fashioned Yeast Rolls Recipe
- Prep Time: 30 minutes
- Cook Time: 20 minutes
- Total Time: 2 hours 30 minutes
- Yield: 12 servings
- Category: Bread
- Method: Baking
- Cuisine: American
Description
These Old Fashioned Yeast Rolls are soft, fluffy, and buttery, making them a perfect homemade bread accompaniment for any meal. With a tender crumb and golden crust, these rolls are simple to make with basic pantry ingredients using a traditional yeast dough method.
Ingredients
Dough Ingredients
- 1/2 cup warm water (110°F/43°C)
- 1 packet active dry yeast (about 2 1/4 teaspoons)
- 1/4 cup granulated sugar
- 1/2 cup whole milk, warmed
- 1/4 cup unsalted butter, softened
- 1 large egg
- 1 teaspoon salt
- 3 1/2 to 4 cups all-purpose flour (start with 3 1/2 cups and add more as needed)
For Brushing
- 2 tablespoons melted butter
Instructions
- Activate the yeast: In a small bowl, combine the warm water and sugar, then sprinkle the active dry yeast on top. Let it sit for about 5-10 minutes until the mixture is foamy, indicating the yeast is active.
- Mix wet ingredients: In a large mixing bowl, whisk together the warmed milk, softened butter, and egg. Add the foamy yeast mixture and stir well to combine.
- Add dry ingredients: Gradually add the salt and 3 1/2 cups of all-purpose flour to the wet ingredients. Stir until a sticky dough forms. Add more flour, a little at a time, as needed, until the dough is soft but no longer sticky and pulls away from the sides of the bowl.
- Knead the dough: Turn the dough out onto a lightly floured surface and knead for about 8-10 minutes until smooth and elastic. Alternatively, use a stand mixer with a dough hook on medium speed for 6-8 minutes.
- First rise: Place the dough in a lightly greased bowl, cover with a clean kitchen towel or plastic wrap, and let it rise in a warm place for about 1 to 1 1/2 hours, or until it has doubled in size.
- Shape rolls: Punch down the dough to release air and turn it out onto a floured surface. Divide the dough into 12 equal pieces and shape each into a smooth ball. Place the rolls in a greased 9×13 inch baking dish, spaced slightly apart.
- Second rise: Cover the rolls again with a kitchen towel and let them rise for another 30-45 minutes until puffy and nearly doubled.
- Bake the rolls: Preheat the oven to 375°F (190°C). Bake the rolls for 18-22 minutes until golden brown on top and sound hollow when tapped.
- Brush with butter: Immediately after removing from the oven, brush the tops with melted butter for a soft, shiny finish.
- Cool and serve: Allow the rolls to cool for a few minutes before serving warm. Enjoy with butter, honey, or your favorite spread.
Notes
- Make sure the water and milk are warm but not hot; about 110°F (43°C) is ideal to properly activate the yeast without killing it.
- Adjust flour quantity based on humidity or flour brand to get the perfect dough consistency; dough should be soft but not sticky.
- For extra flavor, you can substitute half the all-purpose flour with bread flour for chewier rolls.
- These rolls freeze well: let cool completely, wrap tightly, and freeze up to 3 months. Reheat before serving.
- You can add herbs or garlic powder to the dough for savory variations.
