
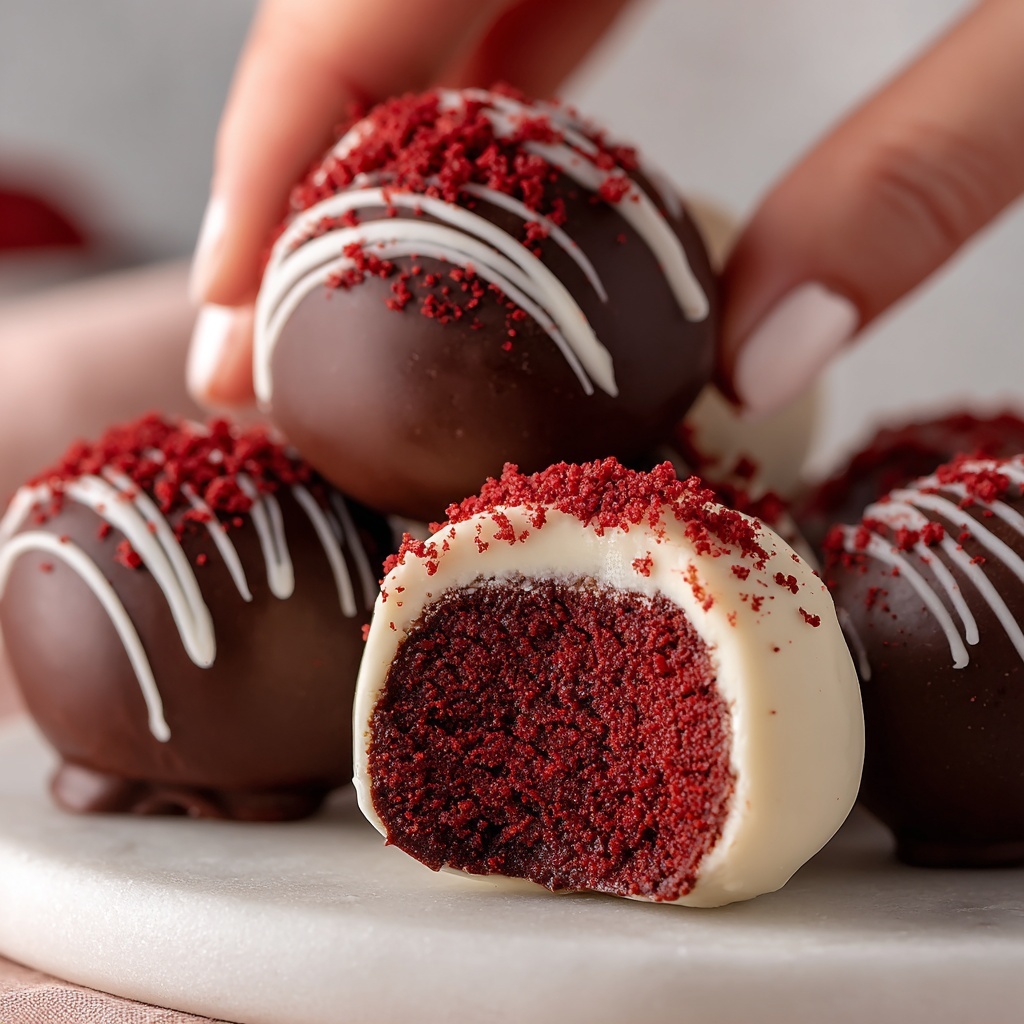
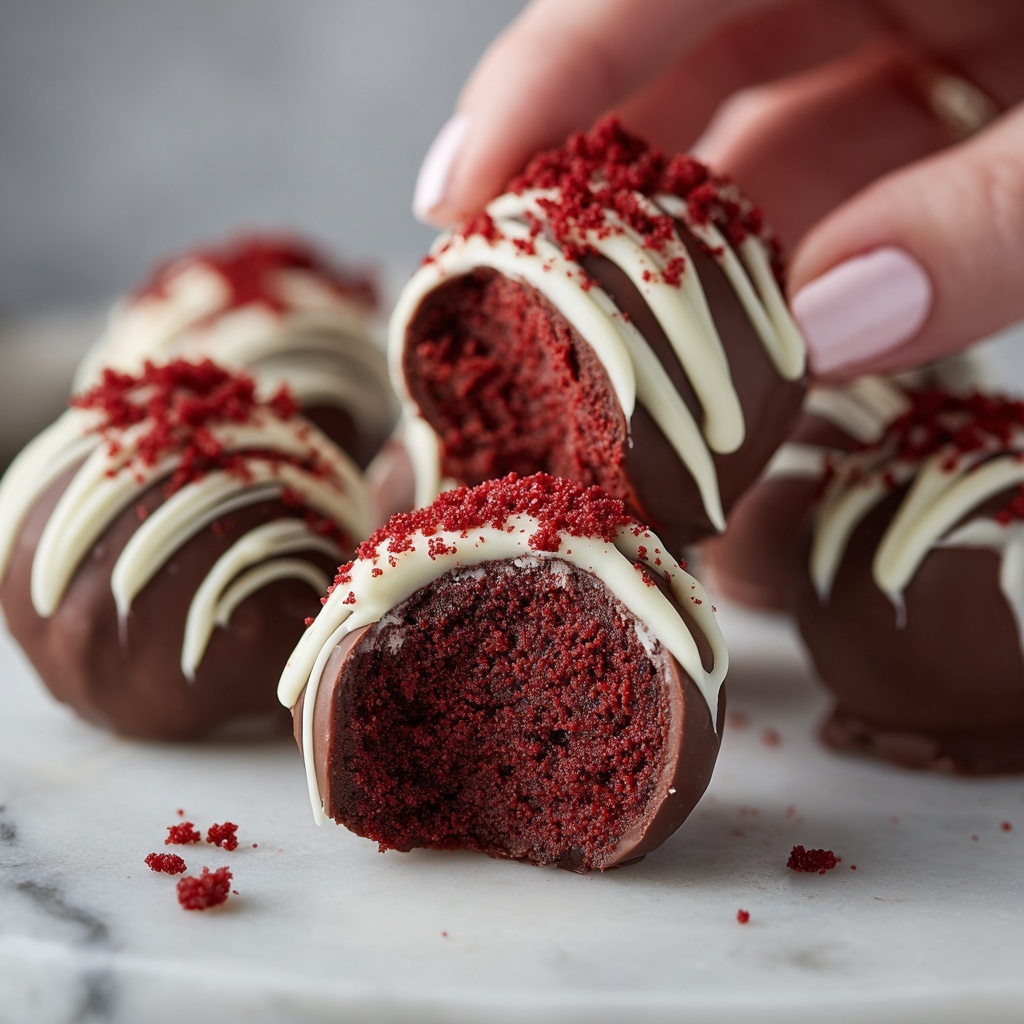
If you’ve ever wished you could enjoy the luscious charm of red velvet cake in a perfectly bite-sized form, then you’re going to adore this Red Velvet Cake Balls Recipe. These little gems boast all the velvety richness and creamy tang of traditional red velvet cake, wrapped up in a smooth cream cheese frosting and covered in a glossy chocolate shell. They’re not just adorable; they deliver big on flavor and make for an irresistible treat at any gathering or whenever a sweet craving strikes.
Ingredients You’ll Need
Gathering the ingredients for this recipe is delightfully simple, and each one plays a vital role in creating that signature taste and texture. From the rich cake mix to the creamy frosting and silky coating, these essentials come together to make magic happen.
- Red velvet cake mix: The foundation of these cake balls, providing the distinct cocoa flavor and gorgeous red hue.
- Cream cheese frosting (16 oz can): Adds that luscious tang and moisture that makes every bite melt-in-your-mouth delicious.
- Chocolate or candy melts: Use these for coating to create a smooth, shiny outer shell that sets just right.
How to Make Red Velvet Cake Balls Recipe
Step 1: Prepare the Cake
Begin by baking your red velvet cake according to the box instructions or your favorite homemade recipe. Patience is key here because you want the cake to cool completely before moving on — this ensures it won’t get soggy when combined with the frosting.
Step 2: Crumble the Cake
Once your cake is perfectly cool, break it into fine crumbs in a large mixing bowl. This is where the transformation starts as you get ready to turn crumbly cake into luscious cake balls.
Step 3: Mix in the Frosting
Add the cream cheese frosting to the crumbled cake and blend everything together until the mixture is uniform and sticky enough to hold shape. The frosting adds the rich creaminess that sets these cake balls apart from ordinary bites.
Step 4: Form the Balls
Roll the mixture into quarter-sized balls, making sure each is smooth and compact. Arrange these on a baking sheet lined with wax paper to keep them from sticking and to prepare for chilling.
Step 5: Chill the Cake Balls
Place the tray in the refrigerator for at least one hour. Chilling firms up the cake balls, ensuring they hold their shape during the next step and making coating easier and less messy.
Step 6: Melt the Chocolate
Gently melt your choice of chocolate or candy melts according to package instructions. Smooth, melted coating is essential to getting a perfect finish on your cake balls.
Step 7: Dip and Set
Using a fork or dipping tool, fully coat each chilled cake ball in melted chocolate. Set them back onto the wax paper and allow the coating to harden completely. This sealing step creates the delightful crunch that contrasts the creamy inside.
Step 8: Enjoy Your Red Velvet Cake Balls
Once coated and firm, these cake balls are ready to dazzle your taste buds. Whether for a party or your own sweet indulgence, they’re satisfying, elegant, and endlessly lovable.
How to Serve Red Velvet Cake Balls Recipe
Garnishes
You can elevate the presentation by adding simple garnishes such as a sprinkle of finely chopped nuts, a dusting of edible glitter, or even drizzles of white chocolate. These little touches not only make your cake balls look stunning but add delightful texture and visual contrast.
Side Dishes
Pair your cake balls with a cup of freshly brewed coffee, a creamy milkshake, or even a tangy fruit salad. The rich flavors of the cake balls complement beverages and lighter sides beautifully, making each bite feel like a special moment.
Creative Ways to Present
For a memorable presentation, try serving the red velvet cake balls on decorative sticks for cake pops, arrange them in festive cupcake liners, or place them on a tiered dessert stand. Each approach adds charm and makes these treats perfect for gifting or celebration tables.
Make Ahead and Storage
Storing Leftovers
Leftover Red Velvet Cake Balls keep well in an airtight container in the refrigerator for up to a week. Keeping them chilled preserves their fresh flavor and ensures the coating stays firm and delicious.
Freezing
You can freeze these cake balls by placing them on a baking sheet to freeze individually, then transferring them to a sealed container or freezer bag. They’ll last up to two months frozen and maintain great taste and texture.
Reheating
There’s no need to reheat cake balls since they’re delightful chilled or at room temperature. Just let them thaw in the refrigerator for a few hours before serving if frozen.
FAQs
Can I make these cake balls with homemade red velvet cake?
Absolutely! Homemade red velvet cake works wonderfully and can add a personal touch to your Red Velvet Cake Balls Recipe. Just be sure it’s fully cooled before mixing with frosting.
What type of frosting works best?
Cream cheese frosting is ideal because of its tangy balance and creamy consistency, but if you prefer, a high-quality buttercream can also do the trick.
Can I use white chocolate instead of chocolate or candy melts?
Yes! White chocolate melts smoothly and offers a beautiful contrast to the red velvet inside, creating an elegant and tasty coating.
How do I prevent the cake balls from cracking when dipping?
Make sure the cake balls are well chilled and the chocolate isn’t too hot. Also, avoid over-handling to keep them intact through the dipping process.
Are these cake balls suitable for parties?
Definitely! Their bite-sized nature and vibrant appearance make Red Velvet Cake Balls Recipe a party favorite that’s easy to serve and enjoy.
Final Thoughts
There’s something truly magical about sharing bite-sized luxuries like these Red Velvet Cake Balls Recipe treats with friends and family. The way velvet cake and cream cheese frosting come together in a perfectly coated ball will have you making them again and again. So why not dive in and make a batch today? Your sweet tooth will thank you!
Print
Red Velvet Cake Balls Recipe
- Prep Time: 30 minutes
- Cook Time: 45 minutes
- Total Time: 2 hours
- Yield: 45 servings
- Category: Dessert
- Method: Baking
- Cuisine: American
Description
These Red Velvet Cake Balls are a delightful twist on classic red velvet cake, turned into bite-sized treats coated in luscious chocolate or candy melts. Perfect for parties, celebrations, or a sweet indulgence, these cake balls combine moist red velvet cake with creamy frosting, chilled and dipped in a smooth coating for an irresistible dessert.
Ingredients
Cake and Frosting
- 1 box red velvet cake mix (or homemade red velvet cake)
- 1 can (16 oz) cream cheese frosting
Coating
- Chocolate or candy melts for coating (approximately 12 oz)
Instructions
- Prepare the Cake: Bake the red velvet cake according to the package instructions or your homemade recipe. Allow the cake to cool completely to ensure easy handling and proper texture for the next steps.
- Crumble the Cake: Once cooled, crumble the cake into a large mixing bowl, breaking it down into fine crumbs to create a uniform mixture.
- Mix with Frosting: Add the entire can of cream cheese frosting to the crumbled cake. Mix thoroughly until the cake crumbs and frosting are fully combined, forming a dough-like consistency suitable for shaping.
- Form Balls: Roll the mixture into quarter-sized balls, approximately 1 inch in diameter. Place each ball on a baking sheet lined with wax paper, ensuring they do not touch.
- Chill: Refrigerate the formed cake balls for at least 1 hour to firm up. This step helps them hold their shape during the coating process.
- Melt Chocolate: Melt the chocolate or candy melts according to the package instructions. Be careful to melt evenly and avoid burning for a smooth coating.
- Dip and Set: Using a fork or dipping tool, dip each chilled cake ball into the melted chocolate to fully coat it. Allow excess coating to drip off, then place coated balls back onto the wax paper.
- Harden Coating: Let the chocolate coating harden completely at room temperature or in the refrigerator before serving or packaging.
Notes
- You can use homemade red velvet cake instead of a boxed mix for a more personalized flavor.
- Ensure the cake is completely cooled before crumbling to avoid a soggy mixture.
- If the cake ball mixture feels too sticky, refrigerate it longer before forming balls.
- Use a toothpick or cake pop sticks to make cake pops if preferred.
- Store the cake balls in an airtight container in the refrigerator; they keep well for up to 5 days.
- Customize coatings with white chocolate and sprinkles for added flair.


