
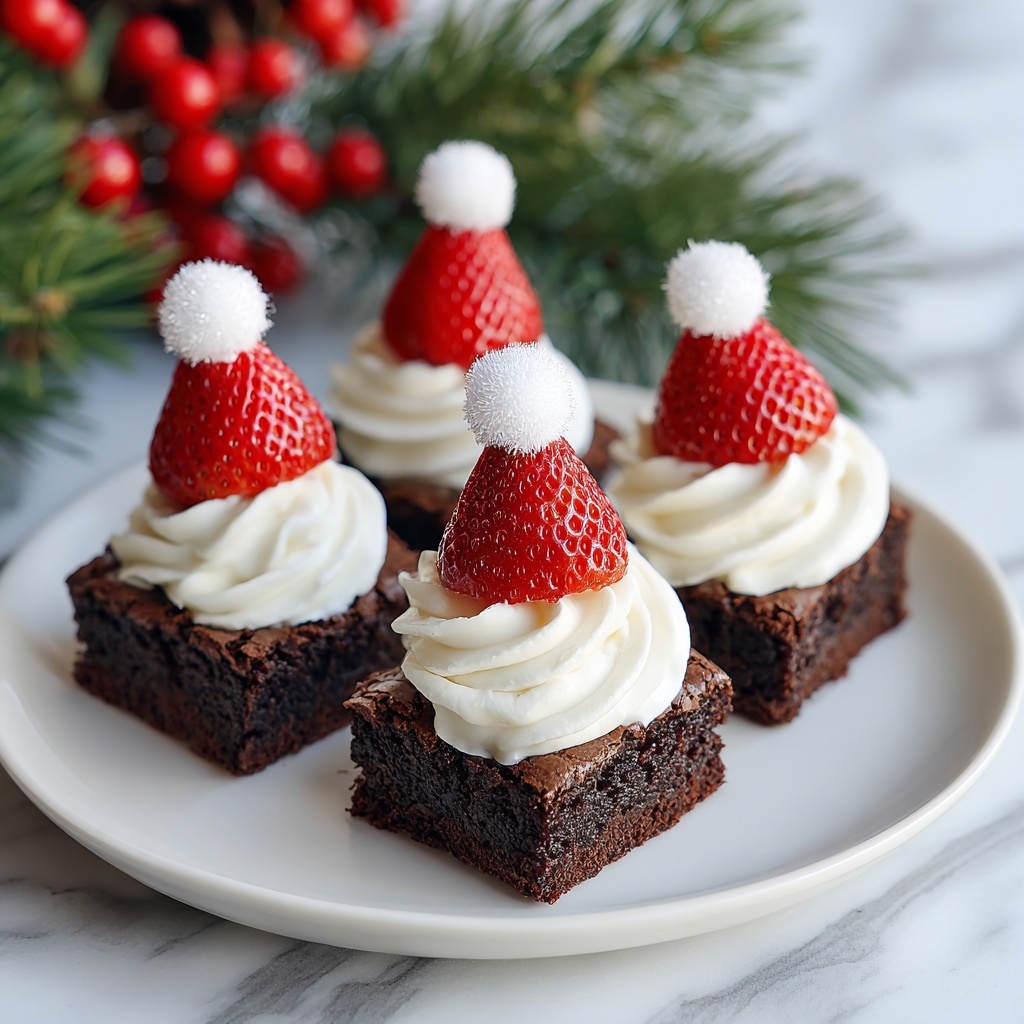
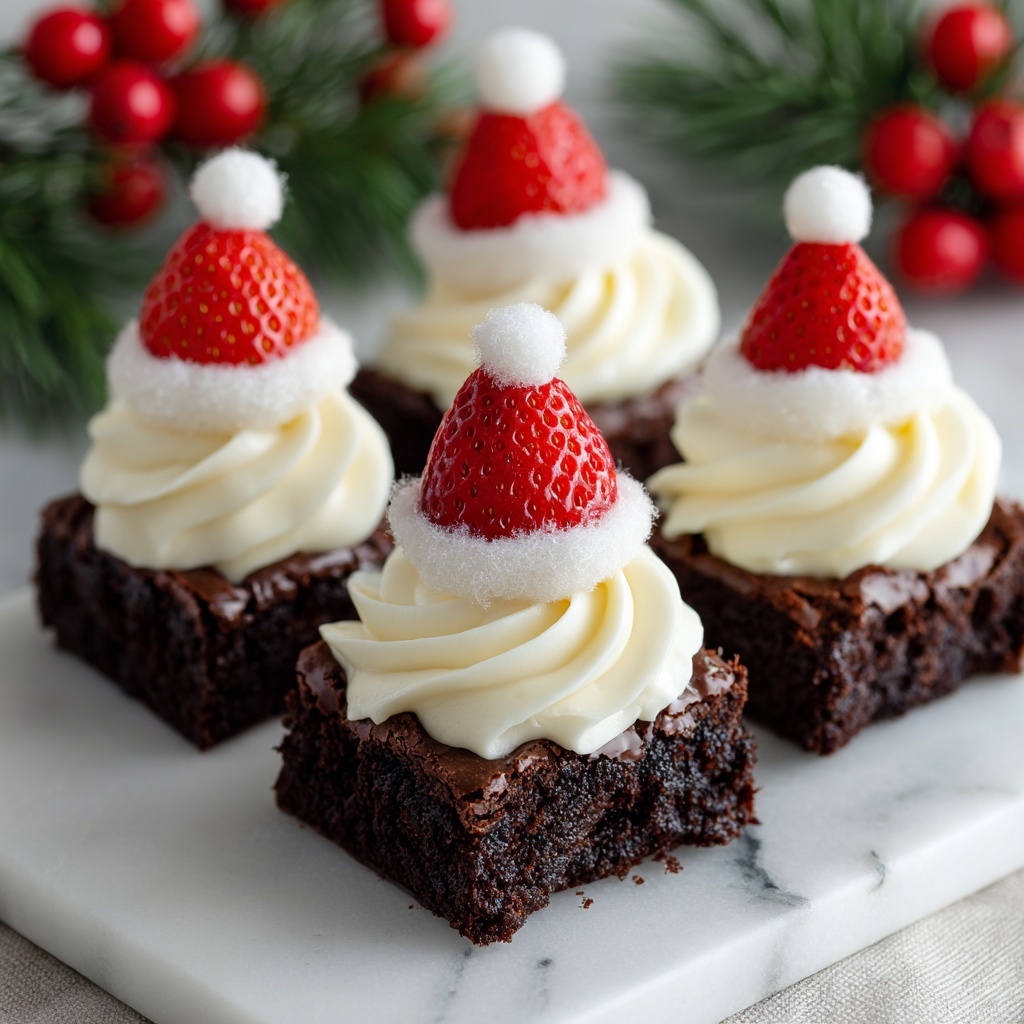
If you’re craving a festive treat that’s as delightful to look at as it is to eat, this Santa Hat Brownie Bites Recipe is exactly what you need. These adorable mini brownies dressed up in sweet white chocolate, juicy strawberries, and a dollop of whipped cream capture all the joy of the holidays in every bite. Whether you’re baking for a party or just want to add a bit of magic to your dessert table, these charming brownie bites are guaranteed to bring smiles and compliments alike.
Ingredients You’ll Need
Everything about this recipe is wonderfully simple but thoughtfully selected to balance rich chocolatey goodness with fresh, vibrant accents. Each ingredient plays a vital role in building the perfect texture, flavor, and festive appearance of these Santa Hat Brownie Bites.
- Brownie mix: The base that brings that fudgy, chocolaty richness you love, keeping your process quick and easy.
- Large eggs: These bind the ingredients together, giving the brownies a tender crumb and perfect rise.
- Vegetable oil: Adds moistness and helps keep the brownie bites soft and chewy.
- White chocolate chips: Melted to coat the tops, these create the creamy “hat brim” that contrasts beautifully with dark brownie.
- Strawberries (hulled): Fresh, sweet, and bright, they form the iconic “hat” part of the Santa look.
- Whipped cream: Light and fluffy, it’s the perfect finishing touch as the hat’s pom-pom.
- Sprinkles (optional): Add festive color and extra fun to your dessert presentation.
How to Make Santa Hat Brownie Bites Recipe
Step 1: Prepare Your Oven and Pan
Preheat your oven to 350°F (175°C). Line a mini muffin tin with paper liners to make sure your brownie bites come out cleanly and easy to handle — plus, the liners add a cute presentation touch.
Step 2: Mix the Brownie Batter
In a large bowl, combine the brownie mix, eggs, and vegetable oil. Stir well until the batter is smooth and fully incorporated. This simple blend lays the foundation for the rich, fudgy base of your brownie bites.
Step 3: Fill the Muffin Cups
Scoop the brownie batter into each paper-lined muffin cup, filling them about two-thirds full. This ensures that when baked, you get delightful little mounds of chocolate with just the right size for bite-sized indulgence.
Step 4: Bake to Perfection
Pop the muffin tin into your preheated oven and bake for 15 to 18 minutes. To check doneness, insert a toothpick into a brownie bite — it should come out mostly clean but still moist. This step keeps your brownie bites fudgy rather than cakey.
Step 5: Cooling Time
Once your brownies are baked, allow them to cool completely. This resting period is essential before decorating to ensure the toppings don’t melt or slide off.
Step 6: Melt the White Chocolate Chips
Place the white chocolate chips in a microwave-safe bowl. Heat them in 30-second intervals, stirring in between until they’re smooth and glossy. This melted chocolate will be the charming brim of your Santa hats.
Step 7: Assemble the Santa Hats
Dip the top of each cooled brownie bite into the melted white chocolate, giving it a sweet, creamy coating. Quickly top each with a hulled strawberry, placing it with the pointed end up to mimic Santa’s classic hat shape.
Step 8: Add the Whipped Cream Pom-Pom
Using a piping bag or spoon, add a dollop of whipped cream atop the strawberry to form the fluffy pom-pom that finishes off the look and adds a light, airy tone to each treat.
Step 9: Add Optional Sprinkles
For an extra festive pop, sprinkle colorful bits right onto the white chocolate or whipped cream while they’re still tacky. This step is optional but definitely adds an irresistible holiday cheer.
How to Serve Santa Hat Brownie Bites Recipe
Garnishes
These brownie bites don’t need much to shine, but a dusting of powdered sugar or a few extra sprinkles around the plate can elevate the presentation. Fresh mint leaves also make a lovely accent if you want a more sophisticated garnish.
Side Dishes
Pair these festive treats with warm drinks such as hot cocoa or spiced tea for a cozy experience. If serving at a holiday party, consider setting them next to a cheese board or alongside a fruit platter to balance richness with fresh variety.
Creative Ways to Present
Line them up on a festive tray shaped like a Christmas tree or arrange the brownie bites on tiered dessert stands. Wrapping the tray with fairy lights or placing mini ornaments around will make your dessert table truly magical and inviting.
Make Ahead and Storage
Storing Leftovers
If you have any leftover Santa Hat Brownie Bites Recipe treats, store them in an airtight container at room temperature for up to three days to preserve their chewy texture and fresh toppings.
Freezing
You can freeze the baked and cooled brownie bites (without the toppings) in a sealed container or freezer bag for up to a month. When ready to enjoy, simply thaw them fully before decorating with white chocolate, strawberries, and whipped cream.
Reheating
Warm your brownie bites for about 10 seconds in the microwave if you like them slightly gooey. Avoid reheating once decorated, as the whipped cream and strawberry topping are best served chilled or at room temperature.
FAQs
Can I use homemade brownie batter instead of a mix?
Absolutely! Homemade brownie batter works wonderfully and can give even more control over sweetness and ingredients. Just be sure your batter’s consistency is similar to mix instructions to maintain the perfect bite-size texture.
What if I don’t have fresh strawberries?
Fresh strawberries give the best look and flavor, but you can experiment with other red fruits like raspberries or even small cherries. Just make sure to adjust the size so it fits nicely on each brownie bite.
Can I make these dairy-free or vegan?
Yes! Use a dairy-free brownie mix, substitute eggs with flax or chia egg replacers, and switch to dairy-free white chocolate and whipped topping to make these festive treats allergen-friendly.
How far in advance can I assemble the Santa Hat Brownie Bites Recipe?
To keep the strawberries fresh and the whipped cream fluffy, it’s best to assemble the brownie bites the same day you plan to serve them or at most a few hours ahead.
Can I make these bigger or in a regular muffin pan?
Definitely! Just adjust the baking time accordingly; larger muffins will take longer to bake and may change the proportions of toppings. Mini bites are perfect for parties and easy snacking, though.
Final Thoughts
I can’t recommend the Santa Hat Brownie Bites Recipe enough for bringing that extra sparkle to your holiday gatherings or just treating yourself to a festive little joy. They’re simple, adorable, and utterly delicious—a perfect trio for any dessert lover. So go ahead, bake a batch, and watch these charming little treats disappear in no time!
Print
Santa Hat Brownie Bites Recipe
- Prep Time: 10 minutes
- Cook Time: 18 minutes
- Total Time: 38 minutes
- Yield: 24 servings
- Category: Dessert
- Method: Baking
- Cuisine: American
Description
These adorable Santa Hat Brownie Bites are festive, bite-sized treats perfect for holiday gatherings. Soft, fudgy brownies baked in a mini muffin tin are topped with melted white chocolate, fresh strawberries, and a dollop of whipped cream to resemble Santa hats. Easy to make and irresistibly cute, they’re sure to bring holiday cheer to any party.
Ingredients
Brownie Bites
- 1 box brownie mix
- 2 large eggs
- 1/3 cup vegetable oil
Toppings
- 1 cup white chocolate chips
- 1 cup strawberries, hulls removed
- 1/2 cup whipped cream
- 1/4 cup sprinkles (optional)
Instructions
- Preheat the Oven: Preheat your oven to 350°F (175°C) and line a mini muffin tin with paper liners to prepare for baking.
- Mix Brownie Batter: In a medium bowl, combine the brownie mix, 2 large eggs, and 1/3 cup vegetable oil. Stir well until the mixture is smooth and fully combined.
- Fill Muffin Tin: Scoop the brownie batter into each paper-lined muffin cup, filling them about two-thirds full to allow room for rising during baking.
- Bake Brownie Bites: Place the muffin tin in the preheated oven and bake for 15-18 minutes, or until a toothpick inserted near the center comes out mostly clean with just a few moist crumbs attached.
- Cool Completely: Remove the brownie bites from the oven and let them cool completely in the tin to ensure they set properly and won’t crumble during decorating.
- Melt White Chocolate: Place the white chocolate chips in a microwave-safe bowl. Microwave in 30-second intervals, stirring between each interval until the chocolate is fully melted and smooth.
- Decorate Brownie Bites: Dip the top of each cooled brownie bite into the melted white chocolate. Immediately place a hulled strawberry on top to resemble Santa’s hat.
- Add Whipped Cream Pom-Pom: Pipe or dollop a small amount of whipped cream onto the tip of each strawberry to create the fluffy pom-pom characteristic of Santa hats.
- Optional Decoration: If desired, sprinkle colorful sprinkles over the whipped cream for extra festive flair before serving.
Notes
- Make sure the brownie bites are completely cooled before dipping in melted white chocolate to prevent melting or sliding off.
- Use fresh, firm strawberries to hold their shape on top of the brownie bites.
- For best results, pipe the whipped cream using a piping bag with a star tip to mimic the look of Santa’s hat pom-pom, or use a small spoon for dollops.
- Sprinkles add a fun touch but can be omitted to reduce added sugar.
- Store in an airtight container in the refrigerator to keep whipped cream fresh; best served within 1-2 days.


