
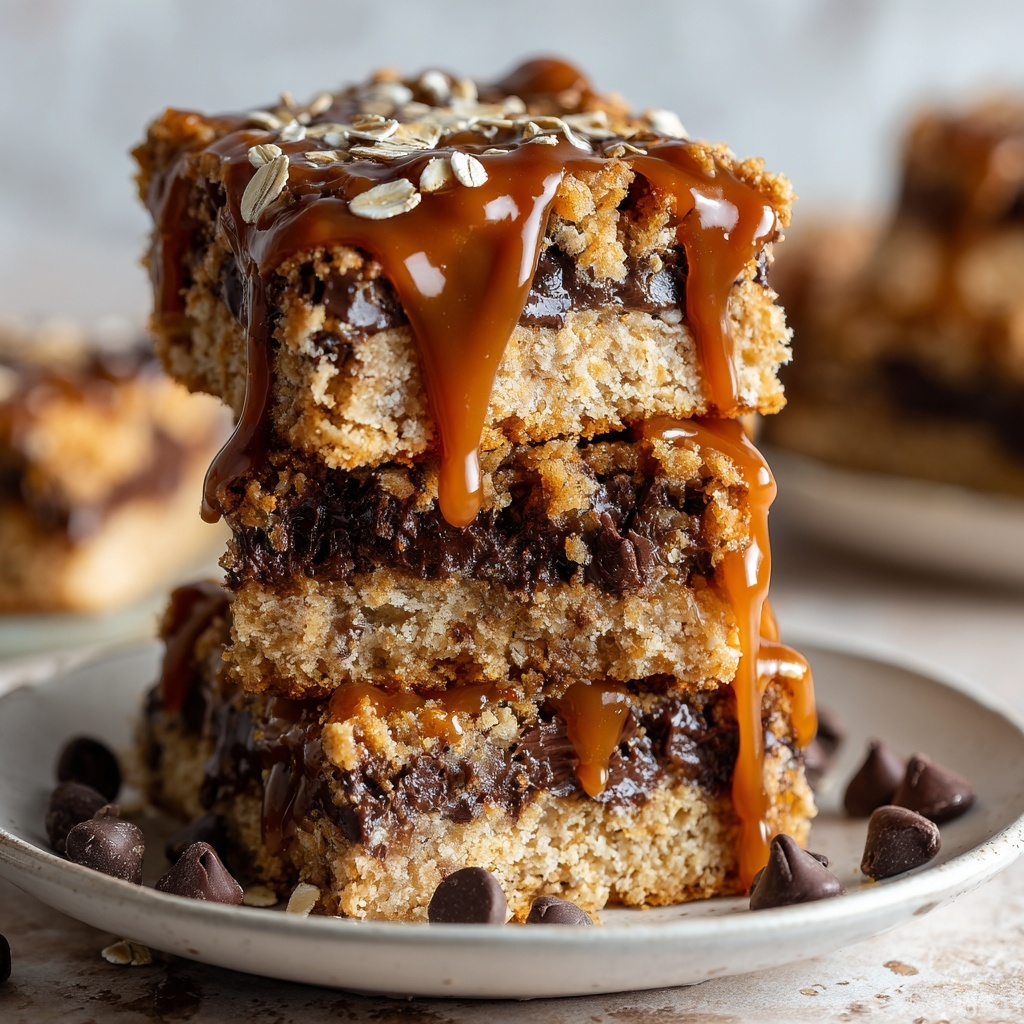
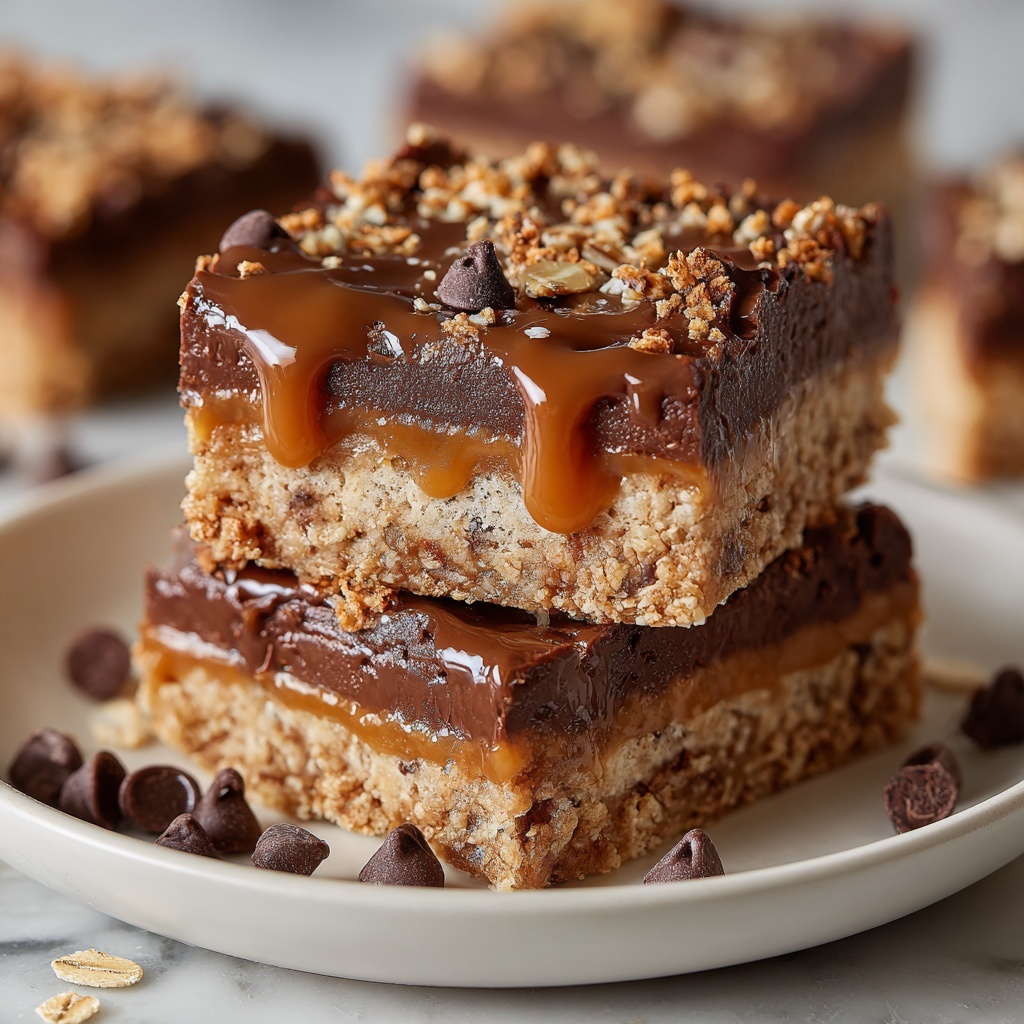
If you are looking for an irresistible treat that brings together chewy oats, rich caramel, and melty chocolate in every bite, look no further than this delectable Caramelitas Bars Recipe. These bars are a glorious mix of textures and flavors that hit all the right notes—sweet but not overpowering, with a perfect balance of buttery crust, gooey caramel center, and a satisfying chocolate finish. Whether you need a show-stopping dessert for a gathering or a cozy snack to enjoy with your afternoon coffee, these Caramelitas Bars will quickly become your new favorite go-to recipe.
Ingredients You’ll Need
The magic of this recipe lies in its simple yet harmonious ingredients, each chosen to deliver the perfect combination of texture, taste, and visual appeal. From the warm brown sugar boosting sweetness and moisture, to the oats adding a rustic chew, every component plays a key role.
- 3/4 cup salted butter, melted: Provides richness and helps bind the crust and topping with a buttery flavor.
- 2/3 cup brown sugar, packed: Brings moisture and deep caramel notes that complement the topping.
- 1 Tablespoon vanilla extract: Adds a warm, fragrant aroma to brighten the base mixture.
- 1 1/4 cup all-purpose flour: Gives structure to the bars and balances the oats.
- 1 1/4 cup rolled oats or old fashioned oats: Adds chewy texture and wholesome crunch.
- 1 teaspoon baking soda: Helps the crust rise slightly for a tender bite.
- 1/2 teaspoon salt, divided: Enhances flavor and balances sweetness in both crust and filling.
- 40 caramel squares: The heart of these bars, melting smooth for that luscious gooey layer.
- 1/3 cup heavy cream: Creates a silky caramel sauce when combined with the caramel squares.
- 1 1/2 cup semi-sweet chocolate chips: Adds a rich chocolate layer that complements the caramel perfectly.
How to Make Caramelitas Bars Recipe
Step 1: Prepare the Pan
Start by preheating your oven to 350°F (177°C). Line an 8×8 inch baking pan with parchment paper and grease it lightly. This simple step is crucial to preventing sticking and allows for easy removal of the bars once they’re perfectly baked.
Step 2: Make the Cookie Mixture
In a large microwave-safe bowl, melt the butter until just liquid. Whisk in the brown sugar and vanilla extract until the mixture is smooth and glossy. This blend of butter and sugar is the secret behind the rich flavor and moist texture of your bars’ base.
Step 3: Combine Dry Ingredients
Add the flour, rolled oats, baking soda, and 1/4 teaspoon of salt to the butter mixture. Use a pastry cutter or fork to blend until the mixture becomes crumbly but fully combined. This crumbly texture is essential as you’ll be forming it into both the crust and the topping of your bars.
Step 4: Form the Base
Press about half of your oat mixture evenly and firmly into the prepared pan to create the crust. Bake this for 10 minutes until it’s set and starting to turn golden. This will give your Caramelitas bars a sturdy, flavorful foundation to build on.
Step 5: Prepare the Caramel Filling
While the crust is baking, combine the caramel squares, heavy cream, and the remaining 1/4 teaspoon of salt in a microwave-safe bowl. Heat on high for one minute, stir, then heat for another minute. Keep stirring until the caramel mixture is smooth and glossy, being careful not to overheat so it doesn’t seize. This luscious sauce will melt perfectly over the warm crust.
Step 6: Layer the Chocolate
Once your crust is out of the oven, quickly sprinkle the semi-sweet chocolate chips evenly over the hot base. The warmth will slightly melt the chips, creating a rich, fudgy middle layer.
Step 7: Add the Caramel Layer
Pour the smooth caramel sauce evenly over the chocolate chips while they’re still warm. This step ensures that the caramel settles into all the nooks and crannies for gooey deliciousness in every bite.
Step 8: Top with Remaining Crust
Sprinkle the remaining oat mixture over the caramel layer. Gently press or tap it down with your hand to form a cohesive topping that will bake into a golden, crunchy finish.
Step 9: Bake the Bars
Return the pan to the oven and bake for 15 minutes, or until the top is lightly browned and set. This final baking step ties all those amazing layers together beautifully.
Step 10: Cooling and Slicing
Allow the Caramelitas bars to cool completely on a wire rack before slicing. For clean cuts and to prevent the caramel from oozing, it’s best to let the bars rest at room temperature overnight or chill in the fridge for at least 3 hours. This step rewards your patience with perfect, gooey squares.
How to Serve Caramelitas Bars Recipe
Garnishes
Sprinkle a pinch of flaky sea salt on top of the bars before serving to enhance the caramel and chocolate flavors. You can also drizzle melted white chocolate or a dusting of powdered sugar for a festive touch that adds visual appeal and a little extra sweetness.
Side Dishes
Pair your Caramelitas Bars with a scoop of creamy vanilla ice cream or alongside fresh berries for a refreshing contrast. A hot cup of coffee, tea, or even a cold glass of milk will complement these rich bars perfectly and elevate your dessert experience.
Creative Ways to Present
Try stacking smaller squares in a rustic wooden board presentation or arrange them alongside other bite-sized treats for a dessert platter. Wrapping a single bar in parchment paper tied with twine makes a charming gift or an inviting grab-and-go snack for friends and family.
Make Ahead and Storage
Storing Leftovers
Store any leftover Caramelitas Bars in an airtight container at room temperature for up to 3 days. Keep them covered well to maintain their chewy texture and prevent the caramel from drying out or becoming too firm.
Freezing
You can freeze these bars for up to 2 months. Wrap each bar individually in plastic wrap and then place in a freezer-safe container or bag. Thaw at room temperature before serving — they still retain their perfect gooey charm!
Reheating
If you prefer your Caramelitas bars warm, gently microwave a single bar for about 15–20 seconds. The caramel and chocolate soften beautifully, making the bars taste freshly baked all over again.
FAQs
Can I use different types of chocolate chips?
Absolutely! While semi-sweet chocolate chips provide the classic balance to the caramel’s sweetness, feel free to experiment with milk chocolate, dark chocolate, or even white chocolate for a unique twist.
Is it possible to use a gluten-free flour for this recipe?
Yes, you can substitute all-purpose flour with a gluten-free blend that measures cup for cup. Just ensure your oats are certified gluten-free to keep the bars entirely free of gluten.
What’s the best way to prevent the caramel from becoming too hard?
By combining the caramel squares with heavy cream and heating gently, you ensure the caramel stays smooth and soft. Avoid overheating or cooking for too long, which can cause it to harden once cooled.
Can I use homemade caramel instead of caramel squares?
Definitely! If you have homemade caramel sauce, substitute it in equal quantity for the caramel squares and heavy cream. Just make sure it is pourable enough to spread evenly over the crust.
How thick should I cut the bars?
For the perfect serving size and to enjoy all the layers in each bite, aim for squares about 2 inches by 2 inches. This size balances gooey caramel with a sturdy crumble and melts in your mouth just right.
Final Thoughts
I truly hope you give this Caramelitas Bars Recipe a try because it’s a crowd-pleaser that feels like a warm hug in dessert form. With its layers of buttery crust, melty chocolate, and rich caramel, each bite is pure joy. Once you make these bars, they’re bound to become a beloved classic in your home, just like they are in mine!
Print
Caramelitas Bars Recipe
- Prep Time: 20 minutes
- Cook Time: 25 minutes
- Total Time: 3 hours 40 minutes (including cooling and chilling time)
- Yield: 16 servings
- Category: Dessert
- Method: Baking
- Cuisine: American
Description
These Carmelitas bars are a delightful layered treat featuring a buttery oat crust, rich melted caramel, and a generous topping of semi-sweet chocolate chips. Baked to a golden perfection, they offer a perfect balance of sweet, chewy, and crunchy textures, making them a perfect dessert or snack for any occasion.
Ingredients
Cookie Mixture
- 3/4 cup salted butter, melted
- 2/3 cup brown sugar, packed
- 1 Tablespoon vanilla extract
- 1 1/4 cup all-purpose flour
- 1 1/4 cup rolled oats or old fashioned oats
- 1 teaspoon baking soda
- 1/2 teaspoon salt, divided
Caramel Filling
- 40 caramel squares
- 1/3 cup heavy cream
Topping
- 1 1/2 cup semi-sweet chocolate chips
- Remaining half of the cookie mixture (from above ingredients)
Instructions
- Prepare the Pan: Preheat your oven to 350°F (177°C). Line and grease an 8×8 inch baking pan using parchment paper to prevent sticking and for easy removal.
- Make the Cookie Mixture: In a large microwave-safe bowl, melt the butter. Whisk in the brown sugar and vanilla extract until thoroughly combined.
- Combine Dry Ingredients: Add the flour, oats, baking soda, and 1/4 teaspoon of salt to the butter mixture. Use a pastry cutter or fork to mix until the mixture becomes crumbly and well incorporated.
- Form the Base: Press about half of the crumbly mixture evenly into the bottom of the prepared baking pan to create the crust. Bake this base for 10 minutes until it is slightly set.
- Prepare the Caramel Filling: While the crust bakes, place the caramel squares, heavy cream, and the remaining 1/4 teaspoon salt into a large microwave-safe bowl. Heat on high for 1 minute, stir, then heat for another minute and stir again until the caramel mixture is smooth and fully melted. Heat carefully to avoid seizing.
- Layer the Chocolate: Once the crust is done baking, immediately sprinkle the semi-sweet chocolate chips evenly over the hot crust.
- Add the Caramel Layer: Pour the prepared caramel sauce evenly over the chocolate chip layer.
- Top with Remaining Crust: Sprinkle the remaining half of the oat mixture on top of the caramel layer, gently pressing or tapping down with your hand to form a firm topping.
- Bake the Bars: Return the pan to the oven and bake for another 15 minutes or until the top is lightly browned and set.
- Cooling and Slicing: Remove the pan from the oven and transfer to a wire rack to cool completely. For best results and to avoid caramel oozing, let the bars set at room temperature overnight or chill in the refrigerator for at least 3 hours before cutting into squares.
Notes
- Use parchment paper to line the pan for easy removal and to prevent sticking.
- Be careful heating the caramel mixture; avoid overheating to prevent the caramel from seizing.
- Allow the bars to cool completely or chill well before slicing for clean, neat squares.
- Store any leftovers in an airtight container at room temperature or in the fridge for longer freshness.
- Substitute salted butter with unsalted plus a pinch of extra salt if desired.

