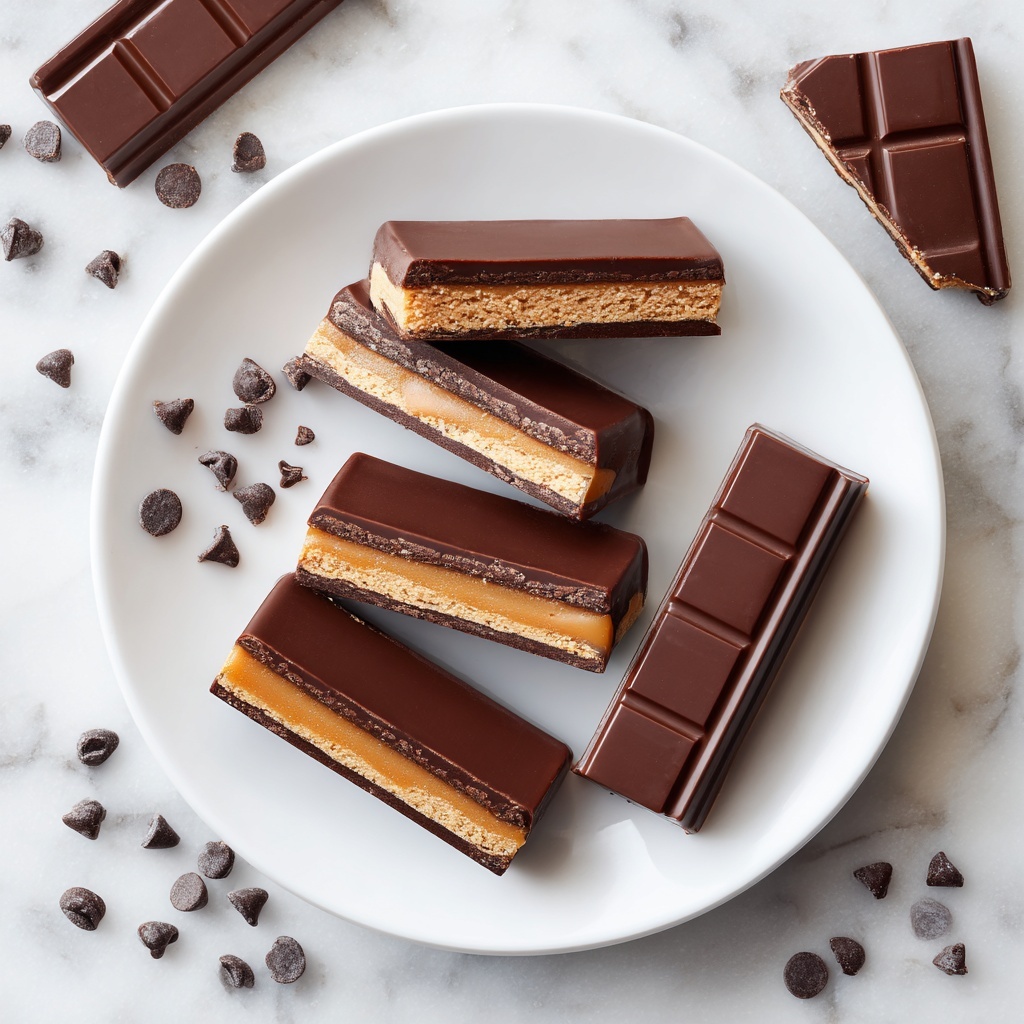
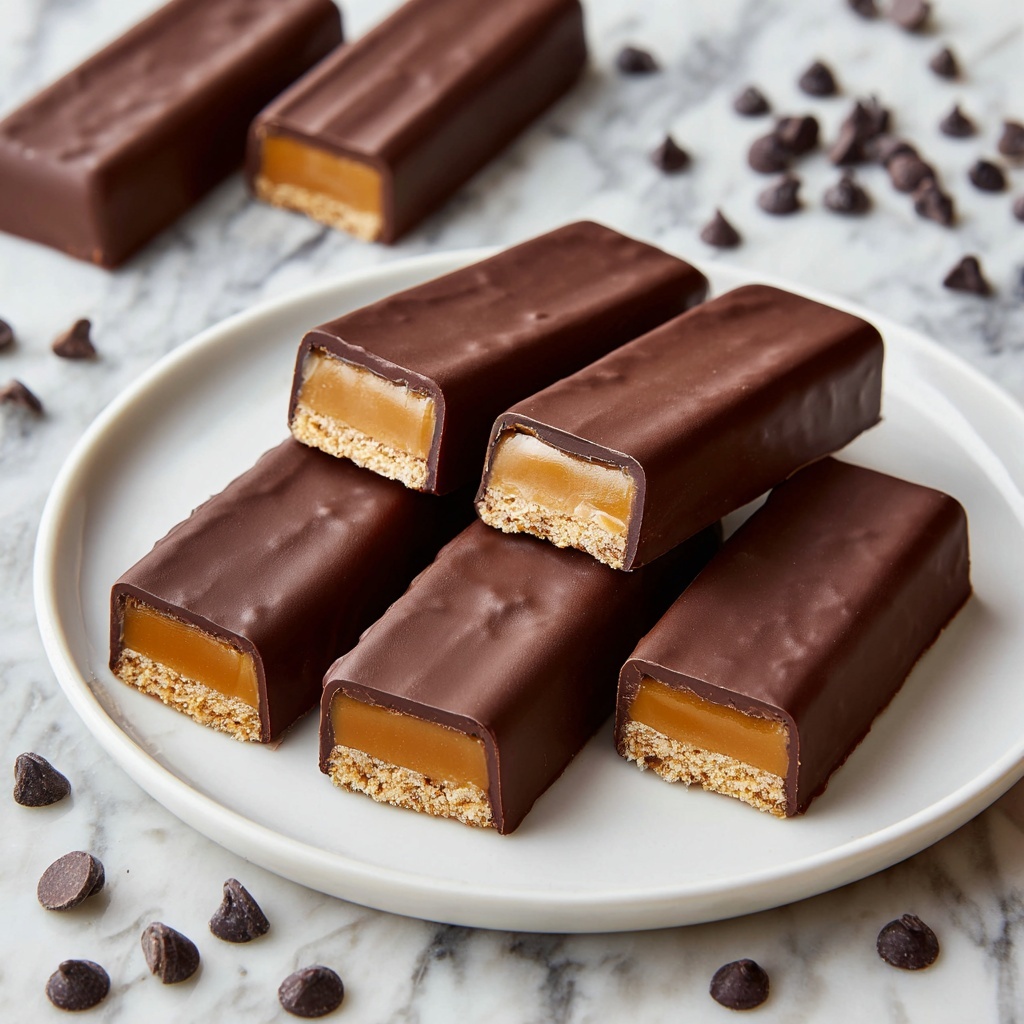
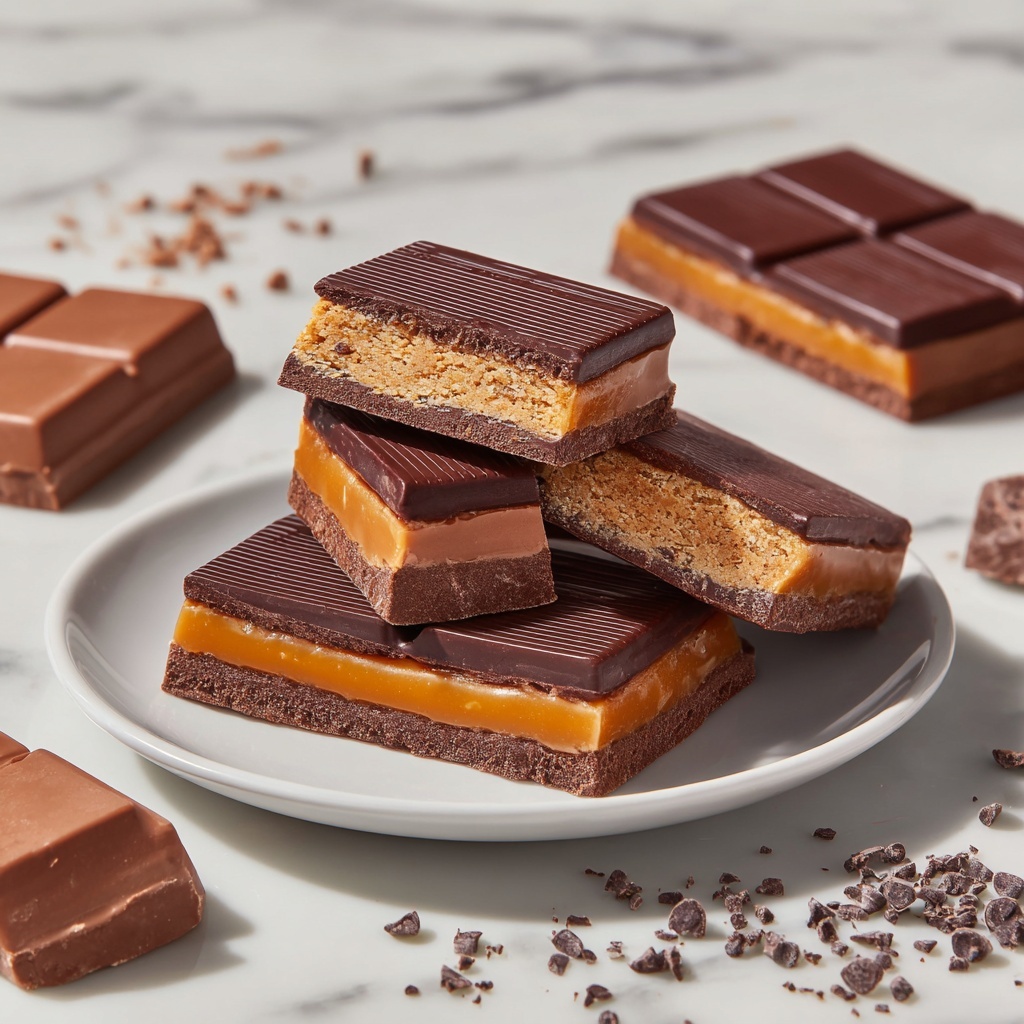
If you have a sweet tooth but want to keep things on the healthy side, you are going to fall head over heels for this Healthy Twix Bars: Guilt-Free Indulgence Recipe. It perfectly captures that nostalgic caramel and chocolate combo we all love, but with wholesome ingredients that make it a treat you can truly feel good about. From the crisp almond flour base to the luscious peanut butter layer and rich chocolate coating, every bite delivers satisfaction without the sugar crash. Trust me, these bars are a game changer—decadence meets nutrition in every square!
Ingredients You’ll Need
Gathering the right ingredients might seem like a tiny task, but these simple and essential items are the magic behind the texture, flavor, and beautiful color of your Healthy Twix Bars. Each ingredient plays a key role whether it’s the creamy richness, the subtle sweetness, or that buttery crunch.
- 2 cups Almond Flour: Provides a sturdy, nutty shortbread base with great texture; oat flour works nicely too for a different bite.
- 1/2 cup Butter (or Coconut Oil): Adds richness and moisture for a tender crust; plant-based butter is a perfect dairy-free swap.
- 1/4 cup Maple Syrup: Natural sweetness with a warm, caramel-like flavor; honey can be used instead for a floral touch.
- 1 teaspoon Vanilla Extract: Elevates all the flavors with fragrant warmth; almond extract can offer a unique twist.
- 1/4 teaspoon Salt: Balances sweetness and intensifies overall flavor; sea salt is a lovely alternative.
- 1 cup Creamy Peanut Butter: The creamy caramel substitute that’s rich and nutty; almond or sunflower butter works well for nut-free diets.
- 1 cup Chocolate Chips: The crowning glory–smooth, melty chocolate that hardens beautifully; dark chocolate chunks add richness.
- 2 tablespoons Coconut Oil: Keeps the chocolate silky and melt-ready; vegetable oil can be used if preferred.
How to Make Healthy Twix Bars: Guilt-Free Indulgence Recipe
Step 1: Prepare and Bake the Shortbread Base
First things first, preheat your oven to 350°F (175°C) and line an 8×8-inch baking pan with parchment paper to prevent sticking. In a mixing bowl, combine the almond flour, melted butter or coconut oil, maple syrup, vanilla extract, and salt. The mixture will come together into a buttery, slightly crumbly dough perfect for pressing. Press this evenly into your pan—this will form the crisp, golden shortbread layer that mimics the classic Twix cookie base. Bake for 10-12 minutes until it’s beautifully golden and fragrant.
Step 2: Whip Up the Peanut Butter Filling
While the base cools, mix the creamy peanut butter, additional maple syrup, vanilla extract, and just a little almond flour for structure in a separate bowl. The goal is a smooth, spreadable filling that’ll take the place of the traditional caramel. Once your shortbread layer is cool enough, spread this luscious peanut butter mixture evenly over it. Then pop the entire pan into the freezer for at least an hour. This step is crucial to let the filling firm up, making those clean-cut bars possible.
Step 3: Coat the Bars in Chocolate
When you’re ready to finish, melt the chocolate chips together with coconut oil in a double boiler or microwave until silky smooth. Carefully lift your bars out of the pan, slice them into your preferred sizes, then dip each bar into the chocolate to coat them fully. Let any excess drip off. Place the chocolate-coated bars on parchment or a wire rack, and once again chill in the freezer for about 10 minutes to harden the chocolate coating. For an extra touch, drizzle a little more melted chocolate on top and sprinkle with a pinch of sea salt for that perfect salty-sweet balance.
How to Serve Healthy Twix Bars: Guilt-Free Indulgence Recipe
Garnishes
Sprinkling a few sea salt flakes on top after the chocolate sets brings out layers of flavor and creates an irresistible sweet-savory vibe. You can also add finely chopped nuts or shredded coconut for a nutty crunch or tropical flair.
Side Dishes
These bars are fantastic on their own, but why not pair them with a scoop of your favorite vanilla frozen yogurt or a dollop of Greek yogurt for a creamy counterpoint? Fresh berries alongside add a burst of juiciness that complements the bars beautifully.
Creative Ways to Present
For parties or gift-giving, arrange the bars in a decorative box lined with parchment paper. You can also serve mini versions on a dessert platter alongside nuts and dried fruit for a gourmet snack board that will wow your guests.
Make Ahead and Storage
Storing Leftovers
Keep your Healthy Twix Bars in an airtight container in the refrigerator, where they will stay fresh and firm for up to a week. This cooling keeps the chocolate from melting and the peanut butter filling delightfully dense.
Freezing
If you want to keep these treats longer, freeze them in a single layer initially, then stack them with parchment between layers in a container. They freeze wonderfully for up to three months, making them a perfect make-ahead snack.
Reheating
When you’re ready to enjoy frozen bars, let them thaw in the fridge for a couple of hours or at room temperature for about 20 minutes. Avoid microwaving as it can melt the chocolate unevenly and change the texture of the bars.
FAQs
Can I substitute almond flour with another flour?
Absolutely! Oat flour is a popular alternative that changes the texture slightly, making it a bit softer, but it still works wonderfully for the base of these Healthy Twix Bars: Guilt-Free Indulgence Recipe.
Is there a vegan option for these bars?
Yes, simply swap out the butter for plant-based butter or coconut oil, and ensure your chocolate chips are dairy free. Using maple syrup keeps the sweetness vegan-friendly!
Can I use crunchy peanut butter instead of creamy?
While creamy peanut butter creates a smooth, caramel-like layer, crunchy peanut butter can add delightful texture if you prefer. Just be sure to mix it well for even spreading.
How long do these bars last in the fridge?
Stored properly in an airtight container, these bars stay fresh for up to one week. They’re best enjoyed chilled for that perfect firm bite.
Can I make these bars nut-free?
Yes! Use sunflower seed butter instead of peanut butter and try oat flour instead of almond flour to avoid nuts altogether. Choose nut-free chocolate chips and double-check labels.
Final Thoughts
These Healthy Twix Bars: Guilt-Free Indulgence Recipe are a celebration of flavor and smart ingredients that come together to satisfy your sweet cravings without the guilt. Whether you need a delightful afternoon pick-me-up or a party treat that impresses and nourishes, these bars have got you covered. I can’t wait for you to try them and experience the joy of indulgence done right!
Print
Healthy Twix Bars: Guilt-Free Indulgence Recipe
- Prep Time: 20 minutes
- Cook Time: 12 minutes
- Total Time: 1 hour 45 minutes
- Yield: 16 servings
- Category: Dessert
- Method: Baking
- Cuisine: American
- Diet: Gluten Free
Description
These Healthy Twix Bars offer a guilt-free indulgence that beautifully balances a buttery shortbread base, a creamy peanut butter caramel layer, and a rich chocolate coating. Perfect for a nutritious treat, they are easy to make, wholesome, and delightfully satisfying.
Ingredients
Shortbread Base
- 2 cups Almond Flour (Substitute with oat flour for a different texture)
- 1/2 cup Butter or Coconut Oil (Use plant-based butter for a dairy-free option)
- 1/4 cup Maple Syrup (Can be replaced with honey for a floral flavor)
- 1 teaspoon Vanilla Extract (Use almond extract for a unique twist)
- 1/4 teaspoon Salt (Sea salt can be a great substitute)
Peanut Butter Filling
- 1 cup Creamy Peanut Butter (Nut-free options include almond or sunflower butter)
- 1/4 cup Maple Syrup
- 1 teaspoon Vanilla Extract
- 2 tablespoons Almond Flour (to thicken)
Chocolate Coating
- 1 cup Chocolate Chips (Opt for dark chocolate chunks for richness)
- 2 tablespoons Coconut Oil (Substitute with vegetable oil if desired)
- Sea Salt (optional, for sprinkling)
Instructions
- Preheat Oven: Preheat your oven to 350°F (175°C) and line an 8×8 inch baking pan with parchment paper for easy removal.
- Prepare Shortbread Base: In a mixing bowl, combine almond flour, melted butter or coconut oil, maple syrup, vanilla extract, and salt. Mix thoroughly until the dough comes together. Press the mixture evenly into the prepared baking pan and bake for 10-12 minutes until the edges are golden brown. Allow to cool completely.
- Make Peanut Butter Filling: In another bowl, combine creamy peanut butter, maple syrup, vanilla extract, and almond flour. Stir well until a smooth, thick filling forms. Spread this peanut butter mixture evenly over the cooled shortbread base.
- Freeze Filling: Place the pan in the freezer and chill for at least 1 hour, allowing the filling to firm up for easier slicing and coating.
- Melt Chocolate Coating: In a microwave-safe bowl or over a double boiler, melt the chocolate chips with coconut oil until smooth and glossy. Stir frequently to avoid burning.
- Assemble Bars: Remove the pan from the freezer and slice into bars. Dip or coat each bar in the melted chocolate, letting excess drip off. Place bars on parchment paper.
- Set and Garnish: Once all bars are coated, drizzle any remaining melted chocolate over the tops and optionally sprinkle with sea salt. Freeze the bars for 10 minutes to let the chocolate harden.
- Store and Serve: Store the finished bars in an airtight container in the refrigerator. Serve chilled or at room temperature for a delicious guilt-free dessert.
Notes
- You can substitute oat flour for almond flour to change the texture somewhat, though it may alter the flavor and consistency.
- Use plant-based butter or coconut oil to make this recipe dairy-free.
- Nut-free versions can be made using almond or sunflower butter instead of peanut butter.
- Dark chocolate adds richness and more antioxidants compared to milk chocolate.
- Bars are best stored in the fridge and consumed within one week for optimal freshness.
- Sprinkling sea salt on top enhances flavor by balancing sweetness.


