
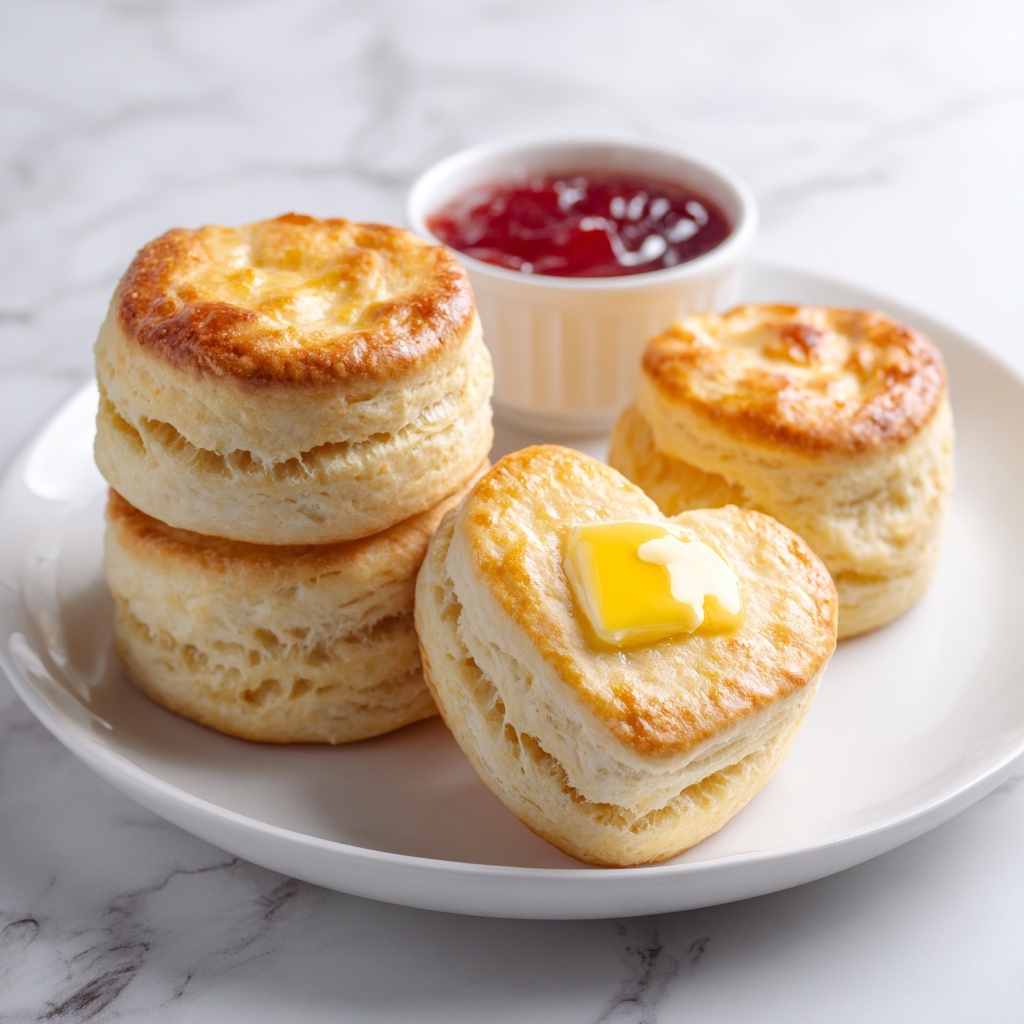
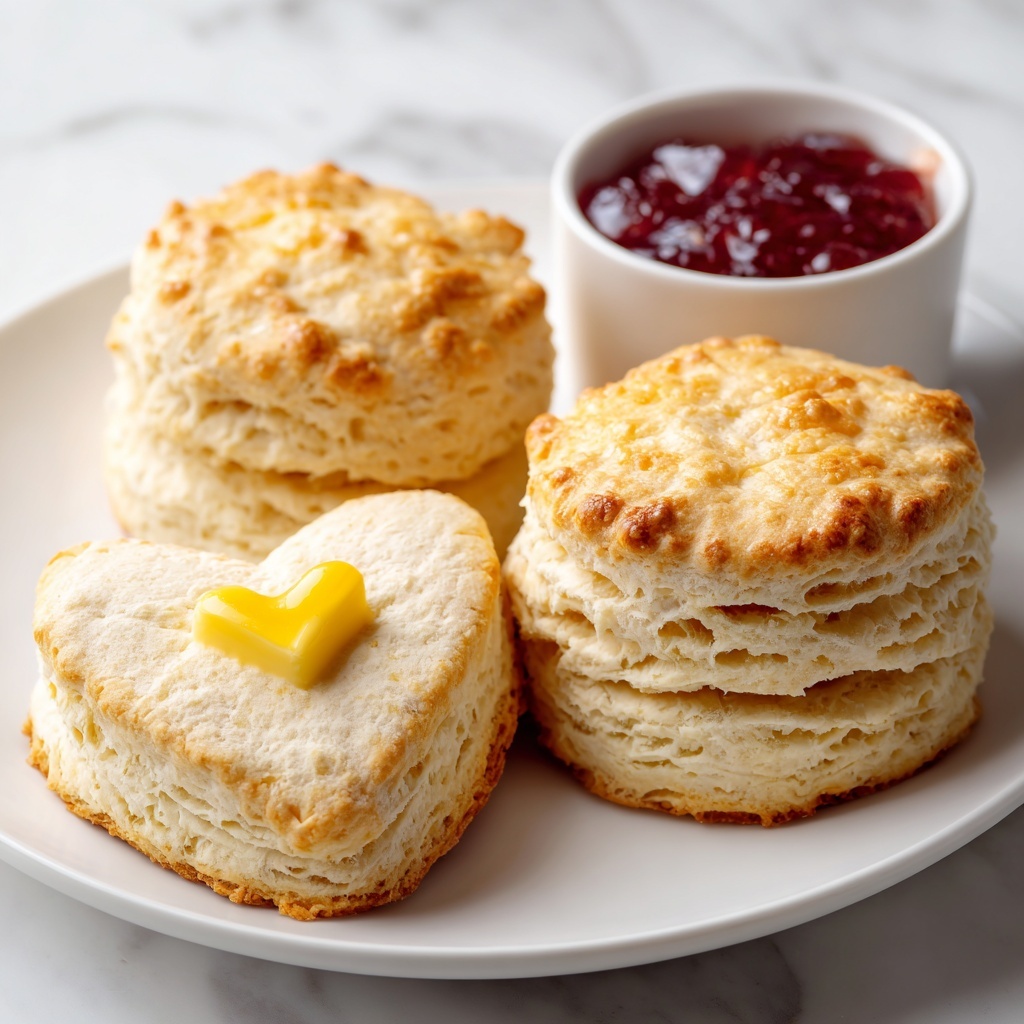
If you’ve ever dreamed of biting into warm, fluffy, melt-in-your-mouth biscuits, then I’m about to share a treasure with you—the Homemade Buttermilk Biscuits: 7 Steps to Fluffy Perfection Recipe. These biscuits have that perfect golden crust, pillowy interior, and buttery richness that take any meal to the next level. With just a handful of everyday ingredients and a pinch of love, you’ll learn how to craft biscuits that instantly become family favorites. Trust me, once you try this recipe, there’s no going back to store-bought!
Ingredients You’ll Need
Creating these delightful biscuits is simpler than you think because each ingredient plays a starring role in the texture and flavor. From the fluffy lift given by baking powder to the tang of buttermilk that makes every bite irresistible, you’ll see how easy it is to assemble these essentials for biscuit bliss.
- 2 cups all-purpose flour: The foundation providing structure and the perfect base for rise.
- 1 tablespoon baking powder: The leavening agent that helps your biscuits puff up beautifully.
- 1/2 teaspoon baking soda: Works alongside baking powder to give an extra tender crumb.
- 1 teaspoon salt: Enhances all the flavors without overpowering.
- 1/4 cup unsalted butter, cold and cubed: Cold butter creates flaky layers as it melts during baking.
- 3/4 cup buttermilk: Adds moisture and a subtle tang that makes these biscuits unforgettable.
How to Make Homemade Buttermilk Biscuits: 7 Steps to Fluffy Perfection Recipe
Step 1: Preheat Your Oven
Start by heating your oven to 450°F (232°C). A hot oven is key to that golden, crisp exterior while keeping the inside fluffy and light. Nothing better than biscuits baking quickly and beautifully!
Step 2: Combine Dry Ingredients
In a large bowl, whisk together your flour, baking powder, baking soda, and salt. This ensures even distribution of leavening agents and seasoning for consistent rise and taste in every biscuit.
Step 3: Cut in the Cold Butter
Drop your cold, cubed butter into the dry mixture. Using a pastry cutter or your fingers, blend until the mixture resembles coarse crumbs. These pea-sized butter bits are essential—they create flaky layers once they melt in the oven. Don’t overwork it!
Step 4: Stir in the Buttermilk
Pour in the buttermilk and gently mix until just combined. It’s crucial not to overmix here; a few lumps are okay! Overworking the dough can make your biscuits tough instead of tender.
Step 5: Knead Lightly on a Floured Surface
Turn the dough out onto a lightly floured surface. Give it just a few gentle kneads—about 5 or 6 times—until it holds together. This step helps build structure without sacrificing fluffiness.
Step 6: Roll and Cut Your Biscuits
Roll the dough out to about 1-inch thickness. Using a biscuit cutter or a round glass, press straight down (no twisting!) to cut out your biscuits. Twisting seals the edges and prevents them from rising properly.
Step 7: Bake to Golden Brown Perfection
Place the biscuits on a baking sheet, close but not touching, and pop them in the oven for 12-15 minutes. Keep an eye on them—they’re done when tops turn a beautiful golden brown and the smell fills your kitchen with pure comfort.
How to Serve Homemade Buttermilk Biscuits: 7 Steps to Fluffy Perfection Recipe
Garnishes
Biscuits are delicious on their own, but a little extra flair makes them even better. Try brushing them with melted butter right as they come out of the oven for that irresistible shine and buttery flavor. Honey or sweet fruit preserves also complement their subtle tang fabulously.
Side Dishes
These biscuits were made to accompany a variety of meals. Pair them with classic Southern dishes like sausage gravy for a hearty breakfast, or alongside fried chicken and collard greens for a soul-satisfying dinner. Don’t forget a dollop of your favorite jam or homemade butter to round out the experience.
Creative Ways to Present
Want to impress your guests? Split warm biscuits horizontally and layer with crispy bacon, fresh herbs, or a slice of sharp cheese for an elevated biscuit sandwich. Or turn them into mini sliders for brunch or game day snacks. Their fluffy texture and buttery taste make endless creativity possible!
Make Ahead and Storage
Storing Leftovers
Once cooled, store your biscuits in an airtight container at room temperature for up to two days. They remain soft and fresh enough to enjoy for a quick snack or to accompany your meals the next day.
Freezing
If you want to make these biscuits ahead of time, freeze the unbaked cut biscuits on a baking sheet until firm, then transfer to a freezer bag. When you’re ready, bake them straight from frozen, adding a few extra minutes to the baking time for fresh-out-of-the-oven goodness.
Reheating
To revive leftover biscuits, wrap them in foil and warm in a 350°F oven for 10 minutes. This method keeps them soft yet restores their fresh-baked aroma and texture. Microwave reheating tends to dry them out, so the oven is always preferred.
FAQs
Can I substitute regular milk for buttermilk?
While buttermilk’s acidity is what helps create the tender flakiness and slight tang, you can mimic it by adding 1 tablespoon of lemon juice or white vinegar to 3/4 cup of milk. Let it sit for 5 minutes before using it in the recipe.
Why do my biscuits sometimes turn out dense?
Dense biscuits often result from overmixing the dough or using melted butter instead of cold. Be gentle when combining ingredients and keep your butter cold to trap steam, which helps create that light, fluffy texture.
Can I make this recipe with whole wheat flour?
You can substitute up to half the all-purpose flour with whole wheat flour for a nuttier flavor and added fiber. Just expect slightly denser biscuits, so try to keep the kneading gentle and don’t overwork the dough.
Do I have to use a biscuit cutter?
A biscuit cutter gives the best rise and shape, but in a pinch, you can use the rim of a glass or simply shape the dough into rounds by hand. Just remember to press straight down without twisting to ensure the best fluffiness.
Why is it important to use cold butter?
Cold butter stays solid in the dough until baking, creating steam and flaky layers as it melts. Warm butter blends completely and won’t give you that delicate, tender texture that defines perfect biscuits.
Final Thoughts
There’s something truly magical about making your own biscuits from scratch, and the Homemade Buttermilk Biscuits: 7 Steps to Fluffy Perfection Recipe makes it so approachable and rewarding. Whether you’re feeding a crowd or craving a simple treat, these biscuits bring warmth and comfort to your table. So grab your ingredients, get baking, and prepare to fall in love with biscuits all over again!
Print
Homemade Buttermilk Biscuits: 7 Steps to Fluffy Perfection Recipe
- Prep Time: 10 minutes
- Cook Time: 15 minutes
- Total Time: 25 minutes
- Yield: 12 biscuits
- Category: Bread
- Method: Baking
- Cuisine: Southern American
Description
These homemade buttermilk biscuits are delightfully fluffy and tender, perfect for breakfast or as a side to any meal. With simple ingredients and straightforward steps, you can easily master these classic Southern-style biscuits baked to golden perfection.
Ingredients
Dry Ingredients
- 2 cups all-purpose flour
- 1 tablespoon baking powder
- 1/2 teaspoon baking soda
- 1 teaspoon salt
Wet Ingredients
- 1/4 cup unsalted butter, cold and cubed
- 3/4 cup buttermilk
Instructions
- Preheat the Oven: Preheat your oven to 450°F (232°C) to ensure it reaches the optimal temperature for baking fluffy biscuits.
- Combine Dry Ingredients: In a large bowl, whisk together 2 cups of all-purpose flour, 1 tablespoon baking powder, 1/2 teaspoon baking soda, and 1 teaspoon salt to evenly distribute the leavening agents and salt.
- Incorporate Cold Butter: Add 1/4 cup cold, cubed unsalted butter to the dry mixture. Using a pastry cutter or your fingers, work the butter into the flour until the mixture resembles coarse crumbs with pea-sized pieces.
- Add Buttermilk: Pour in 3/4 cup of buttermilk and gently stir until just combined, avoiding overmixing to maintain biscuit tenderness.
- Knead the Dough: Turn the dough out onto a lightly floured surface and knead lightly 5-6 times to bring it together without toughening it.
- Roll and Cut: Roll the dough out to about 1-inch thickness. Use a biscuit cutter or a round cutter to cut out biscuits, pressing straight down without twisting to help them rise evenly.
- Prepare for Baking: Place the cut biscuits onto a baking sheet, spacing them evenly but close enough to help them rise upward.
- Bake: Bake the biscuits in the preheated oven for 12-15 minutes until they are golden brown on top and cooked through.
Notes
- Ensure butter is very cold to create flaky layers in the biscuits.
- Do not overwork the dough to avoid tough biscuits.
- Use fresh baking powder and baking soda for best rise.
- Serve warm with butter, honey, or jam for the best flavor.


