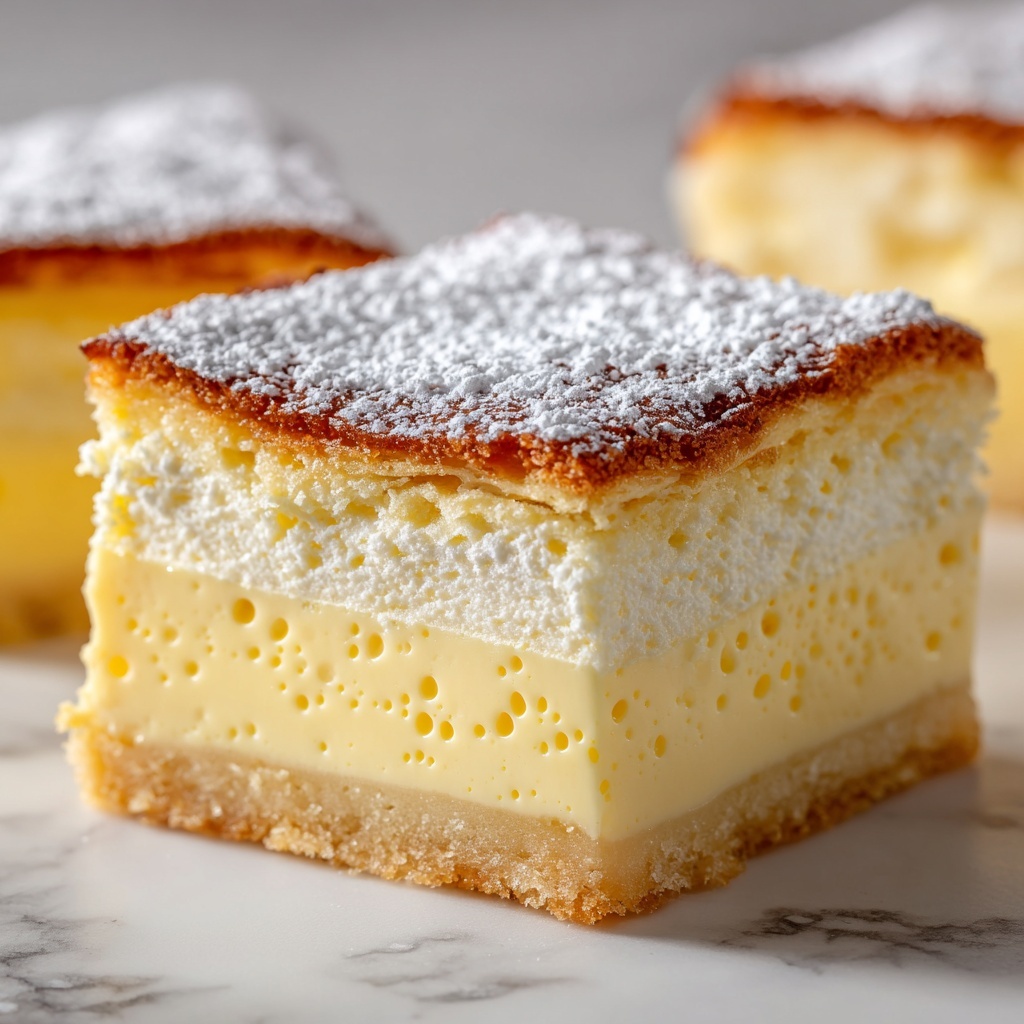
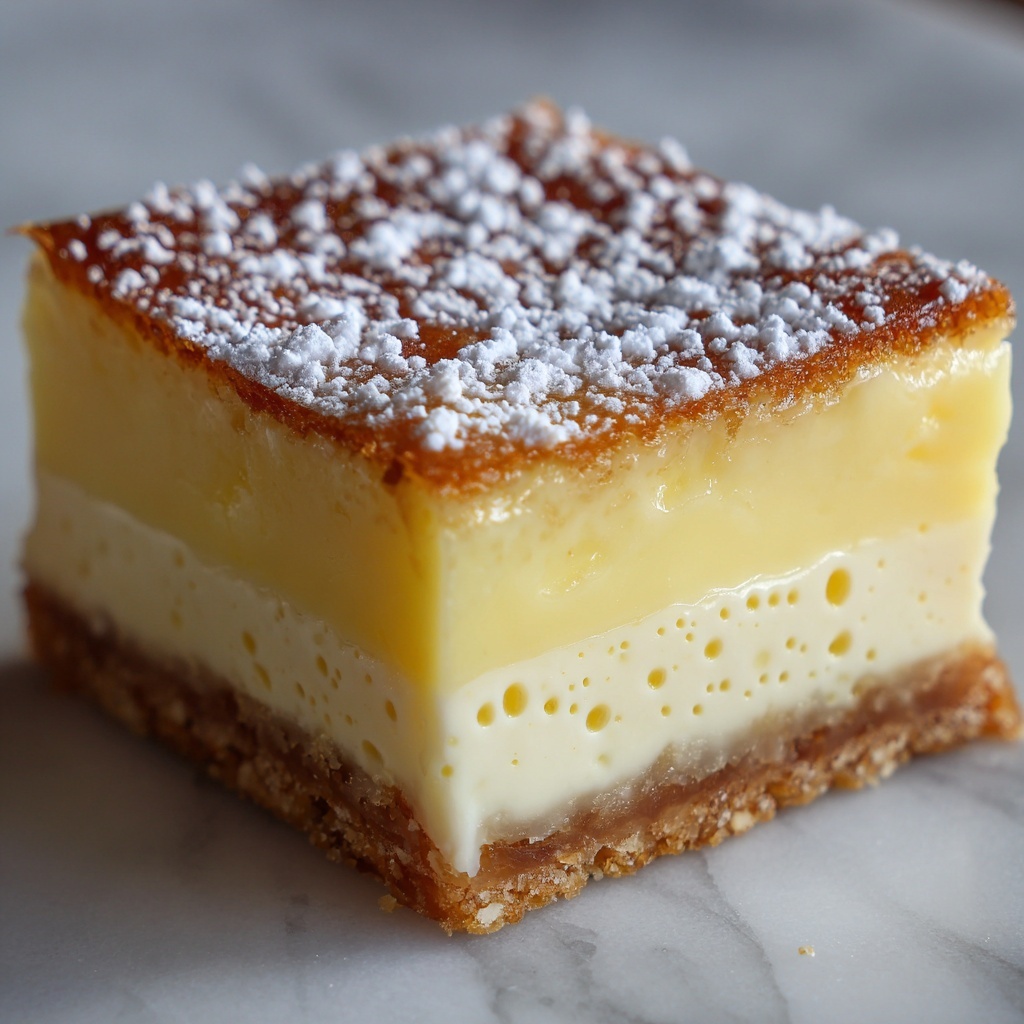
There is something irresistibly nostalgic and wonderfully satisfying about this No-Bake Custard Slice Recipe. With its creamy custard layers sandwiched between crisp biscuits and topped with a smooth icing, this dessert is pure comfort on a plate. The best part is how effortlessly it comes together without needing an oven, making it perfect for warm days or when you want a sweet treat without the fuss. If you love creamy, cool, and tender slices that melt in your mouth, this recipe will soon become a cherished favorite.

Ingredients You’ll Need
Gathering simple, pantry-friendly ingredients is what makes this No-Bake Custard Slice Recipe so easy yet incredibly delicious. Each component plays a crucial role in building that perfect balance of texture and flavor—whether it is the buttery biscuits that provide crunch or the smooth custard that adds comforting richness.
- Plain graham crackers or digestive biscuits (or vanilla wafers): These form the crunchy layers that contrast beautifully with creamy custard.
- Milk: The base for the custard, giving it that silky texture and mild sweetness.
- Sugar: Sweetens the custard perfectly without overpowering other flavors.
- Cornstarch: The secret thickener that transforms the milk into a luscious custard.
- Vanilla extract: Brings warmth and depth of flavor to both the custard and icing.
- Egg yolks: Add richness and help to achieve a creamy custard consistency.
- Butter: Introduces a velvety smoothness and subtle richness to the custard.
- Powdered sugar: Used in the icing for a sweet, smooth finish on top.
- Milk (for icing): Combines with powdered sugar to make the perfect glaze.
How to Make No-Bake Custard Slice Recipe
Step 1: Prepare Your Pan and Biscuit Base
Start by lining an 8×8 or 9×9 square pan with parchment paper to make lifting the slice out a breeze later on. Then, lay down the first layer of biscuits evenly to cover the bottom. This crunchy base will soak up some of the custard, softening just enough while still holding its structure.
Step 2: Whisk and Heat the Custard Mixture
In a saucepan, combine the milk, sugar, and cornstarch; whisk everything together until smooth so no lumps remain. Place the pan over medium heat, stirring constantly to prevent burning. Once the milk is hot, slowly whisk in the egg yolks, which will thicken the custard and add richness.
Step 3: Thicken the Custard
Continue to stir the mixture gently for about 5 to 7 minutes until it thickens to a creamy, pudding-like consistency. This step is where patience pays off, ensuring your custard slice has that luscious, melt-in-your-mouth texture you’re aiming for.
Step 4: Add Butter and Vanilla
Remove the saucepan from heat and whisk in butter and vanilla extract right away until fully blended. The butter lends a silky finish while the vanilla deepens the flavor, making every bite feel decadent.
Step 5: Assemble the Layers
Pour half of the warm custard over the biscuit base, spreading it evenly. Then, place a second layer of biscuits on top, followed by the remaining custard. Finish with a final biscuit layer to create the classic slice structure.
Step 6: Make and Spread the Icing
Combine powdered sugar, 1-2 tablespoons of milk, and vanilla in a bowl to form a smooth icing. Spread this gently and evenly over the top biscuit layer to add a sweet, glossy finish that sets the whole slice apart.
Step 7: Chill Thoroughly
Place the pan in the fridge for at least 4 hours to allow the custard to set firmly—overnight is even better for the best texture and flavor. Once chilled, slice into neat squares and prepare to be amazed by a dessert that’s creamy, crunchy, and irresistibly smooth.
How to Serve No-Bake Custard Slice Recipe
Garnishes
Elevate your No-Bake Custard Slice Recipe by adding fresh fruit like raspberries or sliced strawberries on top. A sprinkle of toasted coconut or chopped nuts also adds a wonderful crunch and a pop of color.
Side Dishes
This slice pairs beautifully with a dollop of whipped cream or a scoop of vanilla ice cream. For a refreshing contrast, serve alongside a citrus fruit salad or a cup of aromatic herbal tea.
Creative Ways to Present
Try layering mini custard slices in individual glasses for a charming parfait presentation. You can also dust the top with cocoa powder or cinnamon for a spicy twist—each variation brings a special touch to this classic treat.
Make Ahead and Storage
Storing Leftovers
Keep any leftover No-Bake Custard Slice covered tightly in the refrigerator. The flavors actually improve after sitting for a day, and the slice stays creamy and fresh for up to 3 days.
Freezing
This custard slice doesn’t freeze well because the texture can change when thawed. It is best enjoyed fresh after chilling in the fridge rather than freezing to maintain that smooth custard consistency.
Reheating
Since this dessert is served chilled, reheating is not recommended. Instead, allow leftovers to come to room temperature briefly if you prefer a less cold bite, but the best experience is always when served cool and firm.
FAQs
Can I use other types of biscuits?
Absolutely! While graham crackers or digestive biscuits are traditional, vanilla wafers or even thin shortbread cookies work well too. Just choose biscuits that soften but don’t dissolve completely when layered with custard.
Is it safe to use raw egg yolks in this recipe?
The egg yolks are gently cooked as they are whisked into the hot milk mixture, which is heated until thickened—this process cooks the eggs thoroughly, making it safe to eat.
Can I make this slice ahead of time?
Definitely! In fact, preparing the No-Bake Custard Slice Recipe a day ahead gives the flavors time to meld and the custard time to set perfectly. Just keep it refrigerated until serving.
How can I make the icing less sweet?
To reduce sweetness, use slightly less powdered sugar and increase the milk a bit for a thinner glaze. You can also add a squeeze of lemon juice to balance the sweetness with a subtle tang.
Can I add chocolate to this dessert?
Yes! For a chocolate twist, you can swirl melted chocolate into the custard before layering or sprinkle chocolate shavings on the icing. It adds a rich depth that chocolate lovers will adore.
Final Thoughts
There’s something truly special about this No-Bake Custard Slice Recipe—it’s like a sweet hug from the inside out. Easy to prepare, no oven required, and absolutely delicious, it’s destined to become your go-to dessert for gatherings or a simple indulgence at home. Give it a try, and watch it quickly become a beloved classic in your recipe box.
Print
No-Bake Custard Slice Recipe
- Prep Time: 15 minutes
- Cook Time: 15 minutes
- Total Time: 4 hours 30 minutes
- Yield: 9 servings
- Category: Dessert
- Method: Stovetop
- Cuisine: American
Description
This No-Bake Custard Slice is a delightful layered dessert featuring creamy homemade custard sandwiched between crispy graham crackers or digestive biscuits. With a smooth vanilla icing topping and chilled to perfection, it’s an easy-to-make treat that requires no baking and is perfect for serving at gatherings or as a sweet indulgence.
Ingredients
Custard Layers
- 2 packs plain graham crackers or digestive biscuits (or vanilla wafers)
- 4 cups milk
- 1/2 cup sugar
- 1/3 cup cornstarch
- 2 tsp vanilla extract
- 3 egg yolks
- 2 tbsp butter
Vanilla Icing
- 1 cup powdered sugar
- 1–2 tbsp milk
- 1/2 tsp vanilla extract
Instructions
- Prepare the Pan: Line an 8×8 or 9×9 square pan with parchment paper to prevent sticking and make removal easier.
- First Biscuit Layer: Arrange a layer of graham crackers or your chosen biscuits to fully cover the bottom of the lined pan.
- Make Custard Base: In a medium saucepan, whisk together the milk, sugar, and cornstarch until the mixture is completely smooth with no lumps.
- Add Egg Yolks: Heat the mixture over medium, stirring constantly. When it becomes hot, slowly whisk in the egg yolks to temper them and avoid curdling.
- Thicken Custard: Continue stirring the mixture consistently for about 5 to 7 minutes until the custard thickens to a creamy, pudding-like consistency.
- Finish Custard: Remove the saucepan from heat and stir in the butter and vanilla extract until the custard is smooth and fully combined.
- Assemble First Custard Layer: Pour half of the prepared custard evenly over the first layer of biscuits.
- Second Biscuit Layer: Place another complete biscuit layer on top of the custard layer.
- Assemble Second Custard Layer: Pour the remaining custard over the second biscuit layer, smoothing it out evenly.
- Final Biscuit Layer: Finish with a last layer of biscuits placed on top of the custard.
- Prepare Vanilla Icing: Mix the powdered sugar, milk (start with 1 tbsp), and vanilla extract in a bowl until you achieve a smooth, spreadable consistency. Add more milk if necessary to reach desired thickness.
- Spread Icing: Evenly spread the vanilla icing over the top layer of biscuits.
- Chill: Refrigerate the custard slice for at least 4 hours to set properly; chilling overnight provides the best texture and flavor.
- Serve: Slice into squares and serve chilled for a refreshing and creamy dessert experience.
Notes
- Use parchment paper to line the pan for easy removal and clean edges.
- Whisk constantly when cooking the custard to prevent lumps and scorching.
- Choose your favorite plain biscuits or wafers for the layers depending on preferred flavor and texture.
- Adjust milk in the icing to get the perfect spreadable consistency that is not too runny.
- Chilling time is essential for the custard slice to firm up and for the biscuits to soften slightly, creating the ideal texture.
- Keep refrigerated and consume within 3-4 days for best freshness.


