If you’ve ever dreamed of creating your own festive treat that perfectly captures the magic of the holidays, the Peppermint Candy Delight: 7 Sweet Steps to Festive Joy Recipe is your new best friend in the kitchen. This classic candy-making adventure blends that refreshing peppermint punch with the fun and satisfaction of pulling and shaping your own candy. It’s a charming project that fills your home with the warmth of sweet aromas and excitement of colorful treats, offering both a delicious reward and a joyful experience to share with friends and family.
Ingredients You’ll Need
Don’t let the simple ingredients fool you—each one plays a crucial role in creating that perfect glossy, peppermint-flavored candy. Your pantry staples transform into holiday magic, bringing the right balance of sweetness, texture, and a vibrant pop of festive red color.
- 1 cup granulated sugar: The foundation for that irresistible crunch and sweetness.
- 1/3 cup water: Helps dissolve the sugar evenly and control the candy’s texture.
- 1/2 teaspoon peppermint extract: Adds the unmistakable cool, refreshing peppermint flavor that defines this treat.
- Red food coloring: For that signature festive touch, making your candies visually delightful.
How to Make Peppermint Candy Delight: 7 Sweet Steps to Festive Joy Recipe
Step 1: Combine Sugar and Water
Start by mixing 1 cup of granulated sugar with 1/3 cup of water in a sturdy saucepan. This simple beginning is critical because a smooth solution is the base to your shiny, clear candy.
Step 2: Heat Until Sugar Dissolves
Place the saucepan over medium heat. Stir gently but consistently to help the sugar dissolve completely into the water without crystallizing. Patiently waiting here ensures your candy texture will be just right.
Step 3: Boil to 300°F
Once the sugar is dissolved, stop stirring and let the mixture come to a boil. Use a candy thermometer to monitor as it reaches 300°F (the hard crack stage). This step is essential to achieve that perfect crunch that snaps when you bite in.
Step 4: Add Peppermint Extract
Remove the pan from heat and carefully stir in 1/2 teaspoon of peppermint extract. This is where your candy transforms, filling the kitchen with that unmistakable holiday scent and flavor signature.
Step 5: Divide and Color the Mixture
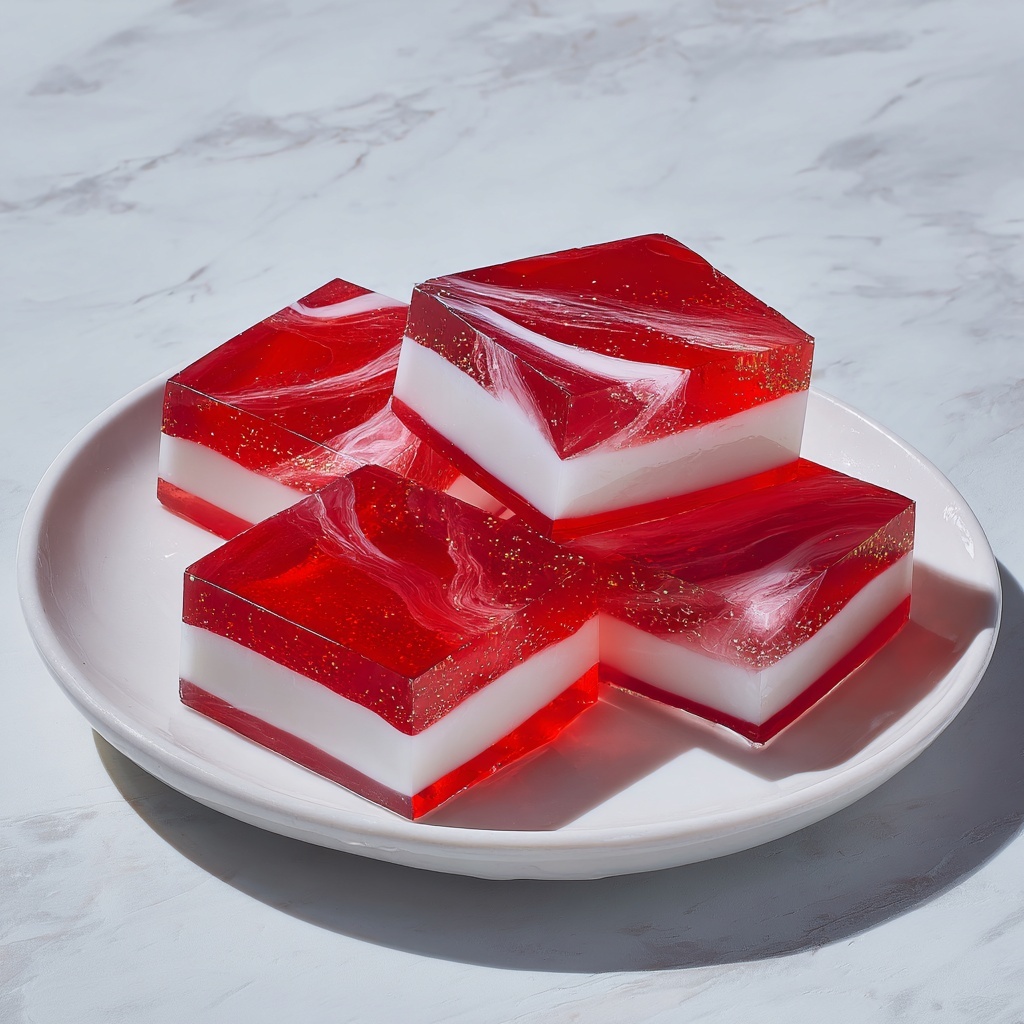
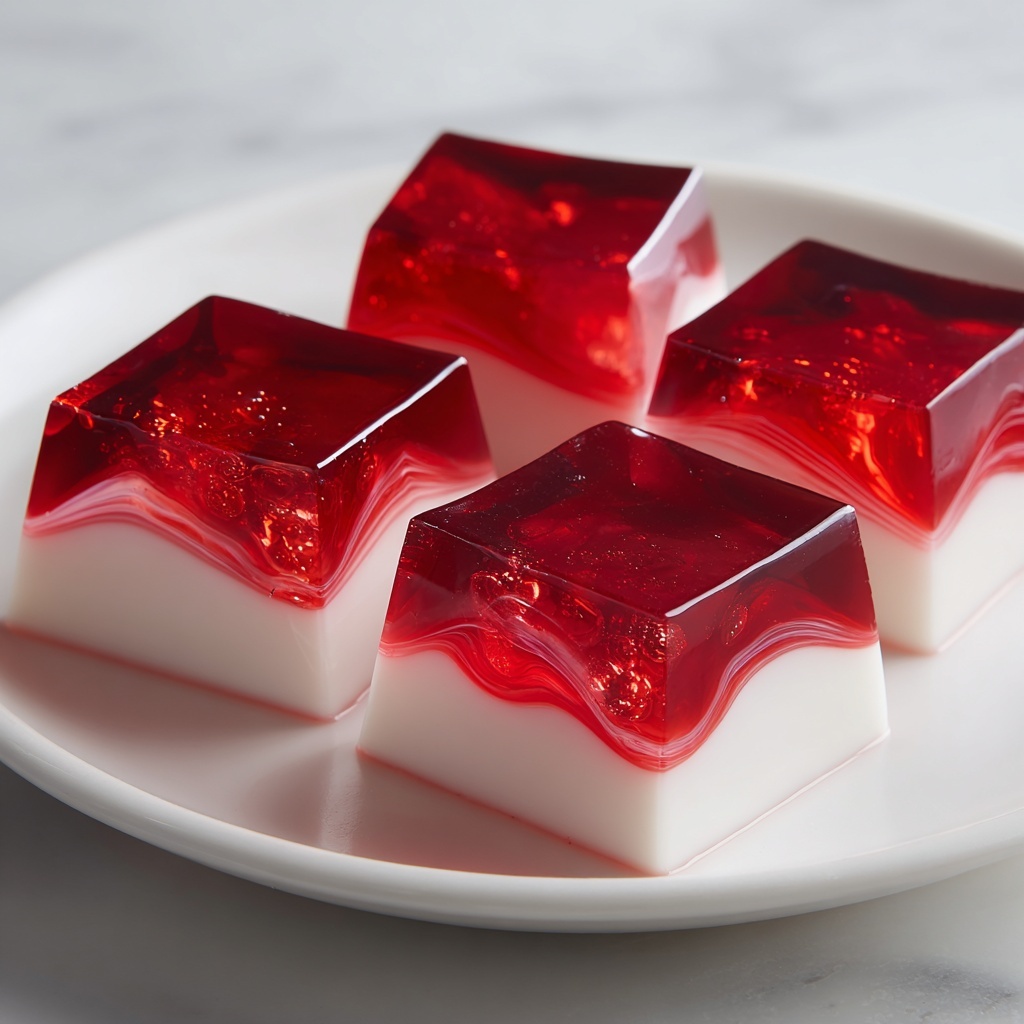
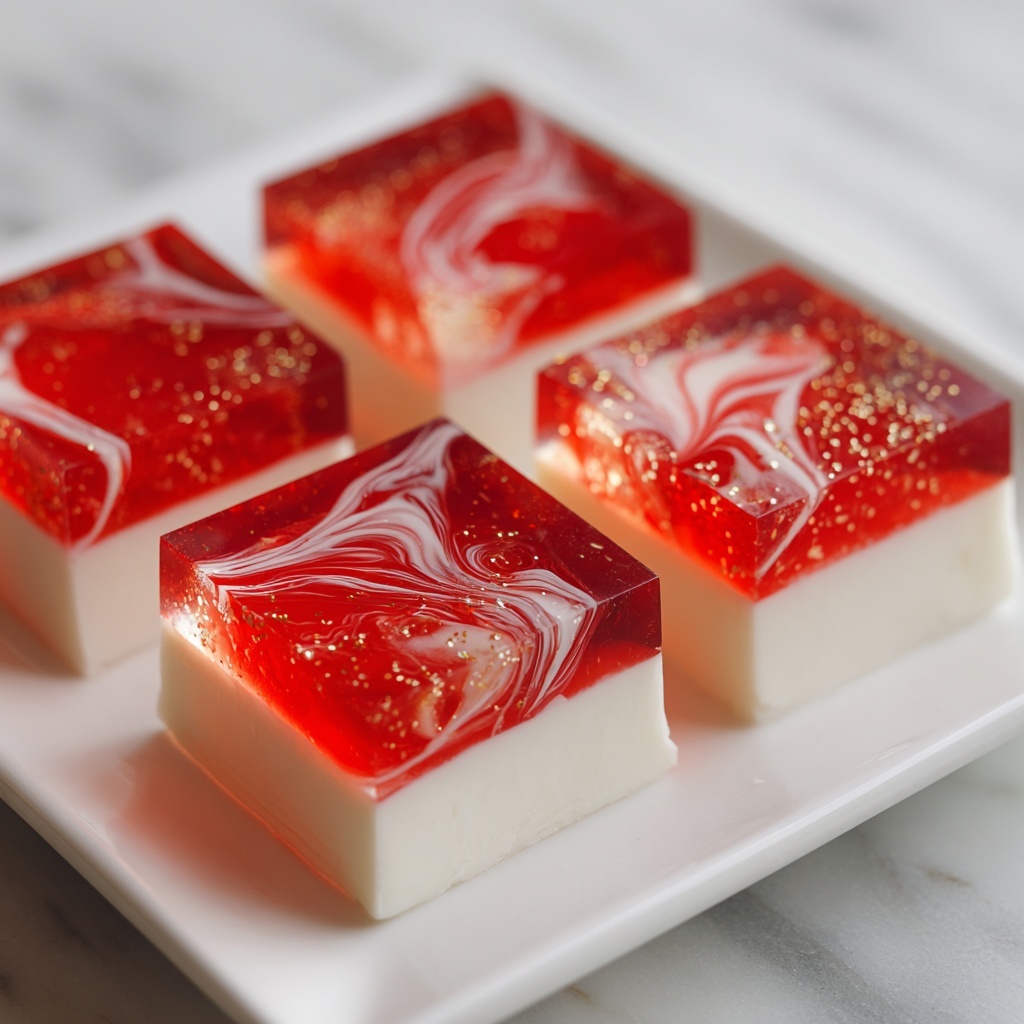
Pour the candy syrup evenly into two separate bowls. Stir red food coloring into one bowl to create a vibrant, festive contrast between the plain and tinted candies—perfect for the classic peppermint look.
Step 6: Pour Onto a Greased Surface
Pour both mixtures onto a greased marble or heatproof surface. This is where the candy begins to take shape and cool enough to handle but remains pliable for shaping.
Step 7: Cool, Pull, and Shape
When the candy cools slightly but is still soft, start pulling it gently to incorporate air and increase that glossy shine. Finally, shape it into your favorite festive candy forms—twisted sticks, disks, or even little peppermint twists that are perfect to pop into mouths or decorate gifts.
How to Serve Peppermint Candy Delight: 7 Sweet Steps to Festive Joy Recipe
Garnishes
Sprinkle a light dusting of powdered sugar or crushed peppermint candy on top of your shaped candies for that extra festive flair and a hint of crunch. This adds a lovely textural contrast that makes your peppermint delights even more irresistible.
Side Dishes
These candies pair wonderfully with a warm mug of hot cocoa or a creamy eggnog, elevating cozy holiday gatherings. They also make a delightful after-dinner treat alongside rich desserts like chocolate mousse or cheesecake, balancing sweetness with a refreshing peppermint finish.
Creative Ways to Present
Wrap your peppermint candies in clear cellophane tied with red or green ribbons for charming homemade gifts. Alternatively, arrange them in festive jars or stack them as edible décor on a holiday dessert table to impress guests with both their beauty and taste.
Make Ahead and Storage
Storing Leftovers
Keep your peppermint candies fresh by storing them in an airtight container at room temperature. This preserves their crisp texture for up to two weeks, making it easy to enjoy a little sweetness whenever the craving strikes.
Freezing
If you want to enjoy these peppermint delights later on, wrap them tightly in wax paper and place in a freezer-safe container. While freezing isn’t necessary, it can extend their shelf life for up to 2 months without sacrificing flavor or texture.
Reheating
Since this candy is best enjoyed fresh, reheating isn’t typically recommended. However, if your candies become too hard, gently warming them in a low-heat oven for a few minutes can restore some pliability for reshaping.
FAQs
Can I use a substitute for peppermint extract?
Absolutely! You can try spearmint or even vanilla extract for a different flavor twist, but keep in mind that peppermint is what gives this recipe its traditional festive character.
What if my candy crystallizes while cooking?
Crystallization happens if the sugar isn’t fully dissolved or if the sides of the pan aren’t cleaned during boiling. To prevent this, brush the sides with water using a wet pastry brush as it heats.
Can I color the candy other than red?
Definitely! You can use green or any other food coloring to match different holidays or personal preferences, making the recipe wonderfully versatile.
Is a candy thermometer necessary?
Using a candy thermometer helps ensure precise cooking at 300°F, critical for that perfect hard crack stage. Without one, it’s really tricky to get the right texture consistently.
How thick should I pull the candy?
Pull the candy until it shines and feels lighter, usually about 10 minutes. When you stretch it into ribbons about 1/8 inch thick, it’s perfect for classic peppermint candies.
Final Thoughts
I can’t recommend the Peppermint Candy Delight: 7 Sweet Steps to Festive Joy Recipe enough for adding hands-on festive fun to your holiday celebrations. The process is as rewarding as the sweet, minty treats you’ll create. Gather your ingredients, embrace the kitchen magic, and share these bright, joyful candies with everyone you love.
Print
Peppermint Candy Delight: 7 Sweet Steps to Festive Joy Recipe
- Prep Time: 5 minutes
- Cook Time: 20 minutes
- Total Time: 25 minutes
- Yield: 12 servings
- Category: Candy
- Method: Stovetop
- Cuisine: American
Description
Peppermint Candy Delight is a classic festive treat that combines the refreshing flavor of peppermint with the satisfying crunch of homemade hard candy. This recipe guides you through a simple 7-step process to create colorful, peppermint-flavored candies perfect for holiday celebrations or gifting.
Ingredients
For Peppermint Candy
- 1 cup granulated sugar
- 1/3 cup water
- 1/2 teaspoon peppermint extract
- Red food coloring (a few drops)
Instructions
- Combine sugar and water: In a medium saucepan, mix 1 cup of granulated sugar with 1/3 cup of water to prepare the candy base.
- Heat the mixture: Place the saucepan over medium heat, stirring gently until the sugar completely dissolves into the water.
- Boil to hard crack stage: Increase the heat and bring the mixture to a rolling boil; continue cooking without stirring until the temperature reaches 300°F (hard crack stage) using a candy thermometer.
- Add peppermint extract: Remove the saucepan from heat and carefully stir in 1/2 teaspoon of peppermint extract to infuse the candy with a refreshing flavor.
- Divide and color: Pour the hot candy mixture into two separate heatproof bowls; add red food coloring drops to one bowl to create a festive red color, leaving the other bowl clear or white.
- Pour mixtures onto greased surface: Transfer both colored candy mixtures carefully onto a well-greased marble slab or baking sheet, keeping them separate but close.
- Cool and shape the candy: Let the candy cool slightly until it can be handled, then pull and stretch the candy repeatedly until it becomes glossy and opaque. Shape into desired candy pieces while still pliable, then allow to fully harden.
Notes
- Use a candy thermometer for accuracy to reach the perfect hard crack stage at 300°F.
- Make sure surfaces and utensils are greased well to prevent sticking of the hot candy.
- Be cautious while handling hot sugar syrup to avoid burns.
- Pulling the candy adds air bubbles which give a lighter texture and a shiny finish.
- Store candies in an airtight container to preserve freshness and prevent them from becoming sticky.
- If you don’t have a marble slab, a greased silicone baking mat or parchment paper can work substitutes.
