
If you love the cozy, nostalgic flavors of apple pie but want to try something with a fresh and fun twist, this Shredded Apple Pie Recipe is an absolute must-make. Imagine sweet, tender apples grated finely and baked into a luscious filling that melts in your mouth, all nestled in a buttery deep-dish crust. It’s a charming spin on the traditional apple pie that’s both simple to prepare and endlessly satisfying, delivering a perfect balance of cinnamon spice and warm vanilla aroma. Once you take a bite, you’ll be hooked on this unique take that feels homemade and heartwarming all at once.
Ingredients You’ll Need
Gathering these ingredients is a breeze, and each one plays a starring role in crafting the pie’s wonderful flavor and texture. From the soft butter that creates a tender crumb to the fragrant cinnamon that lifts the apples, every component is chosen for its purpose.
- Granulated sugar (1 cup): Adds the perfect level of sweetness to balance the tartness of the apples.
- Salted butter (1/2 cup, softened): Provides richness and helps create a smooth texture in the pie filling.
- All-purpose flour (2 tablespoons): Acts as a gentle thickener, ensuring the filling holds together beautifully.
- Vanilla extract (2 teaspoons): Brings a warm, sweet depth that complements the apple’s natural flavors.
- Ground cinnamon (1 teaspoon): Infuses the pie with that classic apple-spice aroma we all adore.
- Tiny pinch of salt: Enhances all the other flavors and balances the sweetness.
- Large eggs (2): Bind the filling ingredients together and add a creamy richness.
- Red Delicious apples (3 large, peeled and grated): The star ingredient, shredded for tender texture and subtle sweetness.
- Unbaked frozen deep-dish pie shell (1): Makes this recipe accessible and hassle-free while still delivering a flaky base.
How to Make Shredded Apple Pie Recipe
Step 1: Preheat and Prepare Apples
Start by heating your oven to 350 degrees Fahrenheit to get it ready for baking. After peeling and grating your Red Delicious apples, gently squeeze out any excess liquid. This simple step prevents the pie from becoming soggy, ensuring your filling will have the perfect consistency.
Step 2: Cream Together the Main Ingredients
In a large bowl, combine the sugar, softened butter, flour, vanilla, cinnamon, salt, and eggs. Use an electric hand mixer on medium speed and beat until everything is fully blended. This mixture is the creamy, flavorful foundation of your filling, so take a moment to enjoy how fragrant it becomes as the vanilla and cinnamon mix in.
Step 3: Fold in the Shredded Apples
Gently fold your shredded apples into the batter, making sure all the fruit is well coated without losing its delicate texture. The shredded apples bring a lovely softness to the filling and let the cinnamon and vanilla truly shine in every bite.
Step 4: Fill the Pie Shell and Bake
Pour the apple mixture into your unbaked pie shell and spread it out evenly. For easier handling, place the pie on a large cookie sheet before putting it into the oven. Bake for 50 minutes up to an hour, but start checking at the 50-minute mark. You’re looking for a firm center that’s set but still moist and tender—this is the magic of the Shredded Apple Pie Recipe.
Step 5: Cool and Enjoy
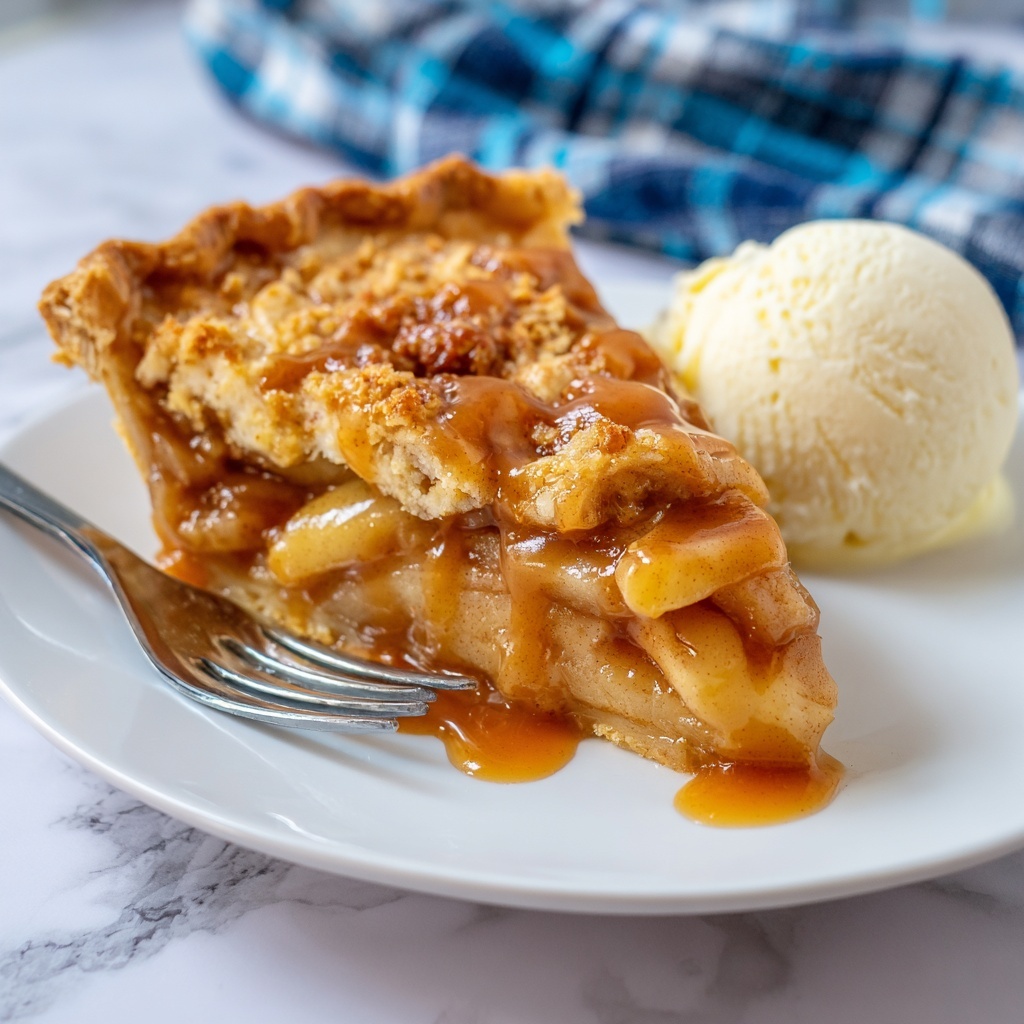
Once out of the oven, allow the pie to cool and rest for about an hour. This pause lets the flavors deepen and the filling finish setting. Serve slices warm, ideally with a scoop of vanilla ice cream and a drizzle of caramel sauce for that extra indulgence that will elevate every mouthful.
How to Serve Shredded Apple Pie Recipe
Garnishes
Simple garnishes can take your Shredded Apple Pie Recipe to the next level. A dusting of powdered sugar adds an elegant touch, while a sprinkle of chopped toasted walnuts or pecans brings a delicious crunch that contrasts wonderfully with the soft filling.
Side Dishes
Pair this pie with a scoop of creamy vanilla or cinnamon ice cream to cool and complement the warm spices. A cup of rich, freshly brewed coffee or a glass of spiced apple cider also makes a delightful companion, rounding out the cozy vibe perfectly.
Creative Ways to Present
For a beautiful presentation, serve your pie slices on rustic ceramic plates with a drizzle of caramel sauce made from scratch or store-bought. You can even top each slice with a dollop of freshly whipped cream mixed with a splash of maple syrup to add a unique twist to every serving.
Make Ahead and Storage
Storing Leftovers
Leftover Shredded Apple Pie Recipe keeps beautifully covered in the refrigerator for up to three days. Be sure to wrap it tightly with plastic wrap or store it in an airtight container to maintain its moisture and prevent it from absorbing other fridge odors.
Freezing
If you want to make this pie ahead of time, you can freeze it after baking and completely cooling. Wrap it securely in plastic wrap and aluminum foil, then freeze for up to one month. When you’re ready to enjoy, thaw overnight in the refrigerator before reheating.
Reheating
To bring your pie back to life, warm individual slices in the microwave for about 30 seconds or heat a whole pie in the oven at 300 degrees Fahrenheit for 15 to 20 minutes. This method restores the warm comfort of freshly baked pie with a tender filling that still shines.
FAQs
Can I use other types of apples for this Shredded Apple Pie Recipe?
Absolutely! While Red Delicious apples work wonderfully for their sweetness and texture, you can experiment with Granny Smith, Fuji, or Honeycrisp for varying tartness and flavors that may give your pie a whole new character.
Do I need to peel the apples before shredding?
Peeling the apples is recommended to get a smooth filling and prevent the skin from altering the texture. However, if you like a bit more rustic feel and don’t mind a little extra texture, you can leave some peel on after thoroughly washing the apples.
Why do I need to squeeze out the liquid from the shredded apples?
Squeezing out excess moisture prevents the pie from becoming soggy and ensures the filling sets up nicely during baking. It keeps the crust crisp and the texture just right—soft but not watery.
Can I make this pie without a pre-made crust?
Definitely! If you prefer homemade, a simple buttery pie crust will be delightful here. Just make sure to blind bake it a bit before filling to help keep it crisp.
Is this recipe suitable for beginners?
Yes! This Shredded Apple Pie Recipe is straightforward and uses affordable, easy-to-find ingredients. The steps are intuitive, making it a perfect choice if you’re new to baking or looking for a delicious apple pie alternative without the fuss.
Final Thoughts
This Shredded Apple Pie Recipe has quickly become one of my favorite ways to celebrate apples in a dessert that’s both comforting and a little unexpected. It’s simple enough to whip up on a cozy afternoon, yet special enough to impress family and friends. I truly hope you enjoy making and sharing this pie as much as I do—it’s the kind of recipe that feels like a warm hug in every bite.
Print
Shredded Apple Pie Recipe
- Prep Time: 20 minutes
- Cook Time: 1 hour
- Total Time: 1 hour 20 minutes
- Yield: 8 servings
- Category: Dessert
- Method: Baking
- Cuisine: American
Description
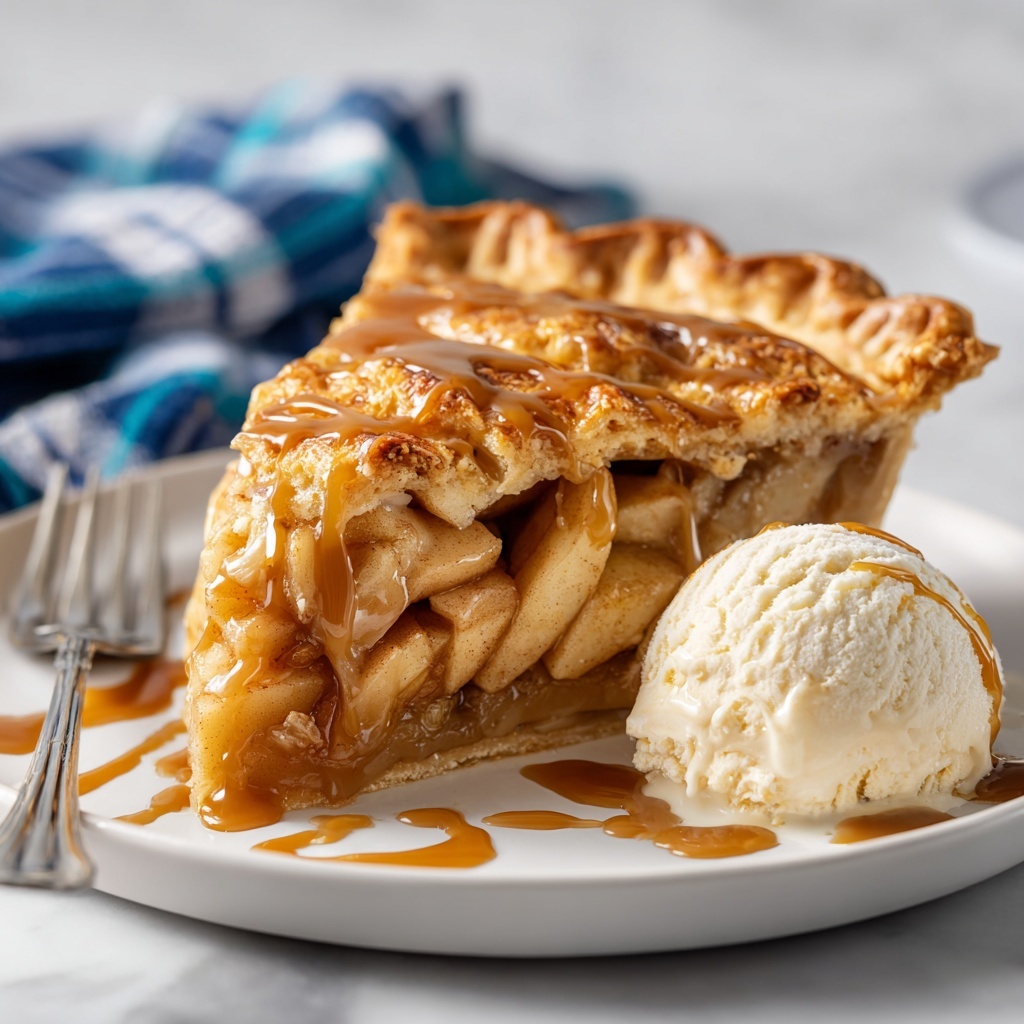
A delightful shredded apple pie featuring grated Red Delicious apples mixed with a cinnamon-spiced creamy filling, baked in a deep-dish pie shell to golden perfection. This warm dessert pairs beautifully with vanilla ice cream and caramel sauce for a comforting treat.
Ingredients
Filling
- 1 cup granulated sugar
- 1/2 cup salted butter, softened
- 2 tablespoons all-purpose flour
- 2 teaspoons vanilla extract
- 1 teaspoon ground cinnamon
- Tiny pinch of salt
- 2 large eggs
- 3 large Red Delicious apples, peeled and grated (about 3 cups grated)
Crust
- 1 unbaked frozen deep-dish pie shell (such as Marie Callender’s)
Instructions
- Preheat oven: Preheat your oven to 350 degrees F (175 degrees C). After grating the apples, make sure to squeeze out any excess liquid from the apples to avoid a soggy pie filling.
- Prepare filling mixture: In a large bowl, combine the sugar, softened butter, all-purpose flour, vanilla extract, ground cinnamon, salt, and eggs. Use an electric hand mixer on medium speed to beat the ingredients together until well combined and smooth.
- Fold in apples: Gently fold the shredded and drained apples into the batter mixture until evenly incorporated. Pour this mixture into the unbaked deep-dish pie shell and spread it out evenly for uniform baking.
- Bake the pie: Place the pie on a large cookie sheet to catch any drips and bake in the preheated oven for 50 minutes to 1 hour. Begin checking for doneness at 50 minutes; the pie is ready when the center is set and no longer jiggly.
- Cool and serve: Carefully remove the pie from the oven and allow it to cool and rest for 1 hour before serving. Serve each slice warm, ideally topped with a scoop of vanilla ice cream and a drizzle of caramel sauce for an indulgent finish. Enjoy!
Notes
- Squeezing out excess apple juice is essential to prevent a watery filling.
- Use a deep-dish pie shell to accommodate the filling volume.
- Red Delicious apples are preferred for their sweetness; however, you can substitute with similar sweet apples like Fuji or Gala.
- Letting the pie rest ensures the filling sets properly, making slicing easier.
- For a dairy-free version, substitute butter with a plant-based alternative and serve with non-dairy ice cream.


