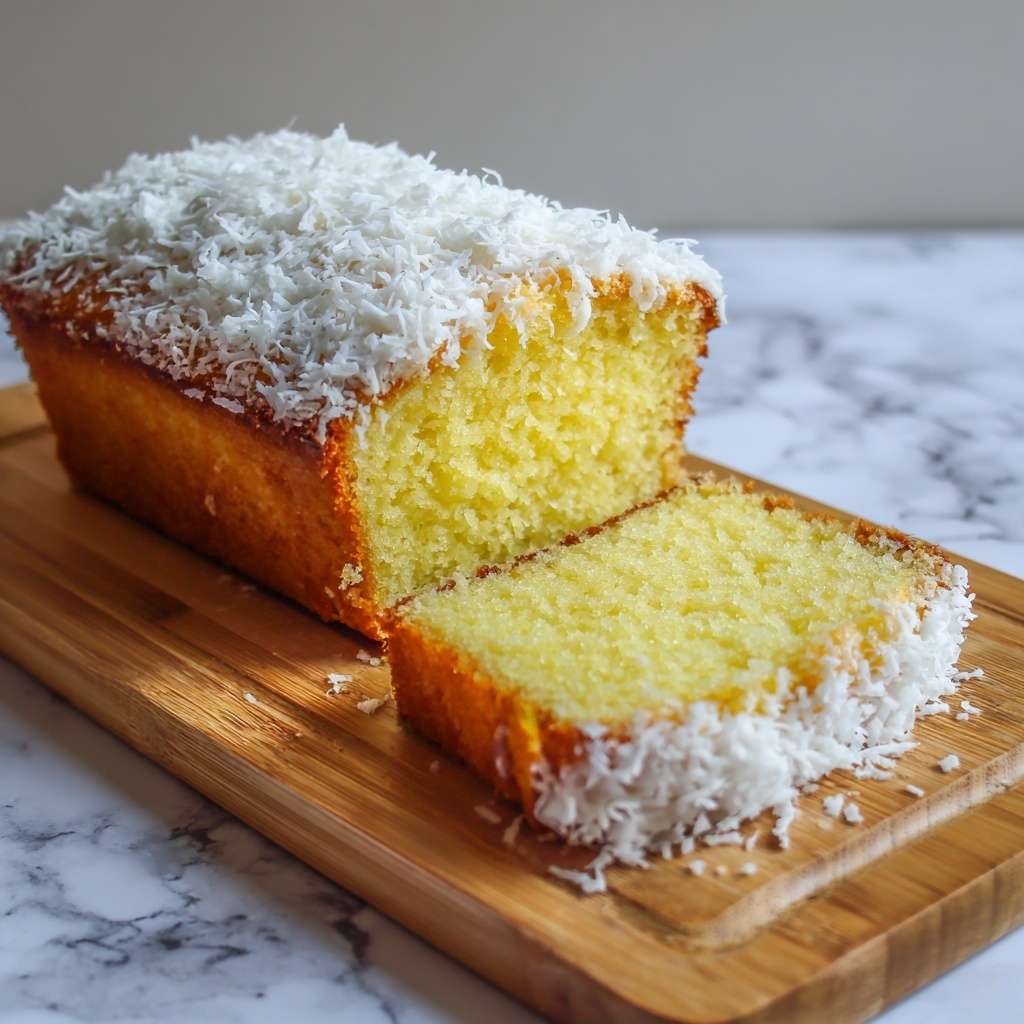
If you have a soft spot for moist, fragrant cakes that deliver tropical vibes with every bite, get ready to fall in love. The Best & Easiest Coconut Loaf Cake Ever Recipe is exactly what you need for your next baking adventure. This cake combines the perfect balance of sweet shredded coconut with a tender crumb, all wrapped up in a straightforward loaf that’s as delightful to make as it is to eat. Whether you’re baking for a special occasion or craving a cozy treat, this recipe will quickly become your go-to favorite.
Ingredients You’ll Need
Don’t let the simplicity of the ingredients fool you — each one plays a crucial role in building the delectable flavor and texture of this coconut loaf cake. From the richness of butter to the tropical sweetness of shredded coconut, these staples work in harmony to create something truly special.
- All-purpose flour (1 1/2 cups): Provides the structure for a tender yet sturdy crumb that holds the cake together beautifully.
- Baking powder (1 teaspoon): This leavening agent gives the cake the perfect gentle rise and light texture.
- Salt (1/2 teaspoon): Enhances all the flavors and balances the sweetness just right.
- Unsalted butter, softened (1/2 cup): Adds richness and keeps the cake moist and velvety.
- Granulated sugar (3/4 cup): Sweetens the cake and helps create a tender crumb.
- Large eggs (2): Bind the ingredients together and contribute to the cake’s softness.
- Vanilla extract (1 teaspoon): A splash of warmth and depth that elevates the overall flavor.
- Sweetened shredded coconut (1 cup): The star ingredient that imparts a satisfying chew and rich coconut flavor.
- Whole milk (1/2 cup): Adds moisture, ensuring the cake stays fresh and tender.
How to Make The Best & Easiest Coconut Loaf Cake Ever Recipe
Step 1: Prepare Your Oven and Pan
Start by preheating your oven to 350°F (175°C). Grease and flour a loaf pan thoroughly. This prep step ensures your cake doesn’t stick and bakes evenly, setting the stage for that perfect golden crust.
Step 2: Combine the Dry Ingredients
In a medium bowl, whisk together the all-purpose flour, baking powder, and salt. Mixing these upfront helps to evenly distribute the leavening and seasoning, so every bite tastes just right.
Step 3: Cream the Butter and Sugar
In a large bowl, beat the softened butter and granulated sugar using a hand or stand mixer until the mixture is light and fluffy. This process incorporates air, which is key to a light texture and flavorful crumb.
Step 4: Add Eggs and Vanilla
Beat the eggs in one at a time, making sure each is fully incorporated before adding the next. Stir in the vanilla extract to infuse the batter with lovely aromatic notes that complement the coconut perfectly.
Step 5: Alternate Adding Dry Ingredients and Milk
Slowly add the dry flour mixture to the wet ingredients, alternating with the milk. Mix just until combined to keep the batter tender — overmixing can toughen the cake, so handle with care!
Step 6: Fold in the Shredded Coconut
Gently fold the sweetened shredded coconut into your batter. This step disperses those delightful coconut bites evenly throughout, so every slice is packed with flavor and texture.
Step 7: Bake the Cake
Pour the batter into your prepared loaf pan and smooth the top. Bake for 50 to 55 minutes or until a toothpick inserted into the center comes out clean. The smell at this point is simply irresistible — the coconut and vanilla aroma filling your kitchen is a signal that something wonderful is baking.
Step 8: Cool and Serve
Allow the cake to cool in the pan before slicing. This resting time helps the flavors settle and the crumb firm up just enough to give you clean, neat slices of heaven.
How to Serve The Best & Easiest Coconut Loaf Cake Ever Recipe
Garnishes
Top your coconut loaf cake with a light dusting of powdered sugar or a simple drizzle of coconut glaze to add an extra touch of sweetness and visual appeal. Toasted coconut flakes scattered on top bring a lovely crunch and enhance the tropical vibe.
Side Dishes
This cake pairs beautifully with a scoop of vanilla ice cream or a dollop of whipped cream. For a refreshing contrast, serve it alongside fresh berries or a tropical fruit salad featuring mango, pineapple, and papaya.
Creative Ways to Present
Serve slices of this coconut loaf cake on colorful plates to brighten up your dessert table. You can also cut it into mini loaf-sized pieces and offer as bite-sized treats at gatherings. For a twist, layer slices with coconut cream and fruit to create an indulgent coconut trifle.
Make Ahead and Storage
Storing Leftovers
Wrap leftover cake tightly in plastic wrap or keep it in an airtight container at room temperature for up to 3 days. The cake maintains its moist texture and fresh flavor best when stored properly.
Freezing
This coconut loaf cake freezes beautifully. Slice it first, then wrap each piece individually in plastic wrap and place them in a freezer bag. When properly stored, it will keep for up to 2 months. Thaw overnight in the fridge before serving.
Reheating
Reheat slices gently in a microwave for 10 to 15 seconds or warm in a low oven until just heated through. This brings back the soft, buttery texture and revives the cake’s fresh-baked charm perfectly.
FAQs
Can I use unsweetened shredded coconut instead of sweetened?
Absolutely! Using unsweetened coconut will reduce the overall sweetness and give a more natural coconut flavor. You might want to add a little extra sugar to balance it out if you prefer a sweeter cake.
Is it possible to use a gluten-free flour blend?
Yes, a gluten-free all-purpose blend works well for this recipe. Make sure your baking powder is gluten-free too. The texture may be slightly different but still delicious and moist.
Can I substitute the whole milk with a dairy-free alternative?
Definitely! Coconut milk or almond milk are fantastic substitutes that complement the coconut flavor while keeping the cake dairy-free.
How do I know when the cake is fully baked?
The best test is the classic toothpick method — insert a toothpick into the center of the cake, and if it comes out clean or with just a few crumbs, it’s done. Also, the cake should spring back lightly when you press the top.
Can I add other flavors or mix-ins?
Sure! Try adding chopped nuts for crunch or a handful of chocolate chips for extra indulgence. Just fold them in along with the coconut to maintain an even distribution.
Final Thoughts
There’s something so comforting and delightful about biting into a slice of The Best & Easiest Coconut Loaf Cake Ever Recipe. Its simplicity is its secret — familiar ingredients transformed into a luscious treat that feels like a little tropical getaway. I can’t wait for you to try it and discover how easily it becomes a beloved staple in your baking repertoire. Happy baking and even happier tasting!
Print
The Best & Easiest Coconut Loaf Cake Ever Recipe
- Prep Time: 15 minutes
- Cook Time: 50 minutes
- Total Time: 1 hour 5 minutes
- Yield: 8 servings
- Category: Dessert
- Method: Baking
- Cuisine: American
Description
This Best & Easiest Coconut Loaf Cake Ever is a moist, tender cake bursting with sweet shredded coconut flavor. Perfectly balanced with vanilla and a hint of butter, this loaf cake is an ideal treat for any occasion, simple enough for beginners and delightful enough for coconut lovers.
Ingredients
Dry Ingredients
- 1 1/2 cups all-purpose flour
- 1 teaspoon baking powder
- 1/2 teaspoon salt
Wet Ingredients
- 1/2 cup unsalted butter, softened
- 3/4 cup granulated sugar
- 2 large eggs
- 1 teaspoon vanilla extract
- 1/2 cup whole milk
Other
- 1 cup sweetened shredded coconut
Instructions
- Preheat and Prepare: Preheat your oven to 350°F (175°C). Grease and flour a standard loaf pan to prevent sticking and ensure easy removal of the cake once baked.
- Mix Dry Ingredients: In a medium bowl, whisk together the all-purpose flour, baking powder, and salt. This helps to evenly distribute the leavening and seasoning in the cake batter.
- Cream Butter and Sugar: Using a large bowl, cream the softened unsalted butter and granulated sugar together until the mixture becomes light and fluffy, which typically takes several minutes. This step is crucial for a tender and airy texture.
- Add Eggs and Vanilla: Beat in the eggs one at a time, ensuring each is fully incorporated before adding the next. Stir in the vanilla extract to add fragrant flavor.
- Combine Wet and Dry Mixtures: Gradually add the dry mixture to the wet ingredients, alternating with the milk. Mix gently until just combined to avoid overworking the batter which can cause a dense cake.
- Fold in Coconut: Carefully fold the sweetened shredded coconut into the batter, distributing it evenly without deflating your mixture.
- Prepare for Baking: Pour the batter evenly into the prepared loaf pan, spreading it out to the edges.
- Bake: Place the loaf pan in the oven and bake for 50 to 55 minutes. Check doneness by inserting a toothpick into the center of the cake; it should come out clean or with a few moist crumbs attached.
- Cool and Serve: Allow the cake to cool in the pan before carefully removing it and slicing to serve. This cooling helps the cake set and makes slicing easier.
Notes
- For a more intense coconut flavor, consider toasting the shredded coconut lightly before folding it into the batter.
- Make sure butter is softened, not melted, for best creaming results.
- Use room temperature eggs and milk to help batter combine smoothly.
- You can substitute whole milk with a nondairy milk alternative, but the texture may vary slightly.
- Store wrapped tightly at room temperature for up to 3 days or refrigerate for up to a week.


