
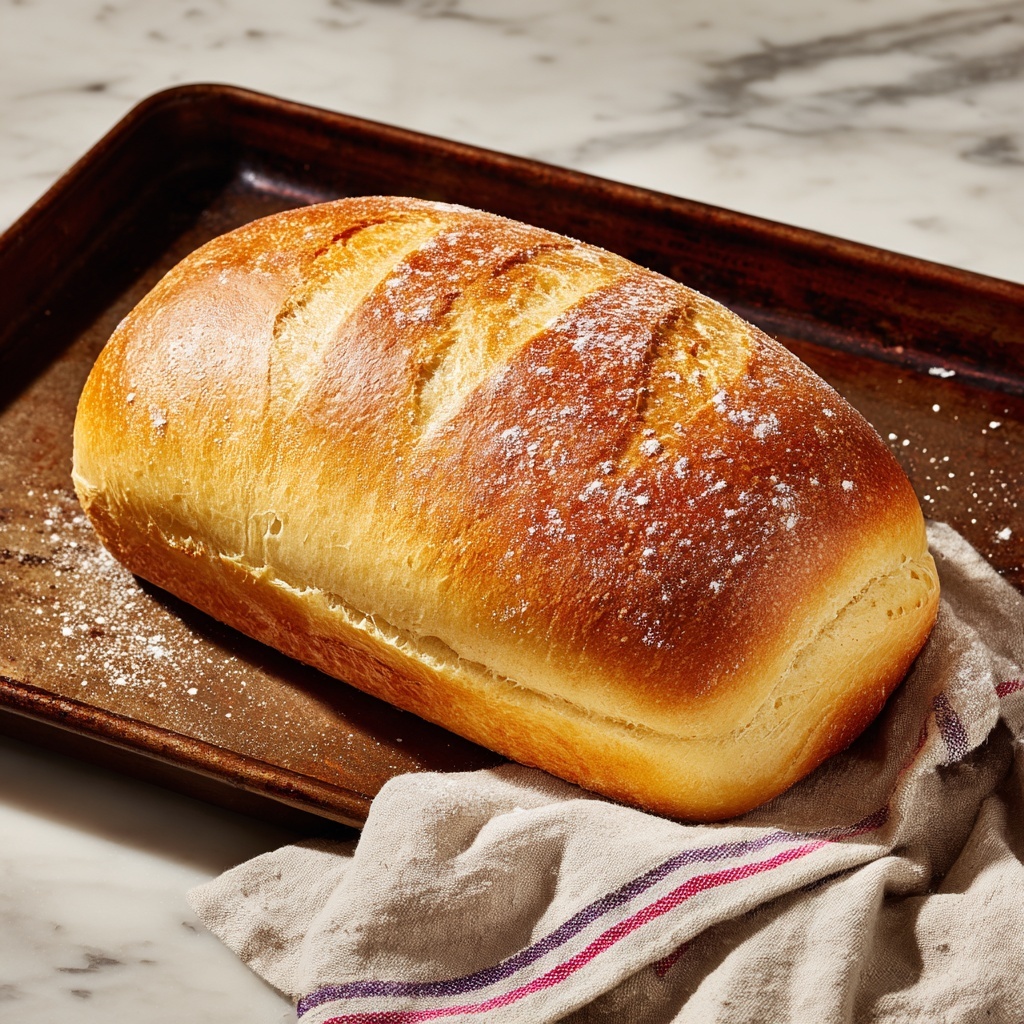
If you have ever wanted to bake a classic, crusty loaf that brings the heart of Italy right into your kitchen, this Italian Bread Recipe is exactly what you need. It’s a beautifully simple combination of just a few humble ingredients that come together to create a loaf with the perfect golden crust, soft and chewy crumb, and that wonderful aroma that fills the entire house. This recipe is an absolute joy to make and even more delightful to share with family and friends at any meal.
Ingredients You’ll Need
Each ingredient in this Italian Bread Recipe plays a crucial role, ensuring that the bread has the ideal texture, flavor, and appearance. With just pantry staples, you’ll be surprised at how perfectly these elements combine for such an authentic and delicious result.
- 3 1/2 cups all-purpose flour: This creates the sturdy base that gives the bread structure and chewiness.
- 1 tablespoon sugar: Feeds the yeast and adds a slight sweetness to balance the flavors.
- 2 teaspoons salt: Enhances the taste and controls yeast activity for a balanced rise.
- 1 tablespoon active dry yeast: The magical ingredient that helps the dough rise and become airy.
- 1 1/2 cups warm water (110°F/45°C): Activates the yeast and hydrates the flour for a perfect dough consistency.
- 1 tablespoon olive oil: Adds moisture and a subtle richness to the bread.
- 1 tablespoon cornmeal (for dusting): Prevents sticking and adds a delightful crunch to the crust’s base.
How to Make Italian Bread Recipe
Step 1: Activate the Yeast
Start by dissolving the sugar and yeast in the warm water. This little step is crucial because it tells you if your yeast is alive and ready to work its magic. Wait until the mixture turns foamy—usually 5 to 10 minutes—and you’ll know it’s time to move on.
Step 2: Mix the Dough
In a large bowl, combine the flour and salt before pouring in your yeast mixture along with the olive oil. Stir everything together until you have a rough, shaggy dough starting to form. This is where the transformation begins!
Step 3: Knead It Out
Turn the dough onto a floured surface and knead it for about 8 to 10 minutes. This might require some elbow grease, but it’s so satisfying to feel the dough become smooth, elastic, and less sticky. Kneading develops the gluten, giving your bread that signature chewy texture.
Step 4: First Rise
Place your dough in a greased bowl and cover it with a damp cloth to keep it cozy. Let it rest and rise for 1 to 2 hours until it doubles in size. This waiting period is a test of patience, but trust me, it’s worth every minute for the light, airy bread you’ll get.
Step 5: Preheat the Oven and Prepare the Loaf
While the dough is rising, preheat your oven to 375°F (190°C). Once the dough has doubled, punch it down gently, shape it into a beautiful loaf, and place it on a baking sheet lightly dusted with cornmeal. The cornmeal adds texture and prevents sticking.
Step 6: Second Rise
Allow the shaped dough to rest on the baking sheet for another 30 minutes. This second rise lets the bread develop even more volume. Before baking, use a sharp knife to slash the top of the loaf—this allows steam to escape and creates that classic rustic look.
Step 7: Bake to Perfection
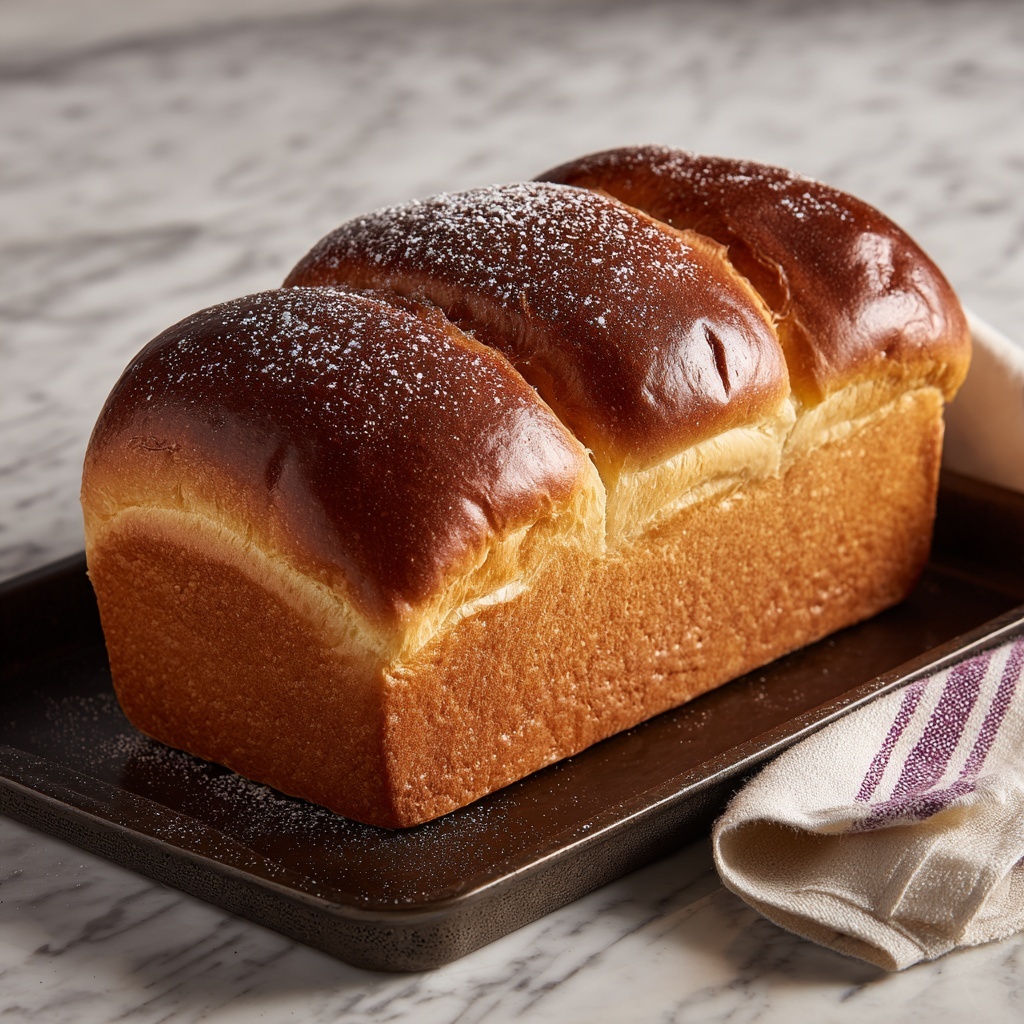
Pop your loaf into the oven and bake for 25 to 30 minutes. You’ll know it’s perfectly baked when it turns a deep golden brown and sounds hollow when tapped underneath. Cooling it on a wire rack is essential to avoid a soggy bottom and to help the crust stay crisp.
How to Serve Italian Bread Recipe
Garnishes
While this Italian Bread Recipe is stunning on its own, a drizzle of good quality olive oil or a sprinkle of sea salt or herbs like rosemary can elevate the experience. For a special touch, spread a bit of garlic butter over warm slices to bring out those homey, aromatic flavors.
Side Dishes
This bread pairs wonderfully with hearty Italian staples like pasta dishes, rich stews, or fresh salads. It’s perfect for soaking up sauces or accompanying a cheese and charcuterie board. Also, dipping it in balsamic vinegar and olive oil is an inviting way to enjoy every crumb.
Creative Ways to Present
Impress your guests by slicing the loaf and arranging the pieces in a basket lined with a colorful napkin, or transform it into bruschetta topped with tomatoes, basil, and mozzarella. You can even hollow out the loaf and use it as an edible bread bowl for soups or dips, showcasing your homemade Italian Bread Recipe in style.
Make Ahead and Storage
Storing Leftovers
To keep your Italian Bread Recipe fresh, store leftover slices in a bread box or paper bag at room temperature. This maintains the crust’s crispness while preventing the bread from drying out. Avoid plastic bags, as they trap moisture and make the crust soggy.
Freezing
If you want to keep your bread longer, wrap it tightly in plastic wrap and then in aluminum foil before freezing. This method preserves flavor and texture for up to three months. When you’re ready to enjoy it, thaw it at room temperature before reheating.
Reheating
To refresh your stored or frozen Italian bread, sprinkle it lightly with water and warm it in the oven at 350°F (175°C) for about 10 minutes. This brings back the delightful crust crunch and softens the interior, almost like it was freshly baked.
FAQs
Can I use bread flour instead of all-purpose flour?
Yes, bread flour can be used in place of all-purpose flour. It has a higher protein content, which will create a chewier texture and a slightly better rise. The resulting loaf will be a bit heartier but equally delicious.
What if my dough doesn’t rise?
If your dough isn’t rising, the most common causes are expired yeast or water that is too hot or too cold. Make sure to use fresh yeast and warm water around 110°F (45°C) to activate it properly. Also, let the dough rest in a warm, draft-free spot for best results.
Is it necessary to slash the top before baking?
Slashing the dough is essential for venting steam as the bread bakes. It also gives the loaf its characteristic rustic look. Without slashing, the bread could split in unpredictable ways and won’t have that beautiful artisan appearance.
Can I add herbs or seeds to the dough?
Absolutely! Adding herbs like rosemary, thyme, or seeds such as sesame or fennel can add wonderful flavor and texture. Mix them in during the initial mixing stage before kneading for even distribution.
How do I know when the bread is fully baked?
Besides the golden brown crust, a simple way to check is to tap the bottom of the loaf; it should sound hollow. You can also use an instant-read thermometer—the internal temperature should be about 190°F to 200°F (88°C to 93°C) when done.
Final Thoughts
Baking this Italian Bread Recipe is like inviting a piece of Italy into your home kitchen. It’s straightforward, satisfying, and yields a loaf full of flavor that everyone will love. Whether you’re a novice baker or a seasoned pro, this recipe is a wonderful way to experience the comforting joy of fresh-baked bread. Give it a try—you won’t regret it!
Print
Italian Bread Recipe
- Prep Time: 15 minutes
- Cook Time: 30 minutes
- Total Time: 1 hour 45 minutes
- Yield: 12 servings
- Category: Bread
- Method: Baking
- Cuisine: Italian
Description
This classic Italian Bread recipe yields a crusty golden loaf with a soft, airy crumb, perfect for sandwiches or accompanying your favorite Italian dishes. Utilizing simple ingredients like all-purpose flour, yeast, and olive oil, this bread is kneaded, allowed to rise twice, and baked to perfection for a delicious homemade staple.
Ingredients
Dry Ingredients
- 3 1/2 cups all-purpose flour
- 1 tablespoon sugar
- 2 teaspoons salt
- 1 tablespoon active dry yeast
- 1 tablespoon cornmeal (for dusting)
Wet Ingredients
- 1 1/2 cups warm water (110°F/45°C)
- 1 tablespoon olive oil
Instructions
- Activate Yeast: In a small bowl, dissolve the sugar and yeast in warm water. Let the mixture sit for 5 to 10 minutes until it becomes foamy, indicating the yeast is active.
- Mix Dry Ingredients: In a large bowl, combine the all-purpose flour and salt evenly.
- Combine Ingredients: Add the foamy yeast mixture and olive oil to the dry ingredients. Stir until a dough starts to form.
- Knead Dough: Turn the dough onto a floured surface and knead vigorously for 8 to 10 minutes until it becomes smooth and elastic.
- First Rise: Place the kneaded dough into a greased bowl. Cover it with a damp cloth and allow it to rise in a warm place for 1 to 2 hours, or until doubled in size.
- Preheat Oven: While the dough rises, preheat your oven to 375°F (190°C).
- Shape Dough: Punch down the risen dough to release air. Shape it into a loaf and place it on a baking sheet lightly dusted with cornmeal to prevent sticking.
- Second Rise: Let the shaped loaf rise for another 30 minutes until slightly puffed.
- Slash and Bake: Using a sharp knife, slash the top of the loaf to allow steam to escape while baking. Bake for 25 to 30 minutes, or until the crust is golden brown and the loaf sounds hollow when tapped.
- Cool: Remove the bread from the oven and cool it on a wire rack before slicing to preserve the texture.
Notes
- Ensure the water is warm (around 110°F/45°C) but not hot to properly activate the yeast without killing it.
- Kneading is essential for developing gluten, which gives the bread its chewy texture.
- The double rise allows the dough to develop flavor and proper crumb structure.
- Using cornmeal on the baking sheet prevents sticking and adds a subtle texture to the bread’s bottom crust.
- Slashing the loaf helps control where the bread expands during baking, improving its shape.
- Allow bread to cool completely before slicing to avoid a gummy texture.


